How to Draw a Hammer in 8 Steps
Updated: October 31, 2026
2
Drawing a hammer is a simple and enjoyable way to practice basic shapes, straight lines and everyday object sketching. Its recognizable head and long handle make it a great drawing project for beginners students and anyone looking to improve their artistic skills. In just eight easy steps, you can learn how to sketch the outline refine the proportions and add small details for a clean realistic finish. Grab your pencil and paper follow each step and create your own hammer drawing with confidence.
Table of Contents
How to Draw a Hammer in 8 Steps
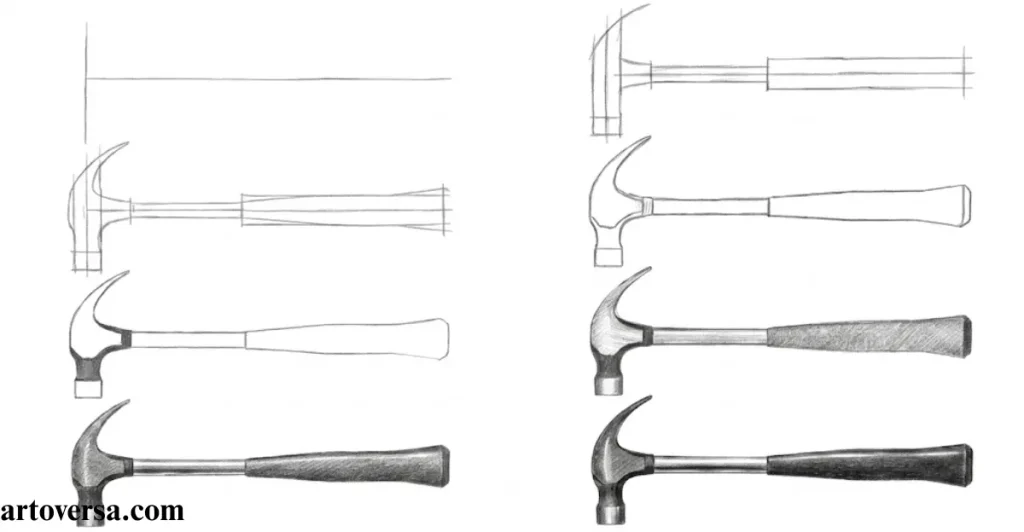
Grab your pencil, paper, and eraser, and follow this simple tutorial to sketch the hammer’s shape, add realistic shading, and refine the details. Let’s get started and bring your hammer drawing to life!
Step 1: Drawing the Hammer’s Basic Outline
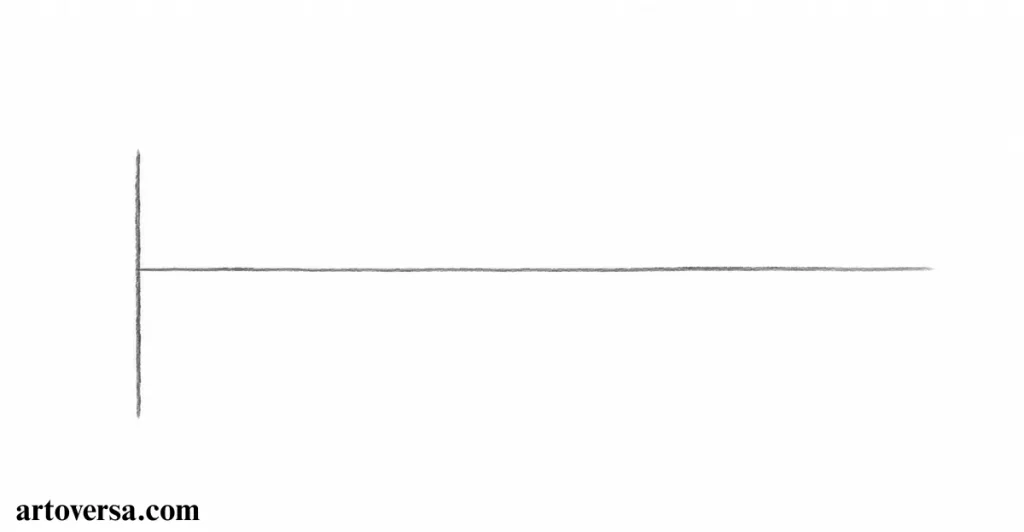
Start by sketching the hammer’s basic shape using light pencil strokes. Focus on the hammerhead and handle, keeping their proportions accurate before adding smaller details.
- Begin by drawing two light guide lines to establish the hammer’s overall shape and direction.
- Sketch a short line to mark the position and approximate width of the hammerhead.
- Draw a longer line extending downward to outline the hammer’s handle.
- Connect the guide lines mentally to visualize the hammer’s basic T-shaped structure before refining the outline.
- Keep the initial strokes light and simple so you can easily adjust the proportions while developing the drawing.
I’ve found that starting with simple guide lines makes the hammer’s proportions much easier to manage. Keeping the pencil strokes light also allows me to correct the head and handle before adding finer details. I pay attention to the alignment of both parts to maintain a balanced shape. Taking time with the initial outline helps me create a cleaner and more accurate hammer drawing.
Step 2: Completing the Hammer’s Line Sketch
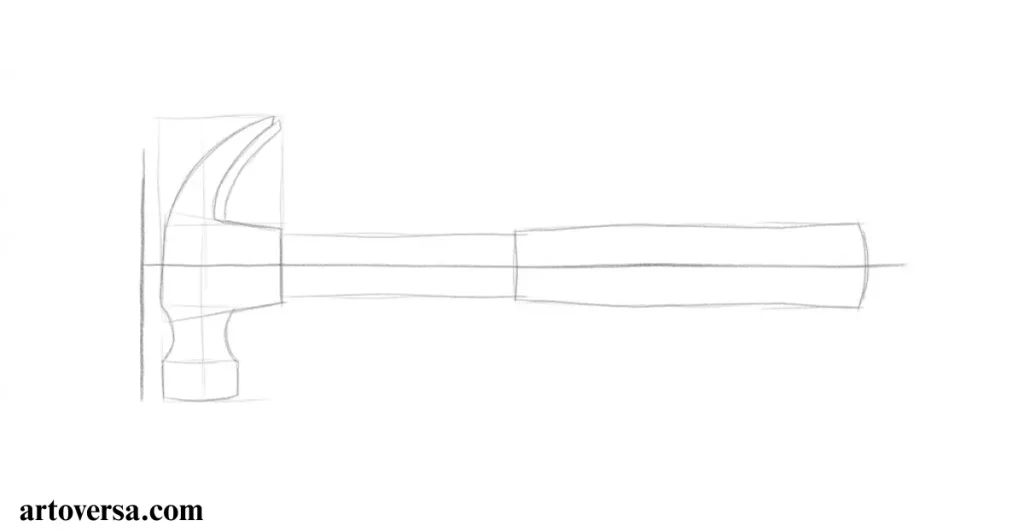
Continue refining the hammer’s outline by connecting the basic guide lines and shaping the hammerhead and handle. Focus on creating clean edges and accurate proportions before moving on to shading.
- Begin by refining the hammerhead’s outline, adding the main edges and defining its overall shape.
- Draw the claw or striking end of the hammer, depending on the hammer style shown in your reference image.
- Connect the hammerhead to the handle, ensuring both parts align naturally and form a balanced structure.
- Refine the handle’s sides with smooth lines, keeping its width consistent and its shape slightly rounded where needed.
- Erase unnecessary construction lines and clean up the sketch while preserving the important outlines of the hammer.
In my experience, refining the main outline before shading makes the hammer drawing look more accurate. Paying attention to the connection between the head and handle helps maintain realistic proportions. I also remove extra guide marks carefully to keep the sketch clean. A well-defined line drawing provides a strong foundation for adding depth and texture in the next steps.
Step 3: Adding Basic Shading for Volume
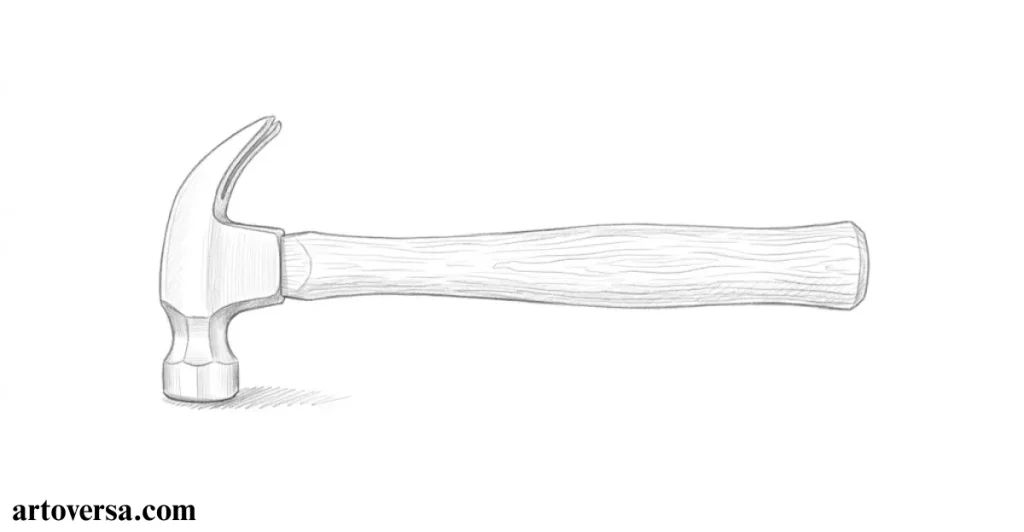
Start adding light shading to your hammer drawing to create a sense of depth and three-dimensional volume. Observe the reference image carefully to identify the light source and the areas where shadows naturally appear.
- Begin by identifying the light and dark areas on the hammerhead to understand how light falls across its surface.
- Apply soft graphite shading to the sides of the hammerhead, keeping the brightest areas lighter to suggest a solid metal surface.
- Add gentle shadows along one side of the handle to give it a rounded and three-dimensional appearance.
- Blend the graphite gradually using light pencil strokes to create smooth transitions between highlights and shadows.
- Keep the initial shading subtle so you can build darker values gradually without losing the hammer’s original outline.
I have found that starting with light shading makes it easier to control the depth of a hammer drawing. Observing the direction of light helps me place shadows more naturally across the metal head and handle. I also build graphite layers slowly to avoid making the drawing too dark too soon. This approach creates a more realistic sense of volume while preserving the important details.
Step 4: Shading the Hammerhead and Claw
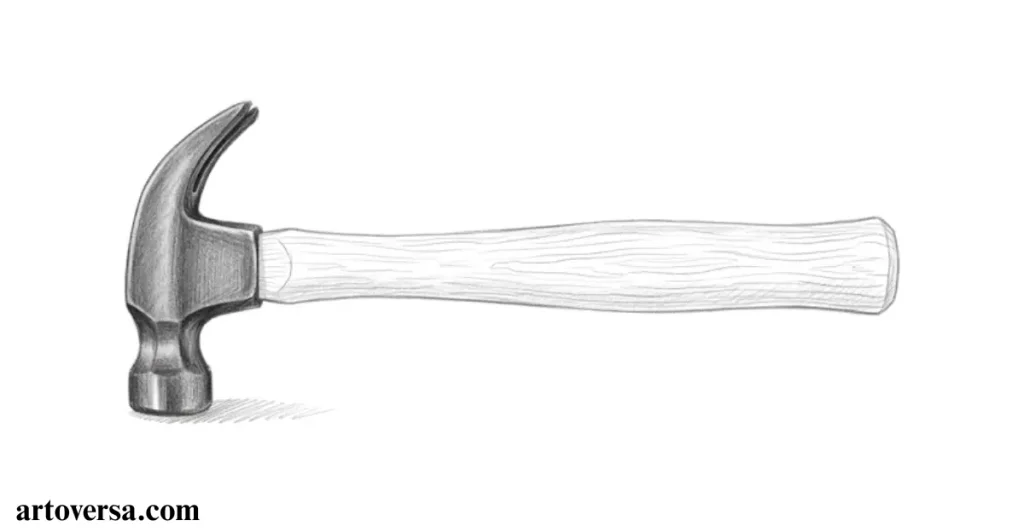
Focus on shading the hammerhead and claw to create a realistic metallic appearance. Observe the reference image closely and use different graphite values to show the contrast between light-reflecting surfaces and deeper shadows.
- Begin by darkening the recessed areas around the hammerhead and claw to establish depth and define their shapes.
- Apply medium graphite shading along the sides of the hammerhead, leaving selected areas lighter to represent reflected light on the metal.
- Shade the curved and inner sections of the claw carefully to distinguish its shape from the main hammerhead.
- Build darker values gradually around the edges and underneath the metal surfaces to create stronger contrast and dimension.
- Refine the highlights and shadows with controlled pencil strokes, keeping the metallic edges clear and well-defined.
One technique I particularly like is building the metallic shading in several light layers rather than applying heavy pressure immediately. This helps me maintain control over the contrast and preserve the brightest highlights. I also pay attention to the claw’s inner curves because they help communicate the hammer’s shape. Balancing light and dark values makes the hammerhead appear more solid and realistic.
Step 5: Shading the Hammer’s Handle
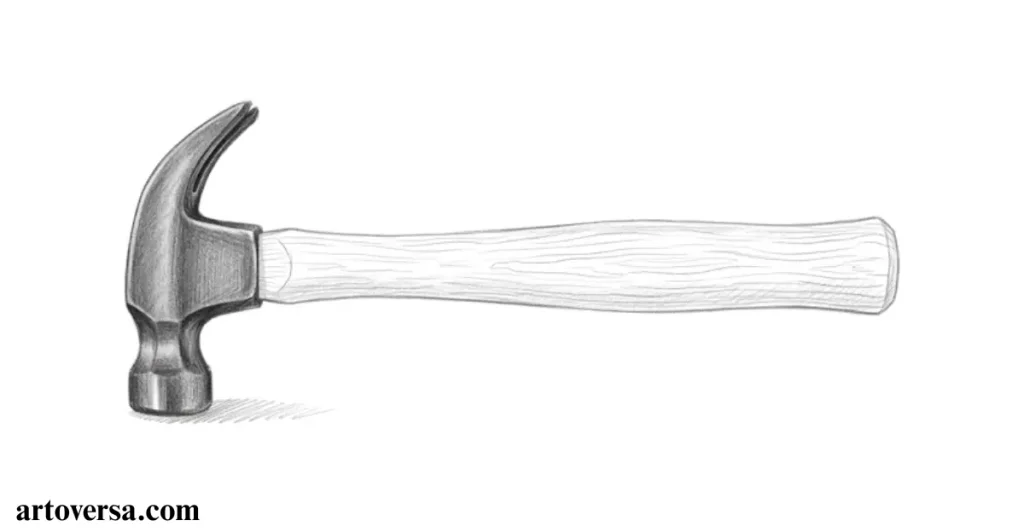
Now focus on shading the hammer’s handle to give it a natural, solid appearance. Observe the reference image to identify the direction of light and use gradual graphite layers to create depth while preserving the handle’s shape and texture.
- Begin by applying light graphite shading along one side of the handle, leaving the opposite side brighter to establish the direction of light.
- Add darker values near the edges and underneath the hammerhead to create depth where the handle connects to the metal.
- Use smooth, lengthwise pencil strokes to follow the handle’s shape and maintain a consistent, natural appearance.
- Gradually build up the shadows with additional graphite layers, blending the transitions between lighter and darker areas.
- Refine the highlights and edges to make the handle look rounded and realistic while keeping its outline clean.
Personally, I prefer using long, gentle pencil strokes when shading a hammer’s handle because they follow its natural shape. Building the graphite gradually helps me avoid harsh patches and uneven shading. I also leave a narrow highlight along the lighter side to suggest a rounded surface. These small details help the handle look more dimensional and balanced with the metallic hammerhead.
Step 6: Enhancing Contrast, Light and Shadows
Refine your hammer drawing by strengthening the contrast between highlights and shadows. Carefully observe the reference image and adjust the graphite values to create a more realistic appearance, giving both the hammerhead and handle greater depth and dimension.
- Begin by identifying the darkest areas around the hammerhead, claw, and handle where shadows need more definition.
- Deepen the shadow values with additional graphite layers while keeping the brightest metal surfaces lighter.
- Strengthen the contrast along the edges of the hammerhead to emphasize its shape and solid metallic structure.
- Refine the handle’s shading by darkening selected areas and preserving the highlights that suggest its rounded form.
- Blend the transitions between light and dark values carefully to create a balanced finish without losing the hammer’s important details.
During my drawing process, I find that adjusting the contrast makes the biggest difference in creating a realistic hammer. I usually deepen the darkest shadows gradually rather than applying too much graphite at once. Preserving the highlights helps me maintain the appearance of reflective metal and a rounded handle. Balancing these values brings the entire drawing together and gives it a more polished look.
Step 7: Refining the Hammer’s Details
Carefully refine the hammer drawing by improving its edges, small shapes, and shading transitions. Pay attention to the hammerhead, claw, and handle so each part looks clear, well-defined, and consistent with the reference image.
- Begin by checking the hammerhead’s outline and correcting any uneven edges or unclear sections.
- Refine the claw’s curves and pointed end to make its shape more distinct and realistic.
- Add subtle graphite strokes to improve the handle’s texture and smooth out any uneven shading.
- Strengthen small shadow areas around the joints and edges to separate the hammer’s different parts.
- Remove unnecessary construction marks and clean up the final lines while preserving the highlights and darker values.
Throughout my drawing process, I pay close attention to small details because they can make the finished hammer look much more realistic. I prefer refining the edges gradually instead of making too many changes at once. Checking the handle and claw helps me spot areas that need better definition. Careful adjustments at this stage give the drawing a cleaner and more polished appearance.
Step 8: Completing the Hammer Drawing
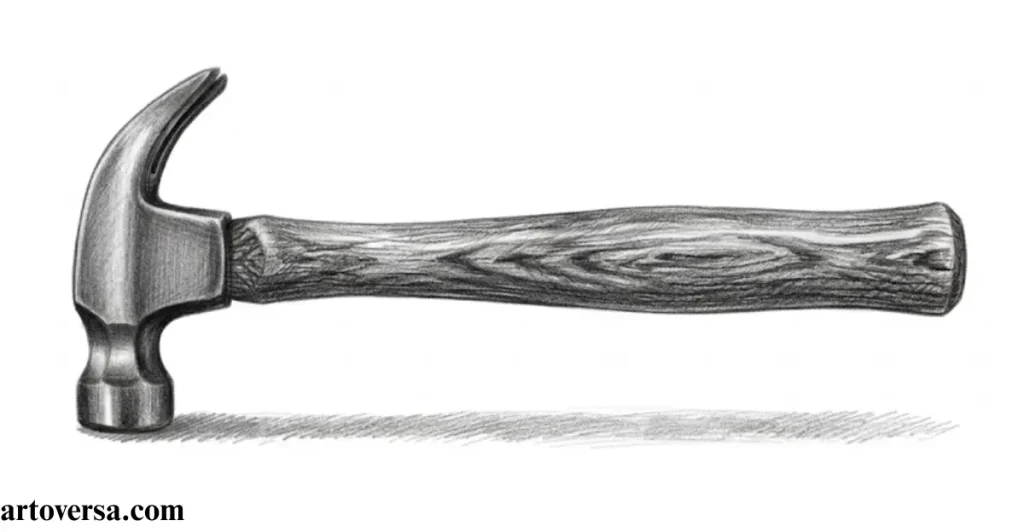
Finish your hammer drawing by reviewing the overall shape, refining the shading, and making the final adjustments to highlights and shadows. Compare your sketch with the reference image to ensure the hammerhead and handle look balanced, realistic, and clearly defined.
- Begin by examining the entire hammer drawing and correcting any remaining issues with proportions, outlines, or alignment.
- Deepen the darkest shadows slightly to improve contrast while keeping the lighter areas clear and visible.
- Refine the highlights on the hammerhead and handle to emphasize their surfaces and create a natural three-dimensional effect.
- Erase any remaining construction lines or unwanted pencil marks without disturbing the finished shading.
- Review the completed drawing and make small final adjustments to achieve a clean, balanced, and realistic hammer illustration.
Finally, I like to step back and examine the entire drawing before considering it complete. Checking the balance between light and dark values helps me identify any areas that need improvement. I also clean up stray pencil marks to keep the finished sketch neat. Taking a little extra time for these final touches makes the hammer drawing look more refined and complete.
Conclusion
Learning how to draw a hammer in 8 steps is a simple way to improve your sketching and shading skills. By starting with basic guide lines, you can create the correct proportions for the hammerhead and handle. Refining the outline helps establish a clear structure before adding shadows and highlights. Gradual graphite shading adds depth and makes the metal and handle appear more realistic. Paying attention to contrast, light, and small details can improve the overall appearance of your drawing. Beginners can follow these steps at their own pace using basic drawing supplies. With regular practice and patience, you can create a clean and realistic hammer drawing with confidence.
FAQs
What materials do I need to draw a hammer?
You need a pencil, drawing paper, and an eraser to get started. An HB pencil is useful for sketching, while softer graphite pencils help create darker shadows.
How do you draw a hammer for beginners?
Start with simple guide lines to establish the hammerhead and handle. Gradually refine the outline, add shading, and finish with highlights and small details.
How can I make my hammer drawing look realistic?
Use light and dark graphite values to create depth and dimension. Pay attention to the metallic highlights, handle shadows, and accurate proportions.
How long does it take to draw a hammer?
A simple hammer sketch may take around 15–30 minutes, depending on your experience. Adding detailed shading and realistic textures can require more time and practice.
Please Write Your Comments