How to Draw a Skull Tattoo Design Step by Step
Updated: October 19, 2026
37
A skull tattoo design is a popular drawing idea that combines bold outlines, distinctive shapes and intricate details to create a striking piece of artwork. Although drawing a skull may seem challenging at first, breaking it down into simple shapes makes the process easier for beginners. You can start with the basic outline, sketch the eye sockets and nose, and then refine the jaw, teeth and shading to bring the design to life. This step-by-step tutorial will guide you through drawing a skull tattoo design while helping you improve your line control, proportions and attention to detail.
Table of Contents
1. Gather the Right Tools for Your Skull Tattoo
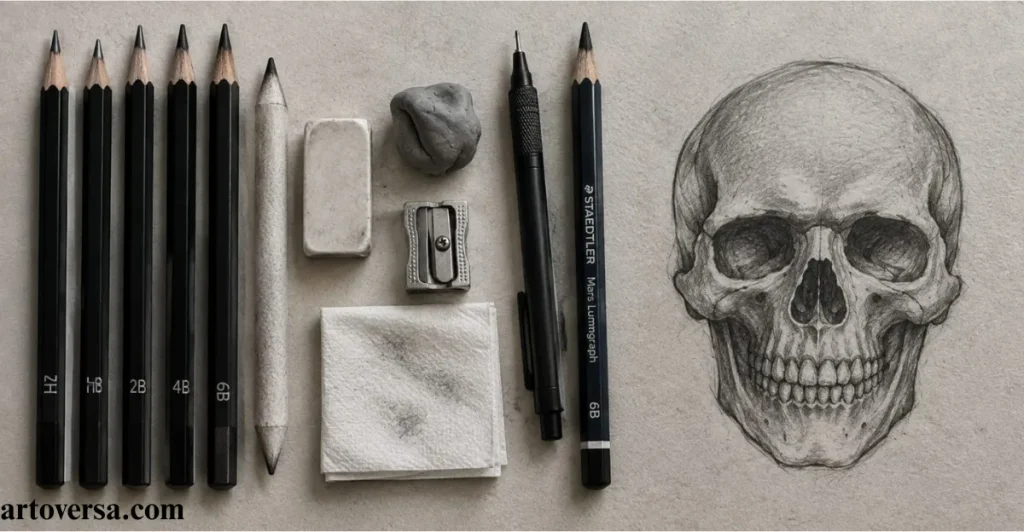
Before starting your skull tattoo design, prepare the tools you need to create accurate shapes and clean lines. The right equipment helps you control small details, correct mistakes and develop a consistent drawing style.
- Use an HB pencil or light digital brush to sketch the skull’s initial shape without creating dark, difficult-to-remove marks.
- Keep an eraser nearby to correct uneven proportions and remove unnecessary construction lines as the design develops.
- Select fine liners or inking brushes for defining the eye sockets, nose, teeth, and outer contours.
- Use darker pencils or thicker digital brushes to create bold outlines that suit traditional tattoo artwork.
- Prepare blending tools or soft shading brushes to add depth around the skull’s hollow areas and curved surfaces.
In my experience preparing the tools first makes the drawing process more organized. Light sketching materials allow you to adjust the skull’s proportions without damaging the final outline. I also recommend testing different brush sizes before adding fine details. This simple preparation helps create a cleaner and more controlled design.
2. Plan the Skull Tattoo Size and Style
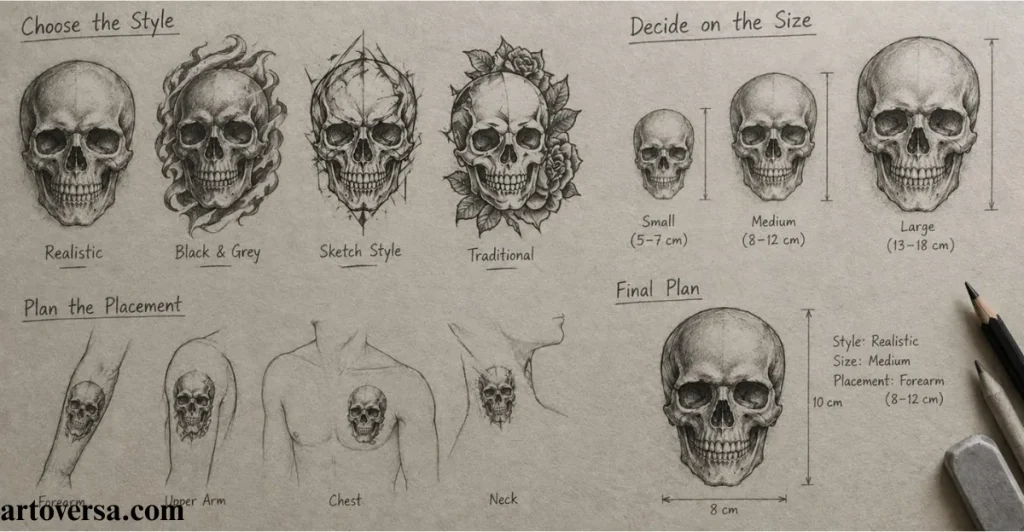
Planning the tattoo’s size and artistic style helps determine how much detail the final design should contain. A realistic skull requires careful bone structure and subtle shading, while a traditional design often relies on bold outlines and simplified features.
- Select a realistic, traditional, gothic or minimalist style to establish the visual direction of your skull tattoo.
- Decide whether the design will feature a complete skull, a side profile or a skull combined with other elements.
- Consider the intended tattoo placement, such as the forearm, upper arm, shoulder or calf when planning the composition.
- Keep the main features large enough to remain recognizable if the final design is relatively small.
- Leave sufficient space around decorative elements so the artwork does not become crowded or difficult to read.
One thing I have noticed is that a clear plan prevents unnecessary changes later. Small tattoo designs usually look better with simplified details while larger compositions allow more room for texture. Establishing the style early also helps maintain consistent linework. A balanced layout gives the entire design a stronger visual identity.
3. Sketch the Basic Skull Shape
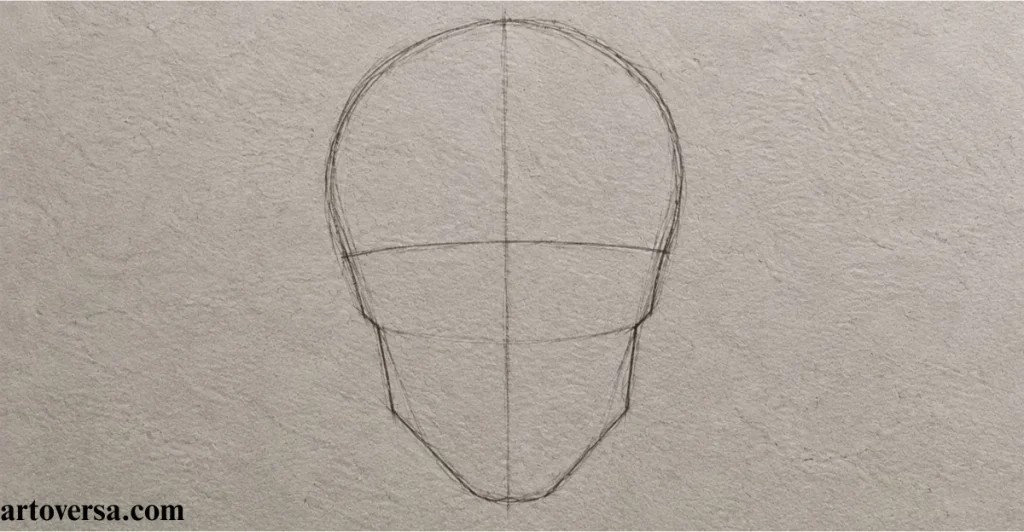
The skull’s outer shape provides the foundation for the entire tattoo design. Instead of drawing every feature immediately, begin with simple geometric guidelines that establish the width, height and position of the head. These initial shapes make it easier to maintain symmetry and realistic proportions.
- Sketch a light oval or rounded shape to establish the upper portion of the skull and its overall width.
- Add a vertical guideline through the center to help position the eyes, nose and mouth symmetrically.
- Draw a horizontal guideline across the middle of the face to establish the approximate placement of the eye sockets.
- Extend the lower portion into a narrower shape that will eventually form the cheekbones and jaw.
- Adjust the outer contour with subtle curves and angles to create a recognizable skull silhouette before adding details.
Based on my drawing practice, construction lines are especially useful when working with skulls. They help keep the facial features aligned and prevent the head from looking uneven. I prefer checking the width of the upper skull against the jaw before moving forward. A strong foundation makes every later step easier.
4. Outline the Eye Sockets and Nose
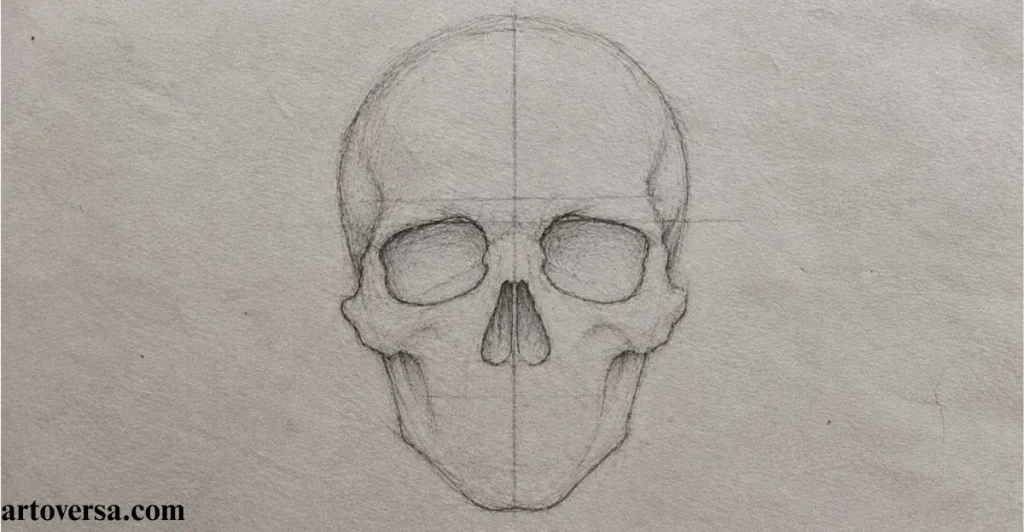
The eye sockets and nasal opening give a skull its distinctive appearance. These dark, hollow areas create contrast and help establish the expression of the design. Their shapes should follow the skull’s structure rather than appearing like randomly placed symbols.
- Sketch two large hollow shapes inside the upper face, keeping their size and position balanced around the center guideline.
- Shape the upper edges of the eye sockets according to your chosen style, using rounded forms for realism or sharper angles for a dramatic look.
- Add the nasal opening between the eye sockets with a narrow upper section and a wider lower shape.
- Define the surrounding brow and cheekbone areas with curved lines that connect naturally to the outer skull contour.
- Darken the inner openings gradually while leaving enough surrounding space to preserve the structure of the face.
From what I have observed the eye sockets often become the strongest focal point of a skull tattoo. Their placement affects how the entire face appears so checking their alignment is important. I also find that leaving the outer edges clean creates better contrast. This makes the skull recognizable even before additional details are added.
5. Create the Teeth and Jaw
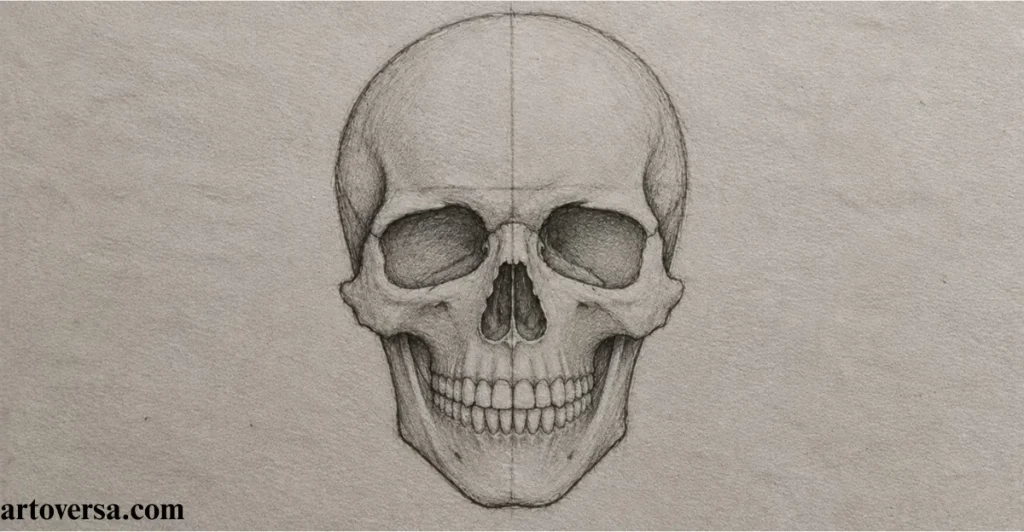
The teeth and jaw bring structure to the lower half of the skull and help complete its recognizable silhouette. Although individual teeth can look complicated they become easier to arrange when you first establish the jaw’s shape. Keep the spacing consistent so the mouth does not appear crowded.
- Outline the lower jaw with two curved sides that narrow slightly toward the chin and connect naturally to the skull.
- Sketch a horizontal guideline for the mouth to keep the upper and lower rows of teeth aligned.
- Divide the teeth into individual sections using short vertical lines, varying their shapes slightly to create a natural appearance.
- Add the larger front teeth first then shape the smaller side teeth to follow the curve of the jaw.
- Define the jawline and spaces between the teeth with darker strokes while preserving clear separation between each tooth.
I have found that drawing the overall mouth shape first makes the teeth much easier to arrange. When the spacing is consistent, the skull looks more structured and believable. Excessively dark lines between every tooth can make the design appear cluttered. Keeping the details controlled creates a stronger tattoo illustration.
6. Add Details and Decorative Elements
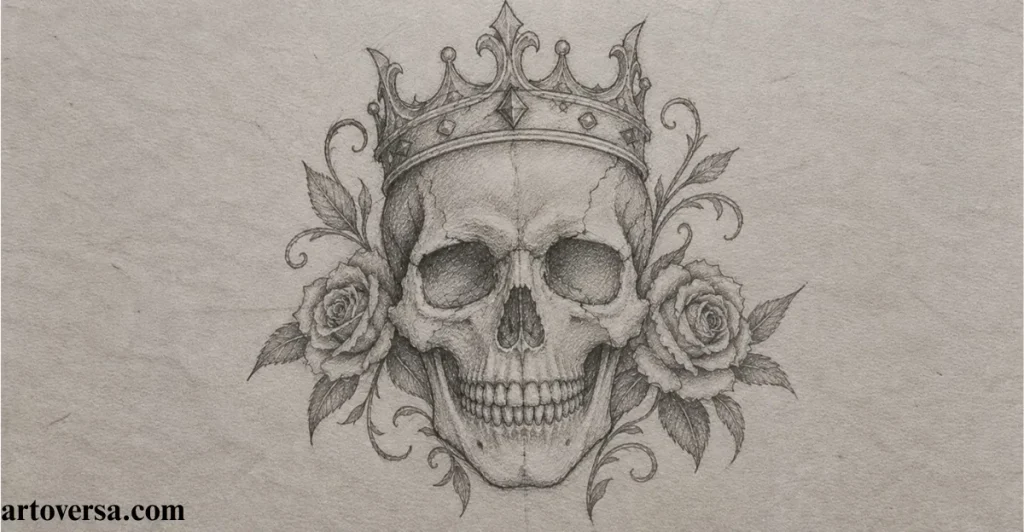
Once the main skull structure is complete you can personalize the design with additional features. Decorative details help distinguish one tattoo from another especially when working with traditional, gothic or ornamental artwork. However these additions should complement the skull rather than distract from its basic shape.
- Add fine cracks across selected areas of the skull to create an aged appearance without covering the entire surface.
- Introduce small crossbones, roses, flames or leaves if they match the theme and composition of your tattoo.
- Sketch subtle lines around the cheekbones and forehead to suggest bone texture and natural surface changes.
- Include ornamental patterns or geometric shapes around the skull for a more stylized and contemporary design.
- Keep decorative elements away from important facial features so the eyes, nose, and teeth remain clearly visible.
In my experience decorative details work best when they support the main subject. A few carefully placed cracks can create more impact than covering the skull with unnecessary marks. I also recommend keeping additional objects proportionate to the face. This approach helps the finished tattoo remain balanced and visually interesting.
7. Refine the Skull Tattoo Outline
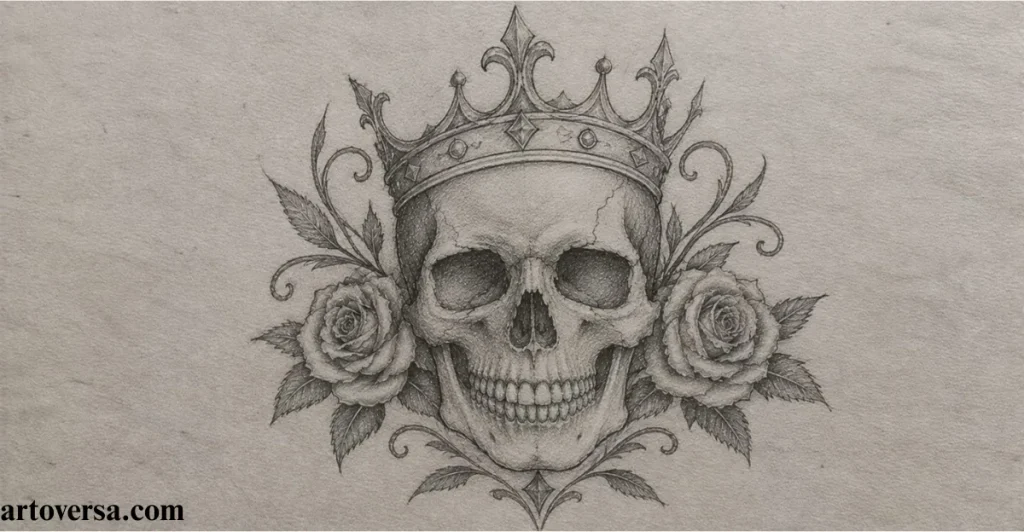
Refining the outline transforms the rough sketch into a more polished piece of artwork. At this stage, focus on the skull’s silhouette, facial alignment and the clarity of each major feature. Remove construction marks and strengthen the lines that define the design.
- Trace the outer skull contour with smooth confident strokes that create a clear and recognizable silhouette.
- Strengthen the outlines around the eye sockets, nasal opening and jaw to establish visual contrast.
- Use thinner lines for the teeth, cracks and smaller decorative elements to avoid making every feature equally heavy.
- Erase or hide unnecessary guidelines after confirming that the proportions and placement of the features are correct.
- Review the entire design for uneven curves, awkward gaps and details that overlap or reduce the skull’s clarity.
One technique I find helpful is reviewing the outline before adding any heavy shading. This makes it easier to identify mistakes that might otherwise disappear beneath dark areas. I also check whether the skull remains recognizable from a distance. Clean consistent lines give the artwork a more professional appearance.
8. Add Shading and Highlights
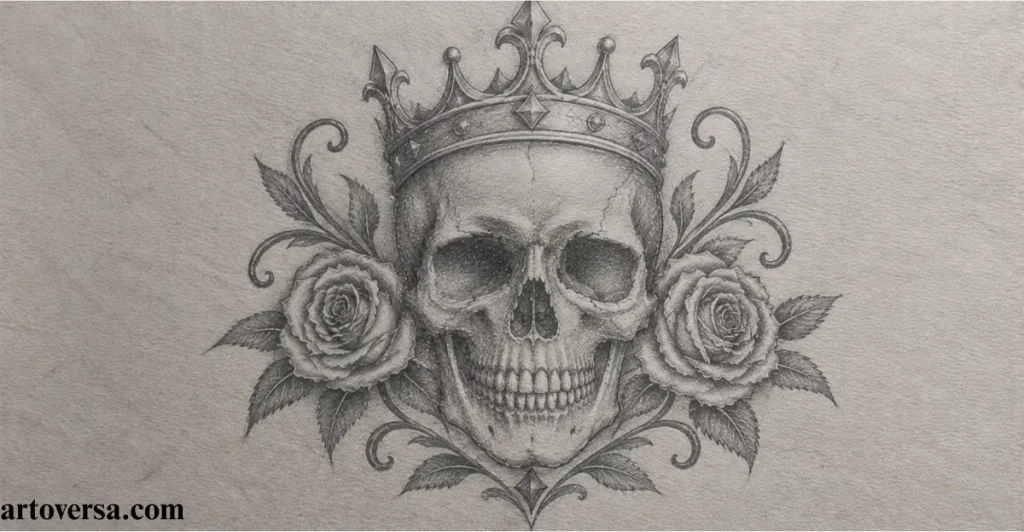
Shading adds dimension to a skull tattoo by emphasizing its hollow spaces, raised bone surfaces and curved structure. You can use black-and-grey shading for a classic appearance or introduce limited colors for a more expressive style. Build the darker areas gradually to preserve the important details.
- Darken the eye sockets and nasal opening to establish the deepest shadows and create strong contrast across the face.
- Add shadows beneath the brow along the cheekbones, and around the jaw to suggest the skull’s three-dimensional structure.
- Use gradual transitions between dark and light areas to make the forehead and rounded sections appear more natural.
- Leave small highlights on raised bone surfaces to separate the lighter areas from the surrounding shadows.
- Apply a consistent shading style throughout the design using smooth gradients for realism or solid black sections for traditional tattoo artwork.
From my experience shading looks more effective when the darkest areas have a clear purpose. Keeping the eye sockets and nose darker than the surrounding bone helps establish depth. I also avoid shading every section equally because it can flatten the design. Balanced contrast makes the skull look more dimensional.
9. Finalize Your Skull Tattoo Design
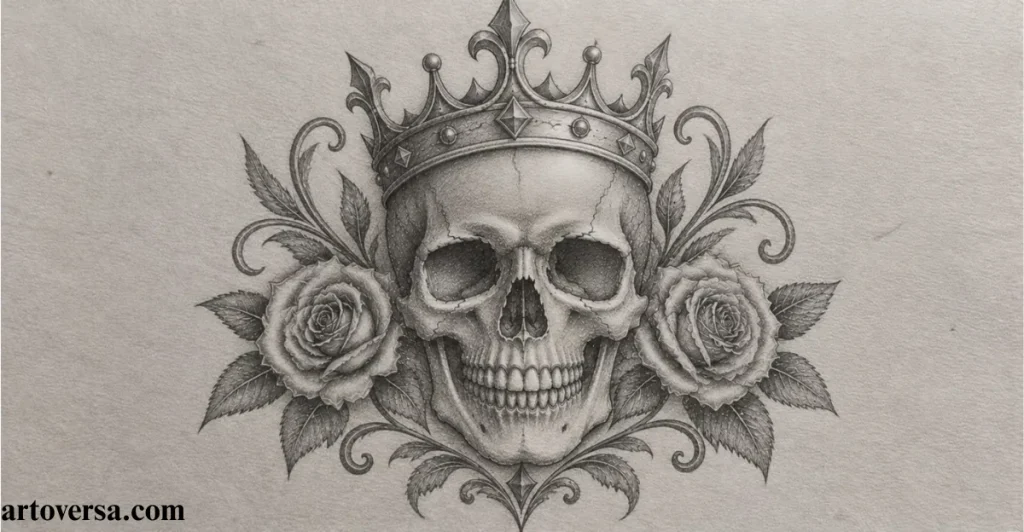
The final stage involves checking the complete design and correcting anything that weakens its overall appearance. A successful skull tattoo should have balanced proportions and a consistent visual style. Review the artwork at different sizes to ensure the main features remain clear.
- Inspect the skull’s outer shape, facial alignment and jaw proportions to confirm that the entire design looks balanced.
- Correct broken outlines, uneven teeth and awkward transitions that make the skull appear inconsistent.
- Remove leftover sketch marks and clean up small details that distract from the main features.
- Check the contrast between the outlines, hollow areas, decorative elements and highlights to maintain visual clarity.
- Save a high-resolution copy of the finished artwork or prepare a clean stencil-ready design for professional review.
I have noticed that stepping back from the drawing often reveals small issues that are difficult to spot up close. Reviewing the skull as a complete composition helps you identify unnecessary details and uneven proportions. I also recommend checking a smaller version to see whether the main features remain recognizable. These final adjustments help create a more polished design.
Conclusion
Creating a skull tattoo design becomes easier when you build the artwork step by step, starting with the basic shape and gradually adding facial features, decorative elements and shading. Understanding the skull’s proportions helps you maintain a balanced composition while keeping the details clear and expressive. Whether you prefer bold traditional outlines or realistic black-and-grey artwork, consistent linework and thoughtful contrast can make your design stand out. Keep practicing different skull shapes, expressions and artistic styles to develop your skills and discover your own approach. With patience and careful attention to detail you can turn a simple sketch into a distinctive skull tattoo illustration.
FAQs
How do you draw a skull tattoo for beginners?
Start with an oval for the upper skull and add guidelines for the eyes, nose, and mouth. Sketch the jaw and teeth before refining the outline and adding shading.
What is the easiest skull tattoo design to create?
A simple skull with large eye sockets, a small nasal opening, and minimal teeth details is a good starting point. Bold outlines and limited shading make the design easier to develop.
Which tools are best for drawing a skull tattoo?
An HB pencil, eraser, sketchbook, and fine liner are useful for traditional drawing. Digital artists can use Procreate or similar drawing software to work with layers, brushes, and shading tools.
How can you make a skull tattoo look realistic?
Focus on accurate proportions, natural bone shapes, correctly spaced teeth, and gradual shading. Dark eye sockets and carefully placed highlights help create a more three-dimensional appearance.
Which shading technique works best for skull tattoo designs?
Smooth gradients work well for realistic skulls, while bold black sections suit traditional and graphic designs. Choose a technique that matches your style and apply it consistently.
Can you create a skull tattoo design in Procreate?
Yes, Procreate lets you sketch the skull on separate layers, refine the outlines, and experiment with shading and colors. Reference and selection tools can also help you keep different parts of the design organized.
How do you make a skull tattoo design look unique?
Combine the skull with distinctive elements such as roses, ornamental patterns, flames, or geometric shapes. Experimenting with the angle, expression and shading style can also give your artwork a recognizable identity.
Please Write Your Comments