How to Draw a Realistic Penguin: Step-by-Step Guide for Beginners
Updated: September 16, 2026
23
Drawing a realistic penguin is a great way to improve your sketching skills while learning the unique shape, posture, and proportions of this fascinating bird. Whether you’re a beginner or an experienced artist, starting with simple construction shapes makes the drawing process easier and more enjoyable.
This step-by-step guide will show you how to sketch a realistic penguin, add feather texture, and apply natural shading with confidence. Follow each step carefully and practise regularly, and you’ll soon be creating lifelike penguin drawings with greater accuracy and ease.
Table of Contents
Why Learn to Draw a Penguin?
Many beginners think penguins are difficult to draw because of their smooth body shape, short flippers, and upright posture. However, by breaking the bird into simple construction shapes, the process becomes much easier. Learning to draw a penguin also improves your observation skills, pencil control, and understanding of proportions, helping you create more realistic wildlife drawings with confidence.
Materials You’ll Need
Before you start drawing, gather these basic tools. You don’t need expensive supplies; just a few essentials will help you sketch, shade, and refine your penguin with confidence.
- HB Pencil – For light construction lines and the initial sketch.
- 2B and 4B Graphite Pencils – For darker outlines, shading, and adding depth.
- Drawing Paper or Sketchbook – A smooth or medium-textured surface for clean pencil work.
- Kneaded Eraser – To erase mistakes and lift highlights without damaging the paper.
- Blending Stump – For creating smooth transitions between light and dark areas.
- Pencil Sharpener – Keeps your pencil tips sharp for drawing fine details.
- Reference Photo – Helps you study the penguin’s proportions, posture, and feather patterns.
Understanding Penguin Anatomy Before You Draw
Before you begin sketching, take a moment to study the penguin’s overall body shape. Notice its rounded head, streamlined body, short flippers, upright posture, and webbed feet, as these features create its distinctive silhouette. Also observe the white belly, dark back, and smooth feather pattern, which will help you place details and apply realistic shading. Understanding these basic features before you draw will make it easier to sketch accurate proportions and create a lifelike penguin.
Step 1 – Draw Basic Construction Shapes
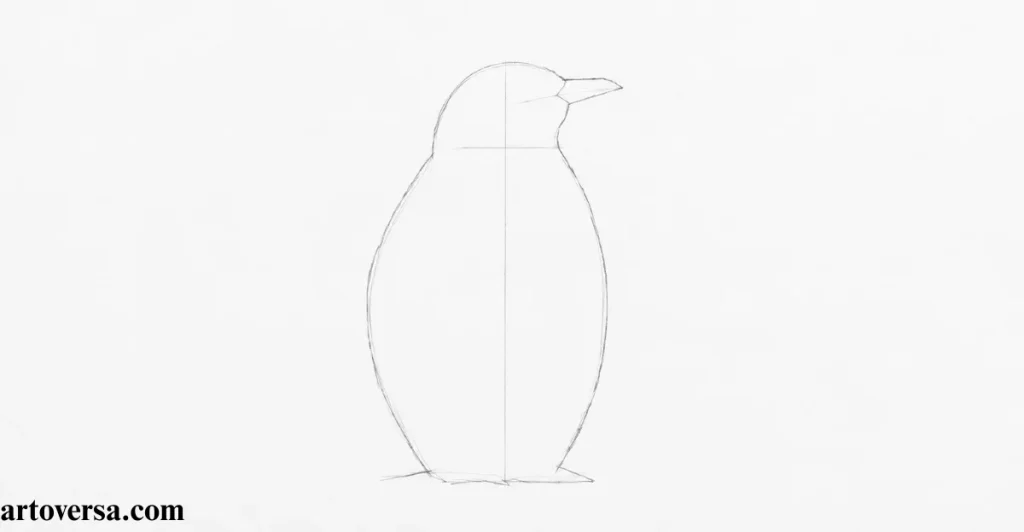
- Draw a large vertical oval to create the penguin’s main body.
- Sketch a small circle above the body for the head.
- Connect the head and body with short, smooth guide lines.
- Keep all construction lines light so you can adjust them easily.
- Focus on the overall shape and proportions instead of adding details.
Common Problems and How to Overcome Them
Many beginners press too hard or start adding facial features before completing the basic structure. Use an HB pencil with light pressure and treat these shapes as simple guides until you’re happy with the overall form.
One pattern I’ve observed while guiding new artists is that they often rush into drawing the beak, eyes, and flippers before building a solid foundation. Once I encouraged them to slow down and focus on simple construction shapes first, their sketches became more balanced, accurate, and much easier to refine. Follow these steps patiently, and you’ll soon develop the confidence and control needed to sketch realistic penguins with ease.
Step 2 – Sketch the Body Proportions
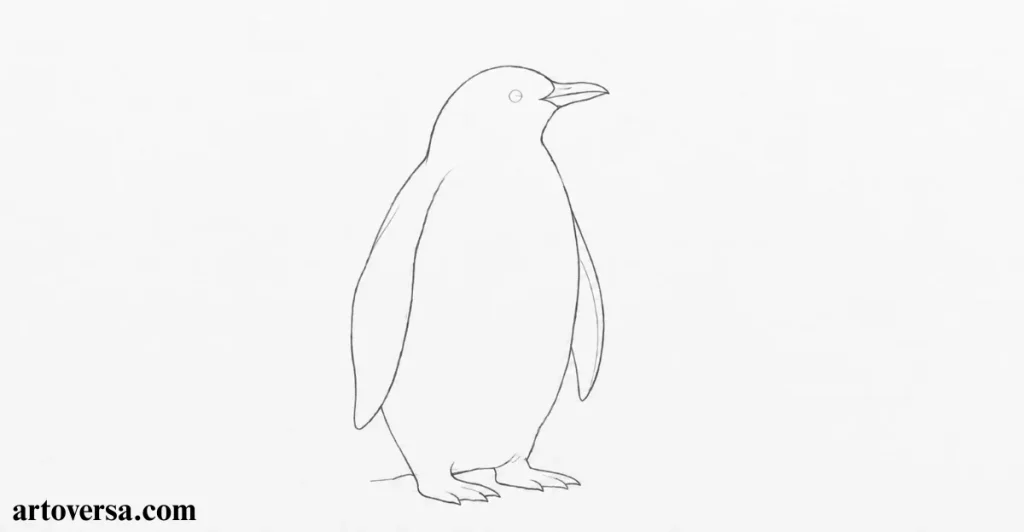
- Refine the body into a smooth, oval shape with a slightly wider lower half.
- Keep the head smaller than the body to maintain natural proportions.
- Gently narrow the neck area where the head meets the body.
- Check that the penguin’s body has a balanced, upright posture.
- Compare the overall silhouette and make small adjustments before moving to the next step.
Common Problems and How to Overcome Them
A common mistake is making the head too large or the body too narrow, causing the penguin to look unbalanced. Compare the size of the head and body frequently, and adjust the outline before darkening any lines.
As I reviewed practice sketches, I noticed that artists who paused to compare the body proportions made far fewer corrections later. Taking a moment to balance the head and body early saved both time and effort throughout the drawing. Develop this habit from the beginning, and your penguin sketches will become more balanced, realistic, and easier to complete.
Step 3 – Draw the Head and Facial Features
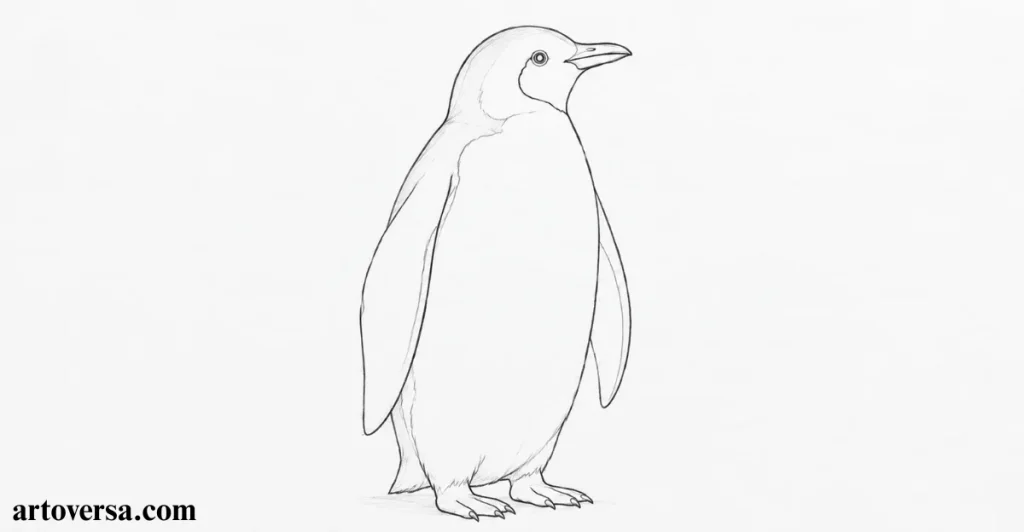
- Refine the head into a smooth, rounded shape.
- Draw a short, pointed beak in the centre of the face.
- Place a small eye slightly above the beak, keeping it proportional to the head.
- Lightly sketch the facial colour pattern around the face and neck.
- Smooth the head outline so it blends naturally into the body.
Common Problems and How to Overcome Them
Many beginners draw the beak too long or place the eye too high, making the penguin lose its natural expression. Keep the facial features small and evenly spaced, and compare them with the head before adding darker outlines.
After looking through many completed sketches, I realised that small adjustments to the eye and beak often made the biggest difference. Artists who took a little extra time refining the face created penguins with far more character and realism. Stay patient during this stage, and your drawing will begin to come to life.
Step 4 – Add the Flippers
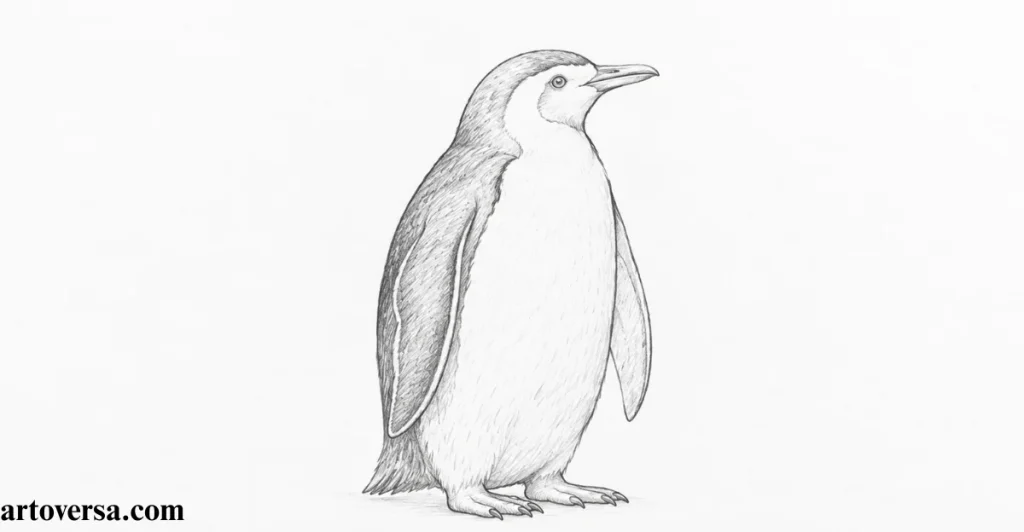
- Draw a long, curved flipper on each side of the body.
- Keep both flippers close to the body for a natural resting pose.
- Make the flippers slightly wider at the base and narrower toward the tips.
- Match the length and angle of both flippers to maintain symmetry.
- Refine the outlines with smooth, flowing curves before adding details.
Common Problems and How to Overcome Them
A common mistake is drawing the flippers too long or attaching them too high on the body, making the penguin look unnatural. Sketch the overall shape first, then compare both sides before refining the outlines.
While reviewing finished penguin sketches, I noticed that well-positioned flippers made the entire drawing feel more balanced. Artists who focused on placement before refining the outlines achieved a much more natural posture. Build the flippers carefully, and the rest of your drawing will come together with ease.
Step 5 – Draw the Feet
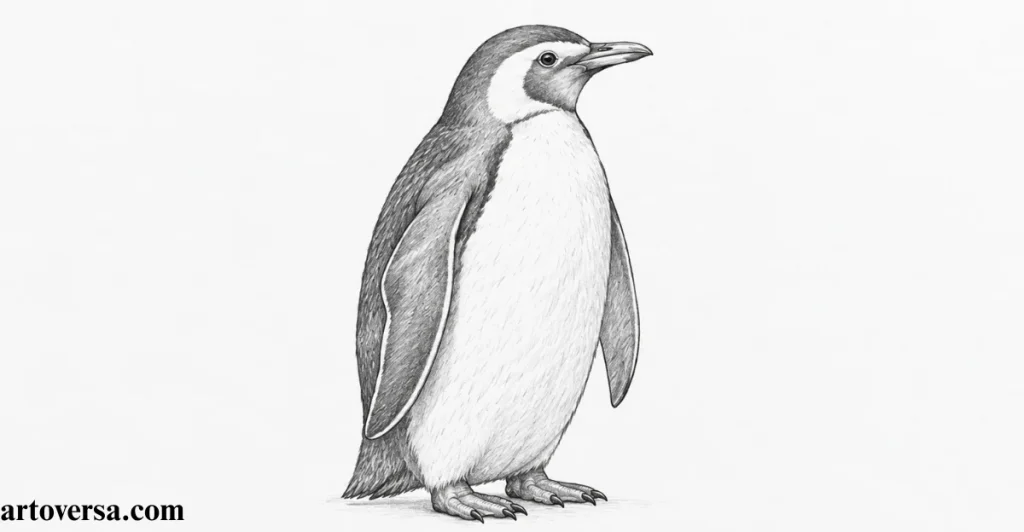
- Sketch two short legs beneath the body, keeping them evenly spaced.
- Draw the webbed feet with three forward-facing toes.
- Keep the feet slightly wider than the legs for better balance.
- Angle the toes naturally to give the penguin a stable standing pose.
- Refine the outlines and check that both feet rest evenly on the ground.
Common Problems and How to Overcome Them
Many beginners draw the feet too small or place them too close together, making the penguin appear unstable. Compare the size and position of both feet before darkening the outlines, and keep the toes spread naturally.
While practising penguin sketches, I found that artists often focused on the body and overlooked the feet. Once they adjusted the foot placement and gave the webbed toes a more natural shape, the entire drawing looked steadier and more realistic. Paying attention to these small details will greatly improve the final result.
Step 6 – Sketch the Belly Pattern
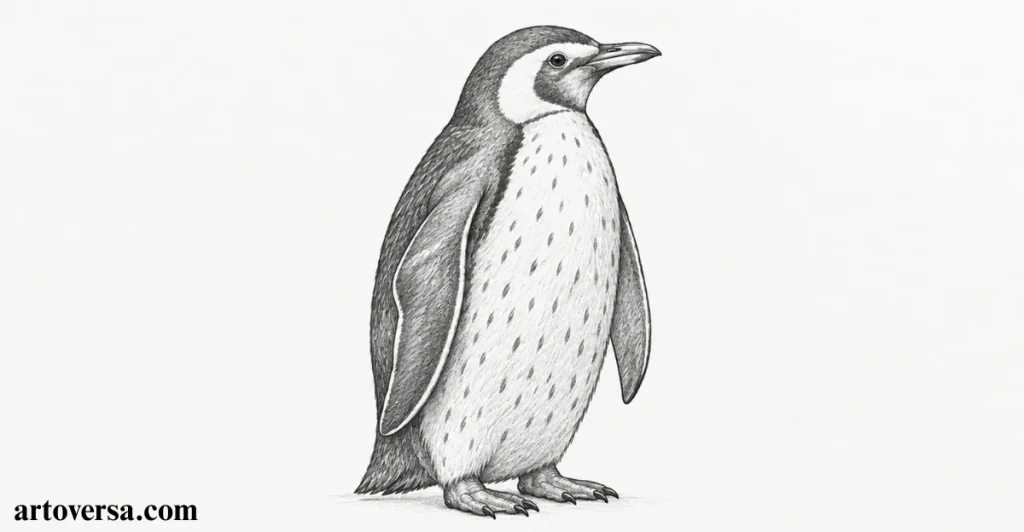
- Lightly outline the white belly patch using smooth, curved lines.
- Keep both sides of the belly pattern as symmetrical as possible.
- Blend the belly outline naturally into the neck and lower body.
- Compare the shape with your reference photo before refining the edges.
- Erase unnecessary guide lines once you’re satisfied with the pattern.
Common Problems and How to Overcome Them
A common mistake is making the belly patch too narrow or uneven, which affects the penguin’s natural appearance. Sketch the overall shape first, then make small adjustments until both sides look balanced.
As I compared different penguin drawings, I realised that a well-shaped belly pattern made the bird instantly recognisable, even before shading was added. Artists who refined this area patiently achieved a cleaner, more realistic look. Take your time with this step, and the penguin’s distinctive appearance will stand out beautifully.
Step 7 – Add Feather Texture
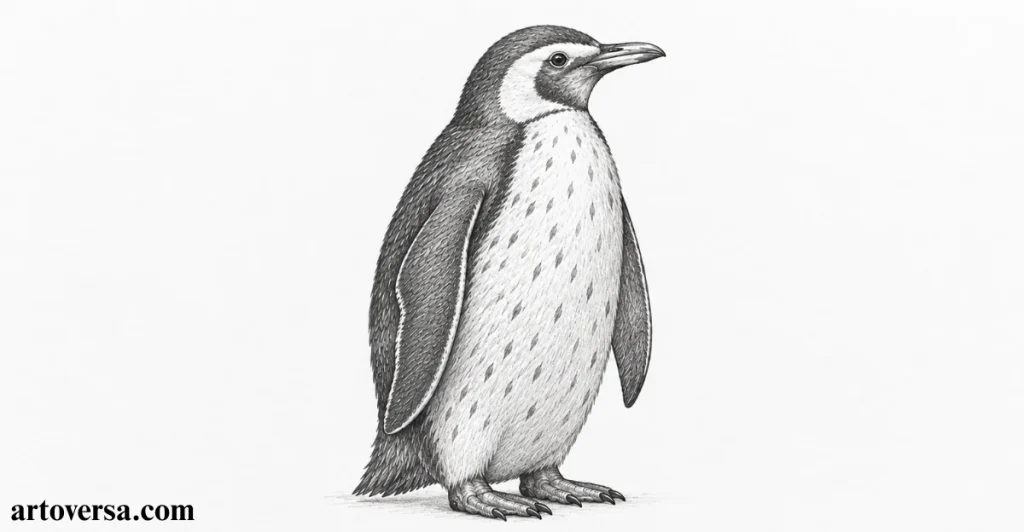
- Use short, light pencil strokes to create soft feather texture across the body.
- Follow the natural direction of the feathers instead of drawing random lines.
- Keep the texture subtle on the belly and slightly darker on the back and flippers.
- Build the texture gradually by adding light layers rather than heavy strokes.
- Leave a few smooth areas to create a clean, natural-looking feather finish.
Common Problems and How to Overcome Them
Many beginners cover the entire penguin with heavy pencil strokes, making the feathers look rough and unrealistic. Add texture gradually, vary your pencil pressure, and avoid drawing every individual feather.
After reviewing countless practice drawings, I found that the most realistic penguins relied on subtle texture rather than excessive detail. Artists who worked with light, controlled pencil strokes created smoother feathers and a much more natural appearance. Build the texture patiently, and your drawing will gain depth without looking overworked.
Step 8 – Clean the Line Art
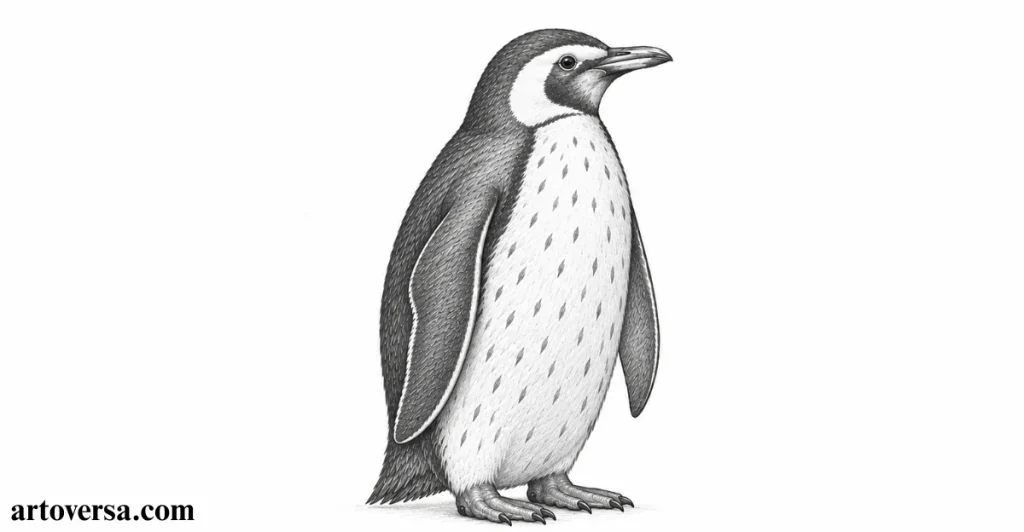
- Carefully erase the unnecessary construction lines without removing the final outlines.
- Darken the important contours using smooth, confident pencil strokes.
- Refine the edges of the head, flippers, body, and feet for a cleaner silhouette.
- Keep the line thickness consistent, adding slightly darker lines only where needed.
- Review the entire sketch and make small corrections before moving on to shading.
Common Problems and How to Overcome Them
Many beginners erase too aggressively or leave too many guide lines behind, making the drawing look untidy. Remove the construction lines gradually, strengthen the final outlines, and make sure the sketch is clean before adding shading.
One habit I noticed among artists with polished drawings was their patience during this stage. They carefully refined each outline instead of rushing to the shading, which made every detail look sharper and more professional. A clean line drawing will make the next steps much easier and improve the overall quality of your artwork.
Step 9 – Shade the Penguin for Realism
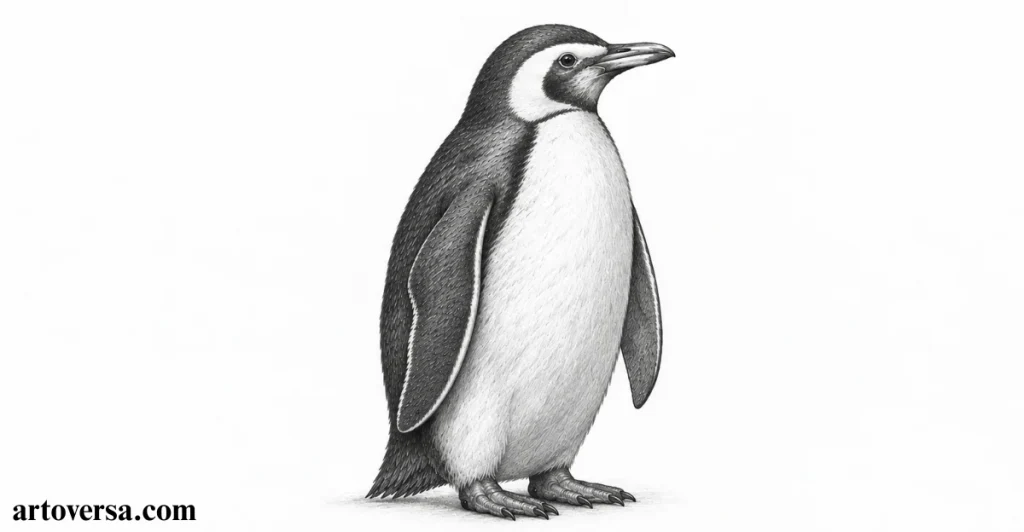
- Begin shading with an HB pencil, then use a 2B or 4B graphite pencil for darker areas.
- Apply light layers of graphite to create smooth midtones and natural depth.
- Add form shadows beneath the flippers, around the neck, and under the body.
- Leave soft highlights on the belly and face to show where light falls naturally.
- Blend the shading gently with a blending stump while preserving the feather texture.
Common Problems and How to Overcome Them
Many beginners use heavy pencil pressure too early, making the shading look harsh and difficult to correct. Build the graphite gradually, strengthen the darker areas little by little, and keep a clear contrast between the highlights and shadows.
While reviewing finished penguin drawings, I noticed that the most realistic artwork relied on smooth tonal transitions rather than dark shading alone. Artists who layered graphite patiently created softer forms and a much stronger sense of depth. Take your time with each layer, and your penguin will look far more natural and three-dimensional.
Step 10 – Add Final Details and Highlights
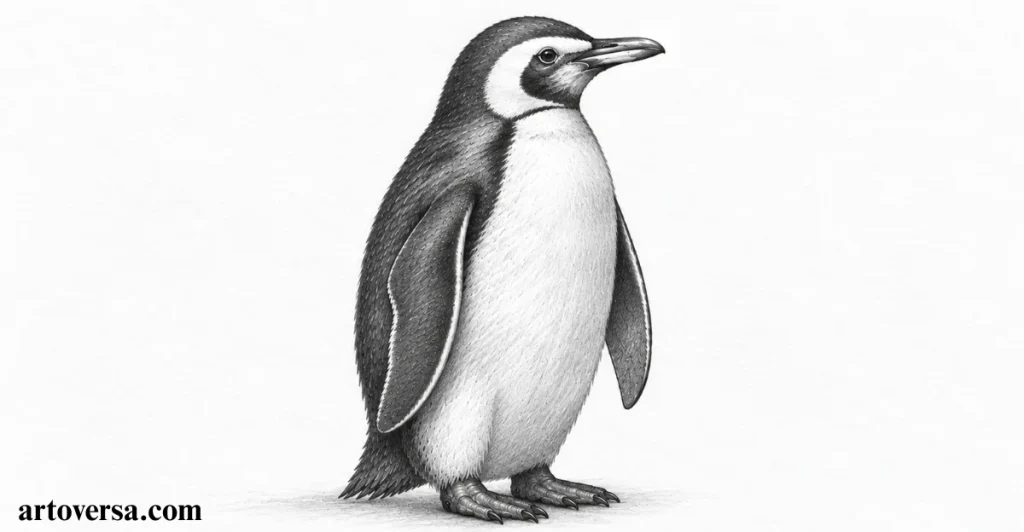
- Sharpen the eye, beak, and claws with clean, controlled pencil strokes.
- Add subtle feather texture only where the drawing needs extra depth.
- Use a kneaded eraser to lift soft highlights on the face, belly, and flippers.
- Deepen the darkest cast shadows to increase contrast and realism.
- Step back and review the entire drawing, making only the final adjustments that improve the overall result.
Common Problems and How to Overcome Them
Many beginners keep adding details after the drawing is complete, making it look busy and overworked. Focus on small refinements, preserve the highlights, and stop once every part looks balanced.
As I compared finished sketches, I found that the strongest drawings weren’t the ones with the most details; they were the ones with the most thoughtful finishing touches. Artists who made a few careful adjustments instead of constant corrections produced cleaner, more professional artwork. Trust your progress, and let the final details enhance your drawing rather than overpower it.
Professional Drawing Tips
Professional artists focus on accuracy before details. Study a clear reference photo, sketch with light construction lines, and check the overall proportions before refining the beak, flippers, or feet. Building a strong foundation makes the entire drawing look more balanced and realistic.
For a natural finish, apply graphite in light layers, preserve your highlights, and increase contrast gradually instead of pressing hard with the pencil. Review your sketch from a distance, make small corrections when needed, and practise regularly to improve your observation skills, pencil control, and confidence with every penguin drawing.
How to Draw Different Types of Penguins
Emperor Penguin
An emperor penguin has the tallest body, a long neck, and a distinctive yellow-orange patch near the head. Keep the body slender and upright to capture its graceful appearance.
King Penguin
A king penguin is slightly smaller than an emperor penguin but has a similar body shape. Draw a streamlined body with bright orange markings around the neck and upper chest for a realistic look.
Adélie Penguin
An Adélie penguin has a compact body, a short beak, and a noticeable white ring around each eye. Use a rounder silhouette and shorter flippers to match its distinctive features.
Chinstrap Penguin
A chinstrap penguin is easy to recognise by the thin black line running beneath its chin. Sketch a slim body and add the characteristic chin marking to distinguish it from other penguin species.
Conclusion
Drawing a realistic penguin is easier when you build the sketch one step at a time. By starting with simple construction shapes and gradually adding details, texture, and shading, you can create a balanced and lifelike drawing with confidence.Keep practising, observe real penguin anatomy, and don’t be afraid to refine your technique with every sketch. The more you draw, the stronger your pencil control, observation skills, and artistic confidence will become.
FAQs
How do you draw a realistic penguin step by step?
Start by sketching simple construction shapes, then refine the body proportions, draw the facial features, add the flippers and feet, create the belly pattern, add feather texture, and finish with realistic shading and highlights.
2. What is the easiest way for beginners to draw a penguin?
The easiest method is to begin with basic circles and ovals, keeping the construction lines light before gradually adding details and shading.
3. What materials do I need to draw a realistic penguin?
You’ll need an HB pencil, 2B and 4B graphite pencils, drawing paper, a kneaded eraser, a blending stump, a sharpener, and a reference photo.
4. How can I make my penguin drawing look more realistic?
Use accurate proportions, subtle feather texture, smooth graphite shading, and natural highlights, and study a real penguin reference photo.
5. What are the common mistakes when drawing a penguin?
Common mistakes include drawing the head too large, placing the flippers incorrectly, making the feet too small, and applying heavy shading too early.
6. How do you draw penguin feathers?
Create feather texture with short, light pencil strokes that follow the natural direction of the feathers instead of drawing every individual feather.
7. Which pencil is best for drawing a realistic penguin?
An HB pencil works best for sketching, while 2B and 4B graphite pencils are ideal for shading and creating depth.
Please Write Your Comments