Realistic Horse Drawing: How to Draw a Horse for Beginners
Updated: September 12, 2026
47
Horses are admired for their strength, beauty and graceful movement. Their powerful body, flowing mane and gentle expressions make them an interesting subject to draw. These animals are often seen on farms and open fields where their natural behavior creates inspiration. A realistic horse drawing helps beginners understand shapes, proportions and details while improving their sketching skills. Create a beautiful realistic horse drawing by following simple steps and improving your sketching skills.
Table of Contents
Materials You’ll Need
Before starting your drawing, collect some basic art supplies that will help make the sketching process smoother. You don’t need expensive tools just a few reliable materials can help you create clean outlines, realistic details, and better shading.
- Graphite Pencils (HB, 2B, and 4B): Use an HB pencil for light guidelines, a 2B pencil for defining shapes, and a 4B pencil for adding darker areas and deeper shadows.
- Drawing Paper: Pick smooth or slightly textured paper that works well with graphite and allows easy blending without creating too much mess.
- Kneaded Eraser: This helps remove extra marks, create highlights, and make corrections while keeping the paper surface clean.
- Blending Stump: Use it to soften graphite, blend shades, and create smoother transitions for a more realistic look.
- Pencil Sharpener: A sharp pencil gives better control for drawing small details and creating precise lines.
- Reference Photo: Keep a clear turkey image nearby to understand its shape, proportions, feathers, and natural details while sketching.
- Having these materials ready will make your drawing process easier and help you focus on creating a more realistic turkey sketch step by step.
Observation to identify the foreground shape(s)
Improve your observation skills by practicing foreground shape identification with different images every day.
Step 1: Basic Line Sketching
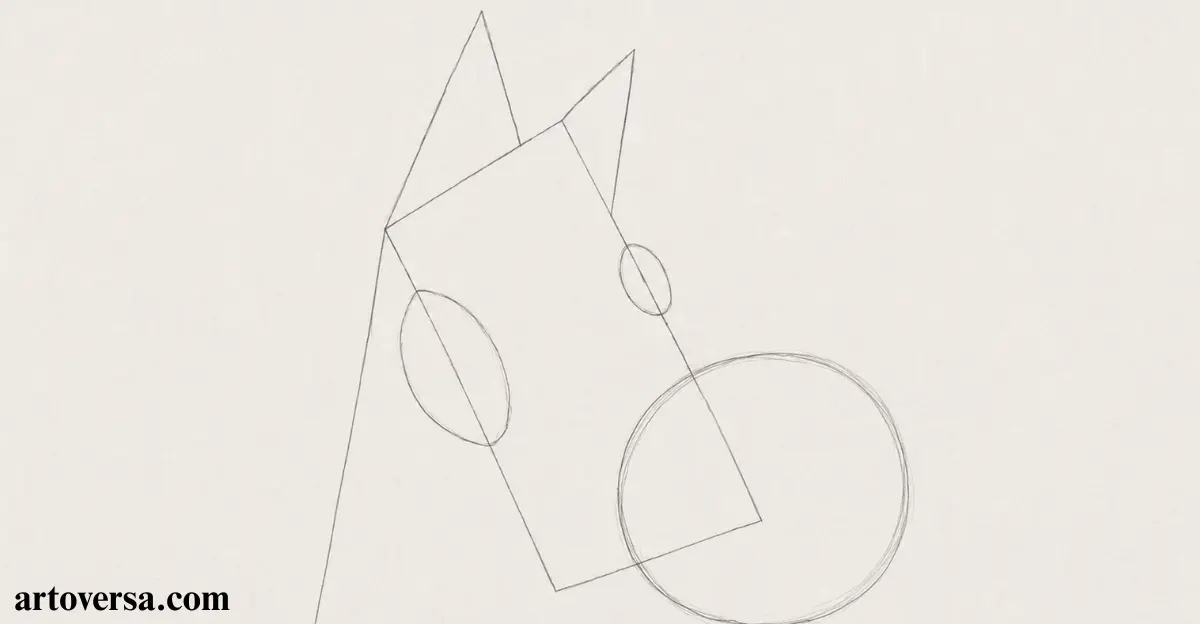
- Begin with light basic line sketching and keep the overall horse drawing soft so the beginner sketch stays easy to adjust.
- Build the horse body using loose guidelines and focus on the overall body structure instead of adding details too early.
- Use simple shapes first because they help maintain balance and create a cleaner horse sketch later.
- Keep the pencil pressure soft while drawing so corrections remain smooth and the structure stays flexible.
- Check the full horse body placement before moving toward smaller parts of the drawing.
Common problems and how to overcome them
Most beginners press too hard during basic line sketching, which makes the horse structure difficult to fix later. Keep the first lines light and focus only on simple forms at this stage.
When I first started sketching horses, I ignored the early structure and rushed into details. My drawings looked stiff and uneven. After practicing softer guidelines and better placement, my horse sketches started becoming smoother and more realistic.
Step 2: Proportionality and Measurement
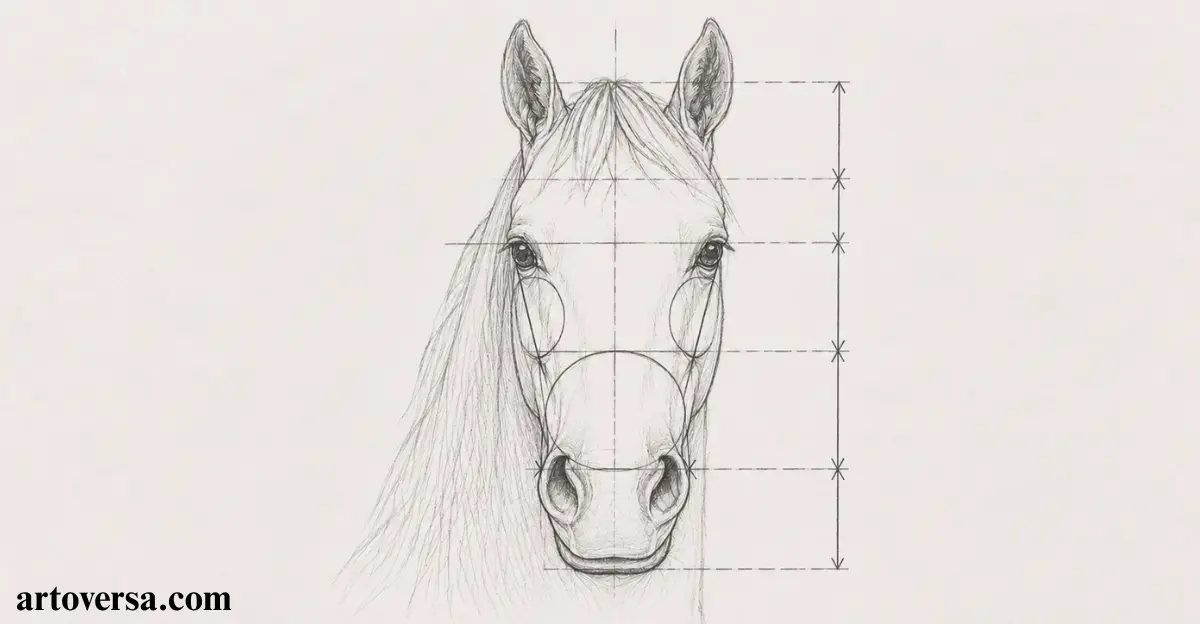
- Observe the space between the horse’s eyes, ears, nose, and mouth to understand the correct facial balance.
- A clear reference point helps you estimate other areas and keep each feature placed in the right position.
- While comparing the image, focus on the distance between different sections instead of guessing randomly.
- Careful checking of the body length and feature placement creates a more natural horse structure.
- Before adding details, review the entire sketch to make sure all parts follow the correct proportions.
Common problems and how to overcome them
Many artists ignore the distance between body parts and add features without proper comparison. Use a simple reference point and check each section carefully to avoid an uneven horse sketch.
During my early practice sessions, I found it difficult to maintain the correct size of each horse feature. Small mistakes in placement affected the whole drawing. After improving my measurement skills, I started creating more balanced and realistic horse sketches.
Step 3: Rough Sketch
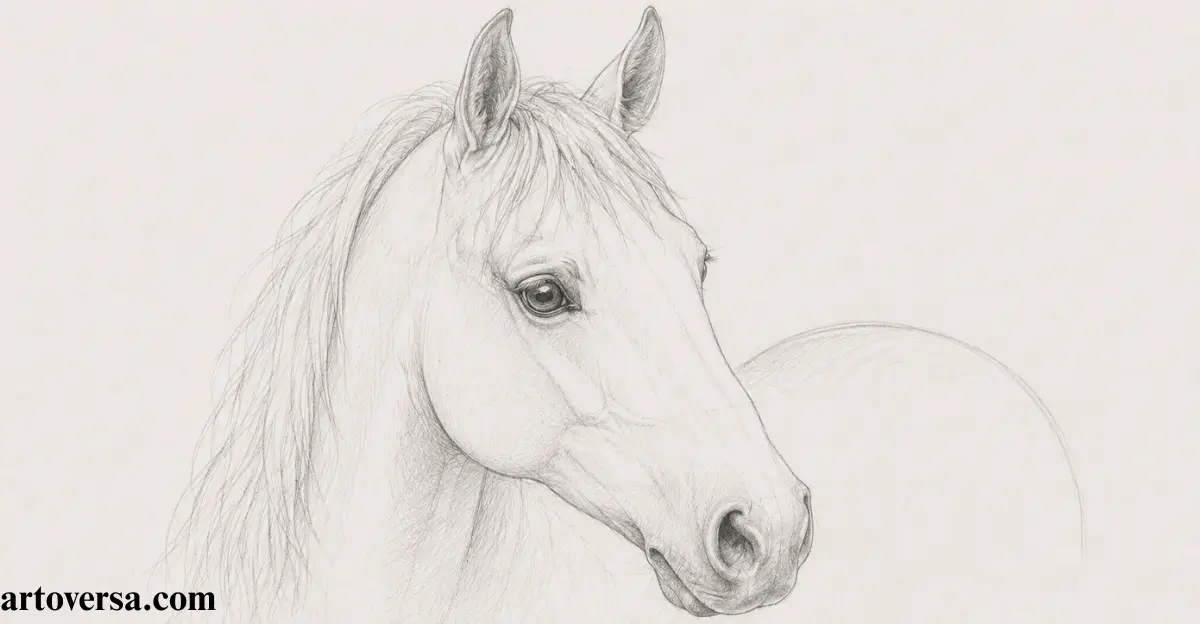
- Begin with a rough sketch of the horse by using the measured proportions and placements from the previous steps to create a simple foundation.
- Create the first outline with light strokes and focus on bringing the main horse structure together without adding extra details.
- Develop the basic form by connecting the head neck body, and legs while keeping the overall shape easy to adjust.
- Keep the initial lines flexible because this stage helps refine the position and balance of the complete drawing.
- Review the entire sketch carefully and make small changes before moving toward detailed features and final touches.
Common problems and how to overcome them
A frequent mistake among beginners is making the first sketch too dark, which makes corrections difficult later. Keep the rough lines soft and focus on creating a flexible structure before refining the artwork.
At the beginning of my drawing journey, I often tried to complete the horse too quickly without building a proper base. My early sketches lacked balance and looked unnatural. After practicing simple rough outlines, I learned how important a strong foundation is for creating realistic results.
Step 4: Cleaning Up and Final Sketching
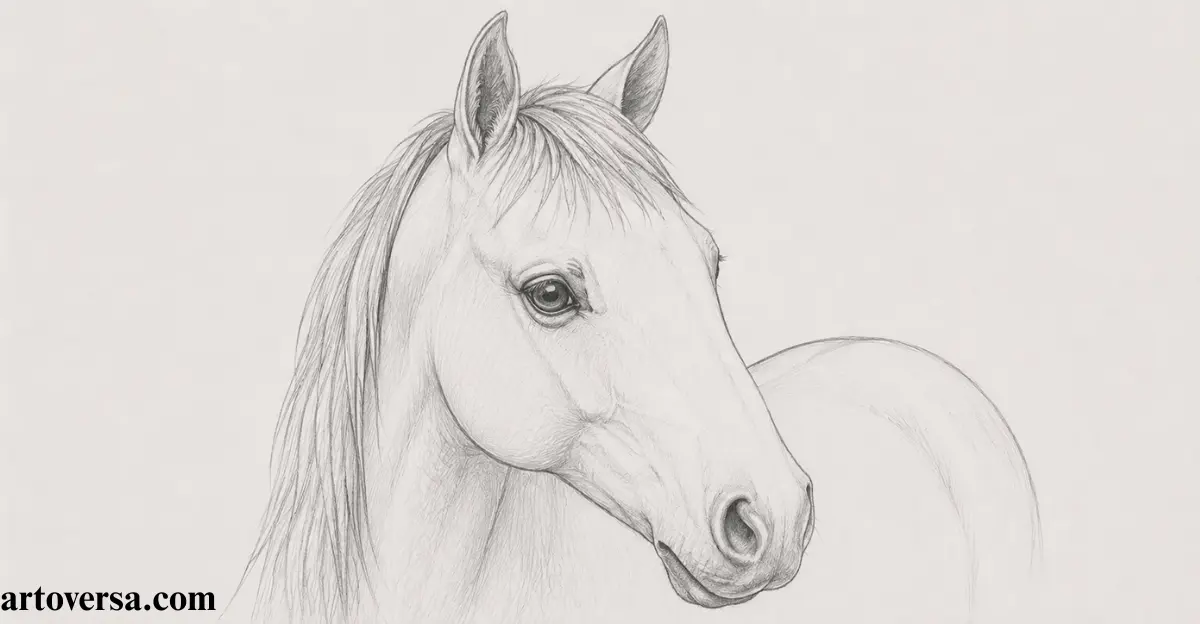
- Begin refining the final sketch by reviewing the horse structure and improving the areas that need more accuracy.
- Remove extra guidelines carefully so the drawing looks cleaner while keeping the important construction lines in place.
- Adjust the remaining outlines with smoother strokes to create a more polished and confident horse appearance.
- Focus on the small corrections around the body face, and other sections to improve the overall result.
- Complete the sketch by checking the details once more before moving toward shading and realistic finishing.
Common problems and how to overcome them
Many beginners erase too much during cleanup and accidentally remove useful construction lines. Keep the important shapes visible while removing only unnecessary marks for a cleaner final sketch.
During my first attempts at creating horse artwork, I often cleaned my sketches too early and lost important structure. With more practice, I learned to refine slowly and protect the main forms. This helped me create cleaner drawings with stronger details and better realism.
Step 5: Sketching the Details
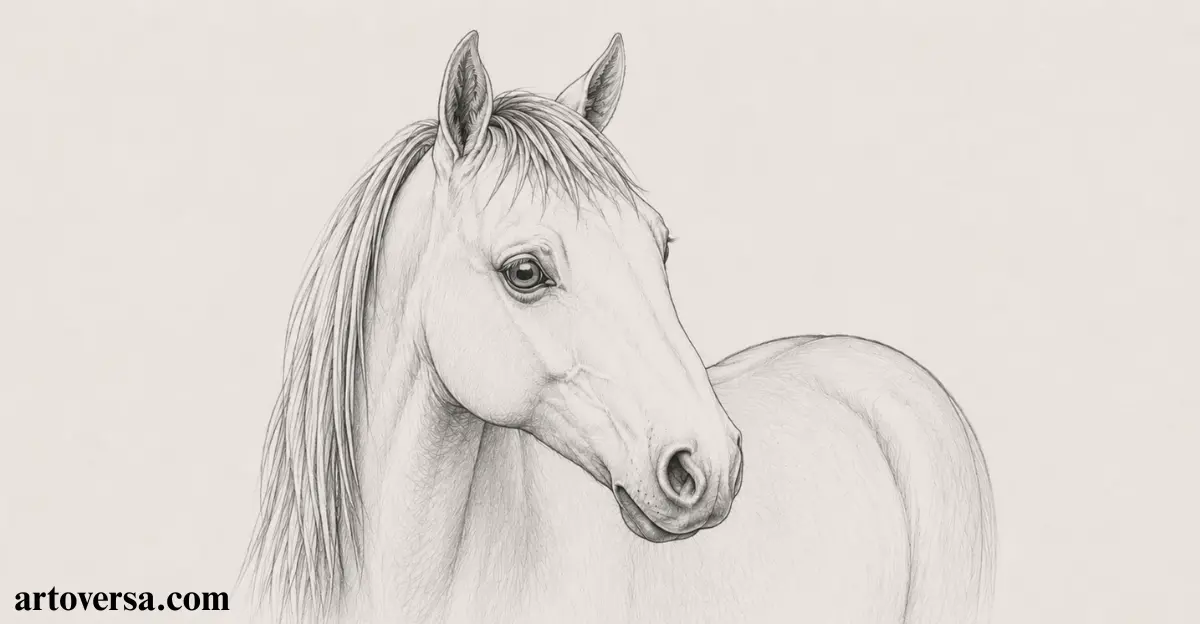
- Add the details carefully after completing the main outline because these small features help the horse develop its unique identity.
- Focus on areas like the eyes, ears, mane, and facial structure to bring more character and realism into the drawing.
- Notice the small textures and natural lines that make the horse look more lifelike instead of keeping the sketch too simple.
- Build each feature slowly while matching the reference so the final artwork maintains accuracy and a natural appearance.
- Refine the important sections with patience because tiny adjustments can improve the overall quality of the horse sketch.
Common problems and how to overcome them
A common challenge for beginners is adding too many details before the basic structure is ready. Complete the main form first and introduce smaller features gradually for a more balanced result.
My early horse drawings looked plain because I focused only on the outline and ignored the smaller features. With regular practice, I learned how details create personality and make the artwork feel more realistic. This experience helped me improve my approach and develop stronger drawing skills.
Step 6: Drawing the Horse’s Eye
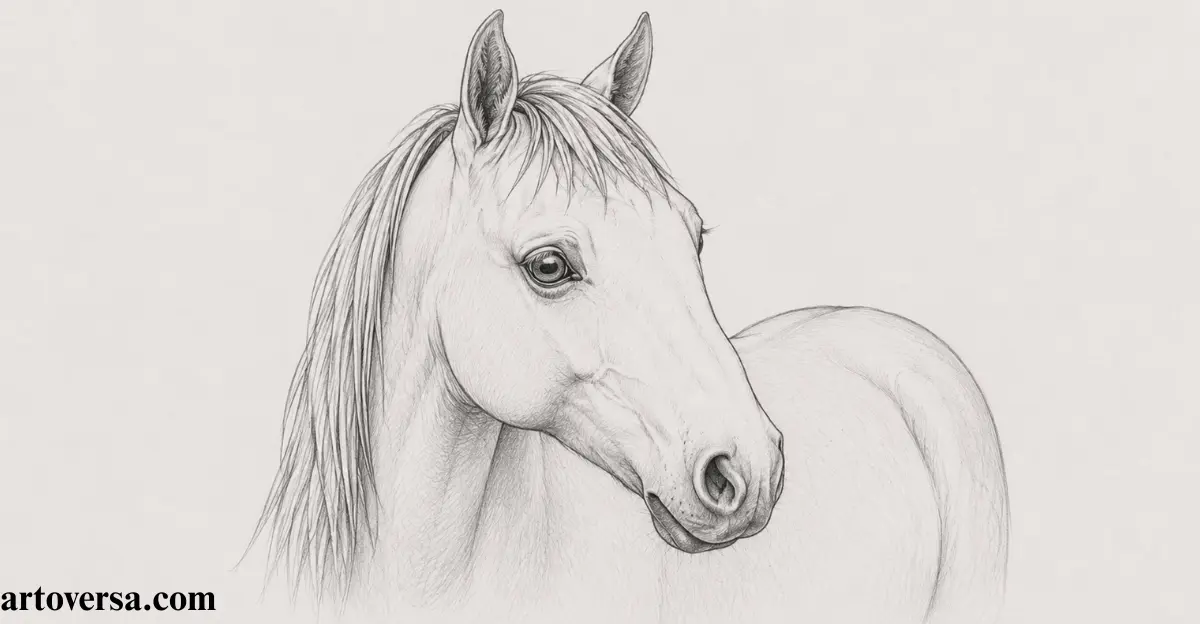
- Start by shaping the horse’s eye with an oval form and observe its position carefully to match the natural structure of the head.
- Notice the light reflection and core shadows inside the eye because these details create depth and a more realistic appearance.
- Place the eye slightly above the center of the head while keeping its location aligned with the side-facing angle.
- Consider the hidden eye position as well and mark the small bump to maintain accurate facial structure.
- Refine the outline slowly and balance the surrounding areas so the expression looks natural and complete.
Common problems and how to overcome them
Many artists make the eye too large or place it incorrectly, which changes the horse’s expression. Study the reference carefully and focus on shape, position, and shading before adding final touches.
My first horse sketches had eyes that looked flat because I ignored small details like reflection and shadow. With more practice, I learned how these elements create life in the drawing. This experience helped me improve facial features and achieve a more realistic style.
Step 7: Nose and Mouth
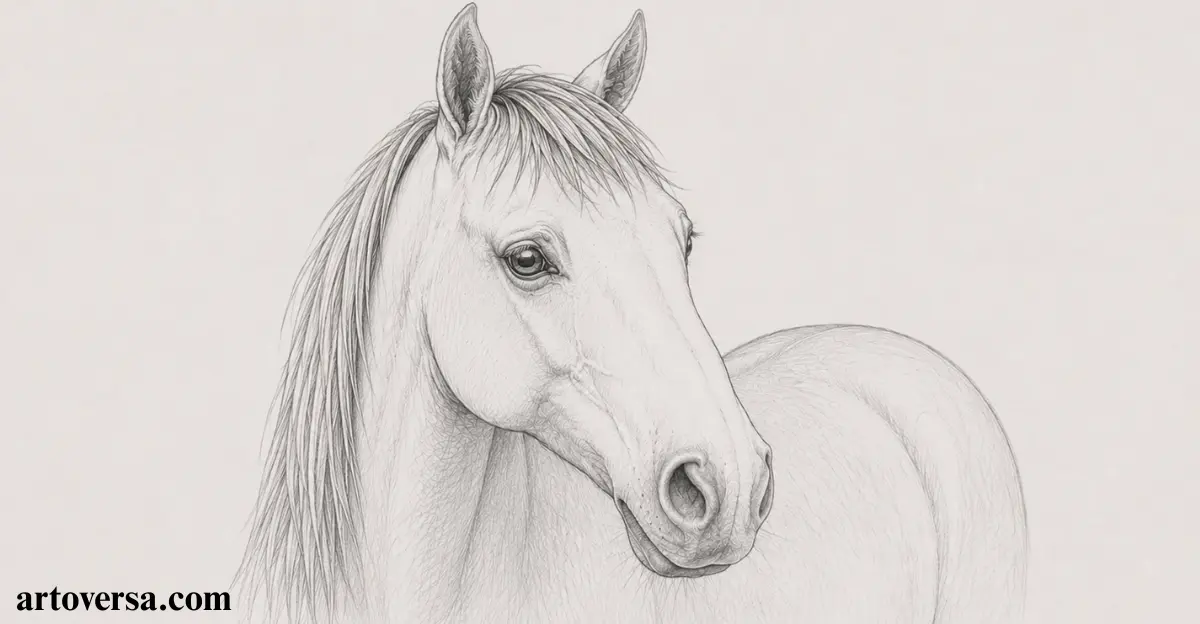
- Create the horse’s nose with an inverted apostrophe-like shape and connect it smoothly with the surrounding facial structure.
- Study the mouth carefully as a curved line can bring a natural expression and improve the overall appearance.
- Include the white strip between both nose areas because this small feature helps maintain the correct facial pattern.
- Keep the muzzle lines soft while preparing this section for future shading and adding more depth.
- Balance the lower face details gradually so the nose and mouth match the complete head shape.
Common problems and how to overcome them
A frequent issue for beginners is making the muzzle too broad or missing the separation between nose sections. Compare the reference carefully and build these areas with simple lines before applying darker tones.
While learning horse sketching techniques, creating a natural muzzle was one of the difficult parts because small errors changed the expression. Regular observation of facial details improved the understanding of shape and spacing. This practice helped in developing more realistic artwork with better accuracy.
Step 8: Mane and Forelock
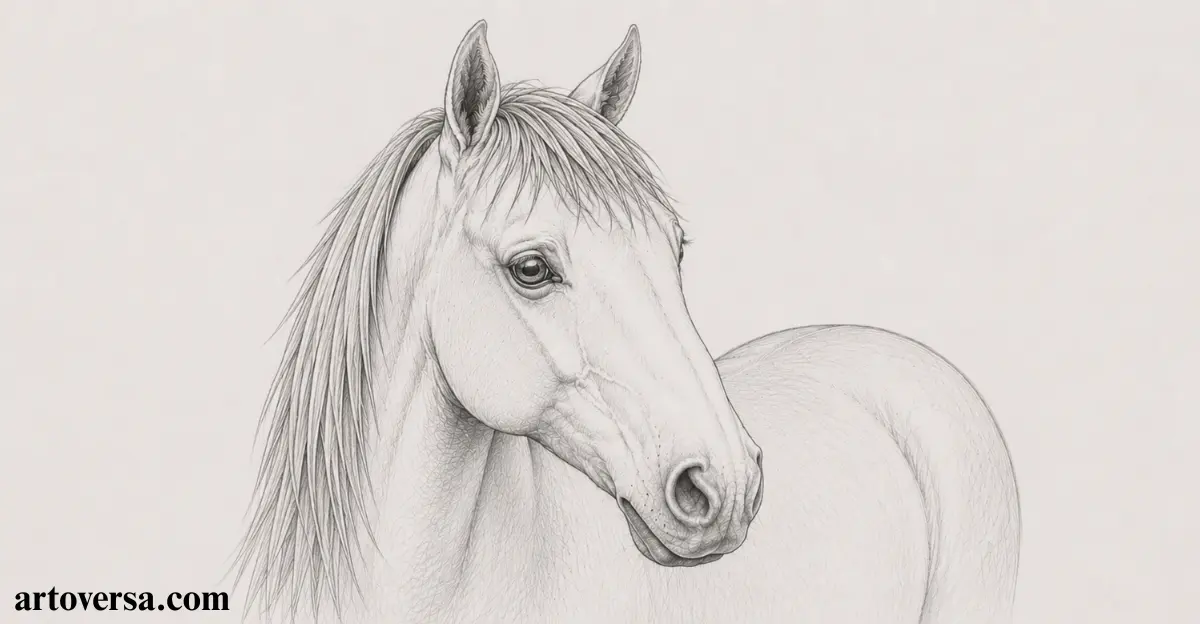
- Start shaping the mane and forelock by using a thin pencil line to create a simple structure that follows the horse’s natural appearance.
- Observe the length and position of the mane carefully so the flowing strands match the direction of the head and neck.
- Choose a well-sharpened pencil or mechanical pencil with a fine lead to create cleaner lines and better control.
- Follow the natural movement of the hair while sketching each section without making the strands look too stiff.
- Refine the forelock area gently because these small details add more character and depth to the horse’s face.
Common problems and how to overcome them
A usual mistake among beginners is drawing the mane with random lines that do not follow the horse’s form. Watch the hair direction closely and keep the strokes light for a more natural result.
During the early learning process of horse drawing, creating realistic hair details was challenging because the strands often looked unnatural. With careful observation and repeated practice, the flow of the mane became easier to understand. This improved the overall texture and realism of the artwork.
Step 9: Drawing Bridle and the Reins
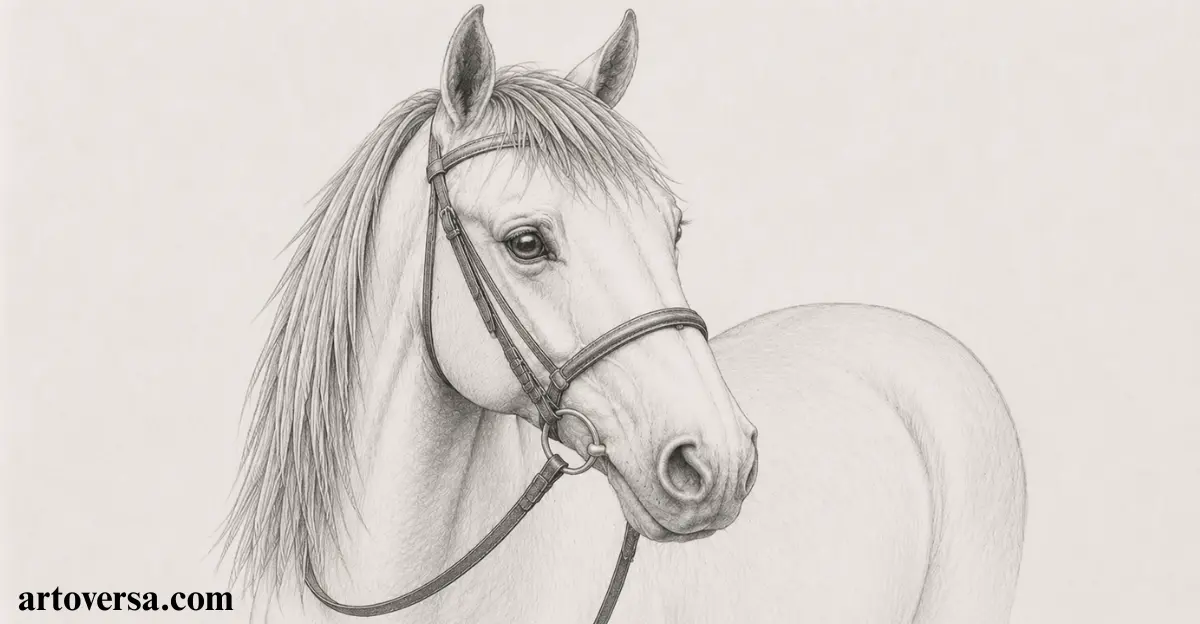
- Create the bridle by sketching the straps around the horse’s head and cheeks while keeping their placement connected with the facial structure.
- Add the reins carefully and remember that only one side may appear visible depending on the horse’s position in the reference.
- Include the snaffle and curb bits with simple lines because these small parts complete the riding equipment details.
- Follow the head shape while placing each strap so the bridle looks natural instead of separate from the horse’s form.
- Review the complete sketch after adding these elements and make final adjustments before moving toward shading.
Common problems and how to overcome them
A frequent mistake is placing the bridle straps without following the horse’s head shape, which makes the equipment look unrealistic. Compare each part with the reference and keep the lines connected properly.
While developing horse sketches, understanding how bridle parts fit around the head took time because incorrect placement changed the whole appearance. Continued practice with small equipment details improved accuracy and helped create more complete drawings with confidence.
Step 10: Shading the Details
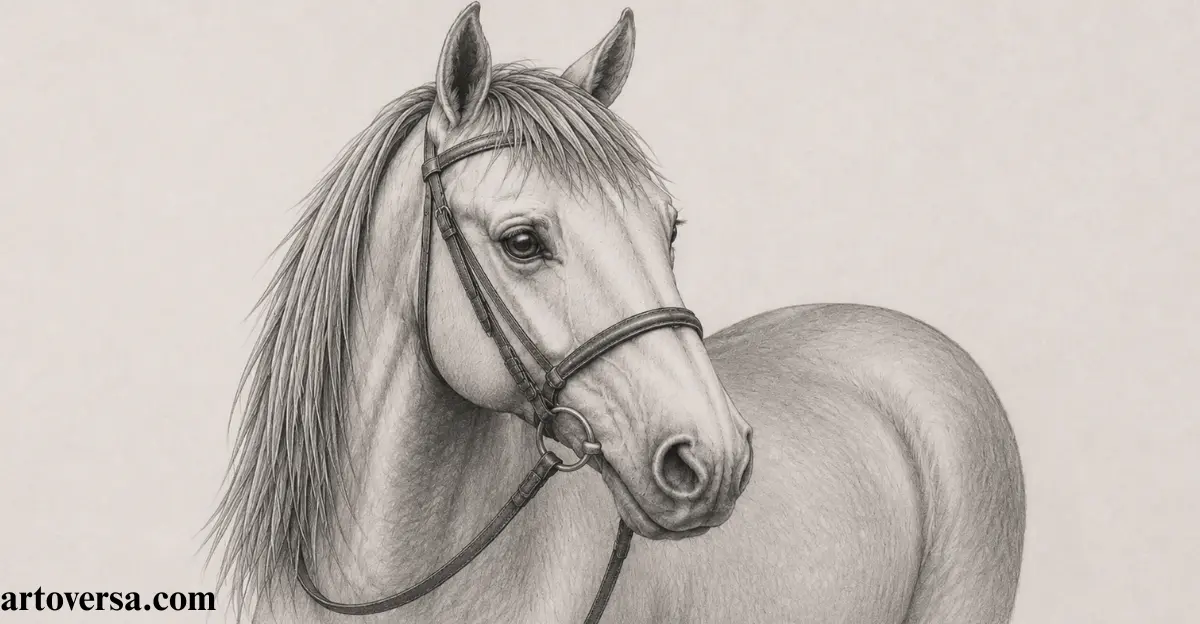
- Begin adding shading to the horse sketch by creating depth and volume that transforms the flat outline into a more realistic artwork.
- Choose different graphite scales like HB, 4B, 6B, and 8B pencils to create soft tones and darker areas.
- Apply lighter shades first and gradually build stronger shadows around the body, face, and other important sections.
- Control the pencil pressure carefully because smooth transitions help the horse appear more three-dimensional.
- Balance highlights and dark areas throughout the drawing to improve texture and give the final piece a natural look.
Common problems and how to overcome them
A major difficulty for beginners is adding heavy shadows too quickly, which can make the drawing look rough. Build tones slowly and use different pencil grades to create smoother depth.
When I started learning realistic horse drawing, shading was one of the hardest techniques because my artwork often looked flat. With time and practice, I understood how graphite pressure and pencil grades create depth. This learning process helped me develop more realistic sketches with better dimension.
Step 11: Shading the Eyes
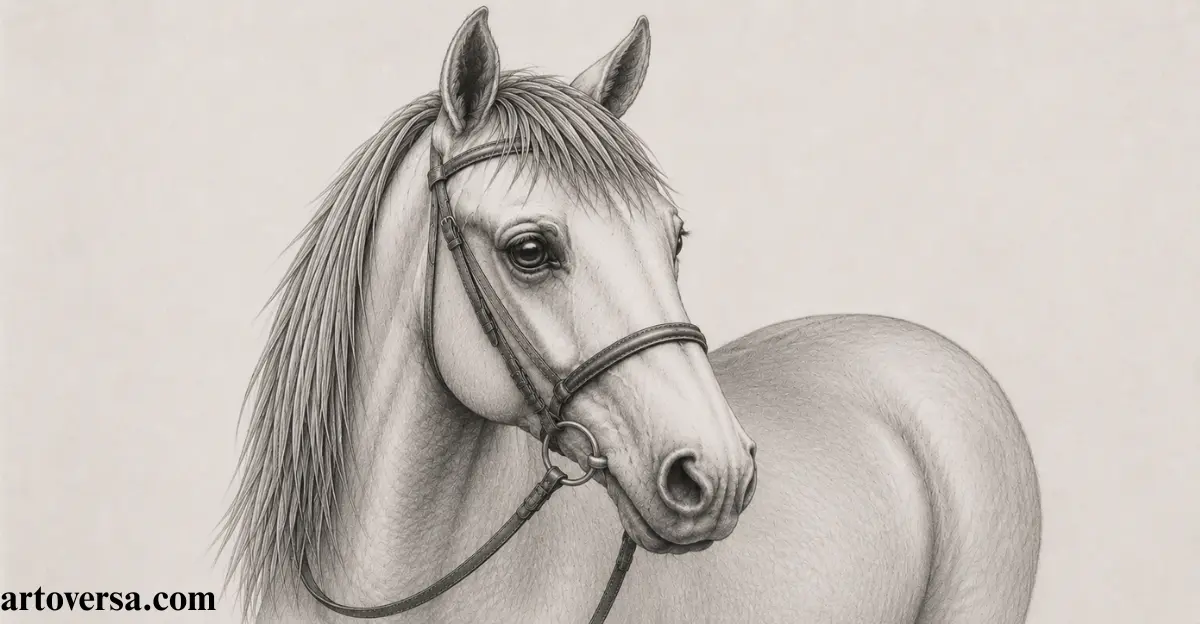
- Start the shading process around the horse’s eyes by adding the darkest areas first and then building softer tones for a realistic effect.
- Focus on the deep shadows inside the eye because these areas create contrast and make the expression appear more alive.
- Blend the mid-tones carefully around the eye shape while keeping the lighter sections visible for natural reflection.
- Add small highlights gradually because they help the eyes look clear and give the horse a lifelike appearance.
- Balance the dark and light values throughout this area so the facial details connect smoothly with the rest of the sketch.
Common problems and how to overcome them
Many beginners shade the eye with one dark tone, which removes depth and makes it look flat. Build the shadows slowly and keep space for highlights to create a more realistic appearance.
At the beginning of my horse drawing practice, creating expressive eyes was challenging because the shading often looked too heavy. After learning to layer dark areas with softer tones, the eyes started showing more depth and emotion. This technique improved the realism of my artwork.
Step 12: Shading the Nose
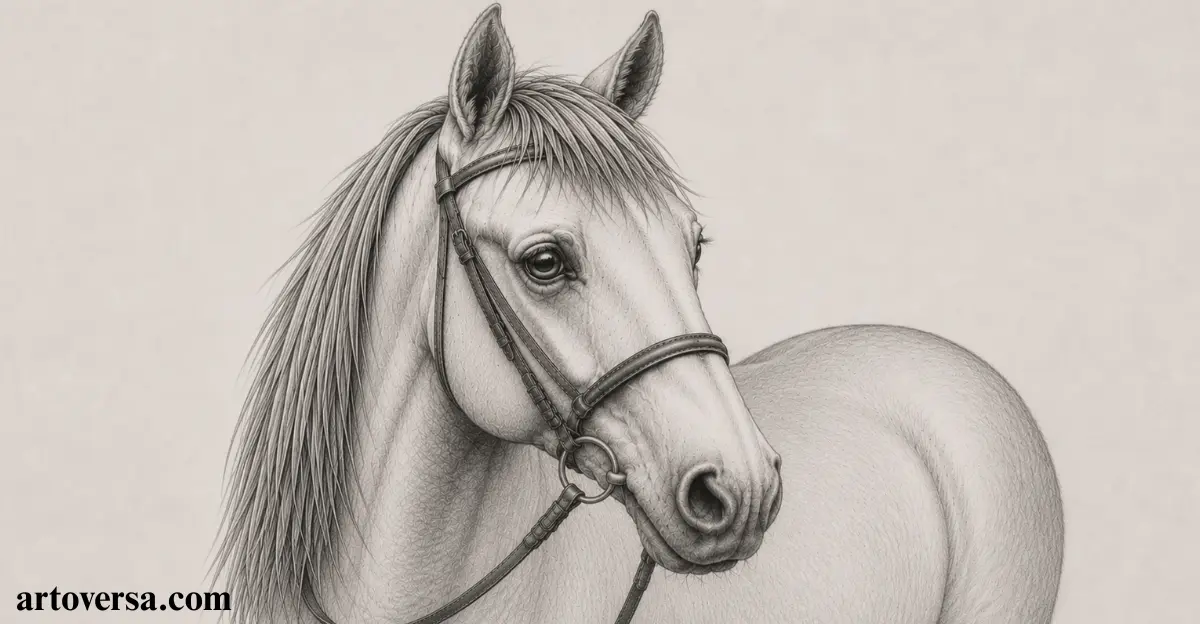
- Begin adding the shading around the horse’s nose by creating deeper tones near the nostril and softer values toward the lighter sections.
- Pay attention to the upper nostril area where darker shades create depth and make the facial structure appear more natural.
- Smooth the lower part carefully so the change between bright and dark areas gives the nose a rounded appearance.
- Shape the ridge around the nose with gentle shadows because this raised section catches more light from the front.
- Use an H-pencil for lighter details and controlled marks that keep the nose connected with the rest of the face.
Common problems and how to overcome them
A frequent issue is applying the same dark tone across the whole nostril, which removes the natural depth. Layer the shadows slowly and leave softer areas around the ridge for better dimension.
While developing my horse sketching skills, the nose area required extra attention as balancing shadows and highlights was not easy at first. Learning gradual tone changes improved the facial texture. This approach brought more depth and a smoother finish to my artwork.
Step 13: Shading the Ears
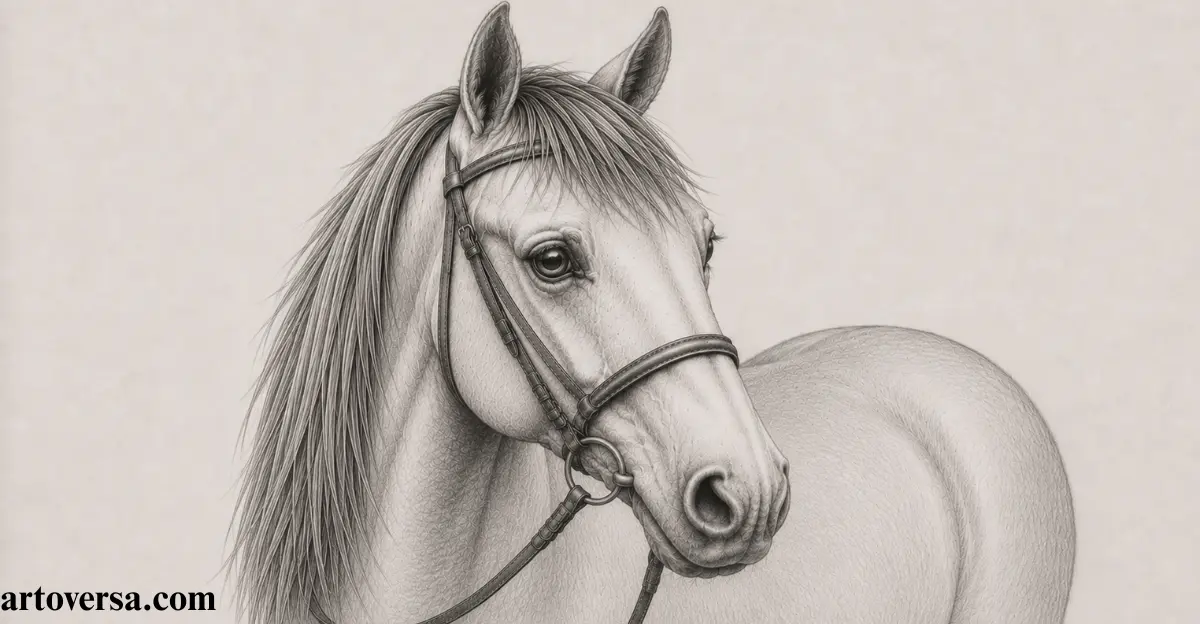
- Create the shading around the horse’s ears by adding fine hair details and keeping the direction of each stroke natural.
- Use a 0.5mm mechanical pencil to define the small hair strands while maintaining clean and controlled marks.
- Darken the center area of the ears with an HB pencil to create depth and make the inner section appear deeper.
- Follow the ear structure carefully because proper light and shadow placement helps the shape look more realistic.
- Balance the darker middle tones with softer edges so the ears blend smoothly with the complete head.
Common problems and how to overcome them
Many beginners shade the ears with random lines, which makes the hair texture look unnatural. Follow the hair direction and build darker areas slowly to maintain a smooth appearance.
Exploring horse sketches, creating natural ear texture took careful observation, as the hair direction and shadows were easy to overlook. Understanding these small details improved the overall expression. This method added more depth and a refined finish to the artwork.
Step 14: Lightly Shading the Mane
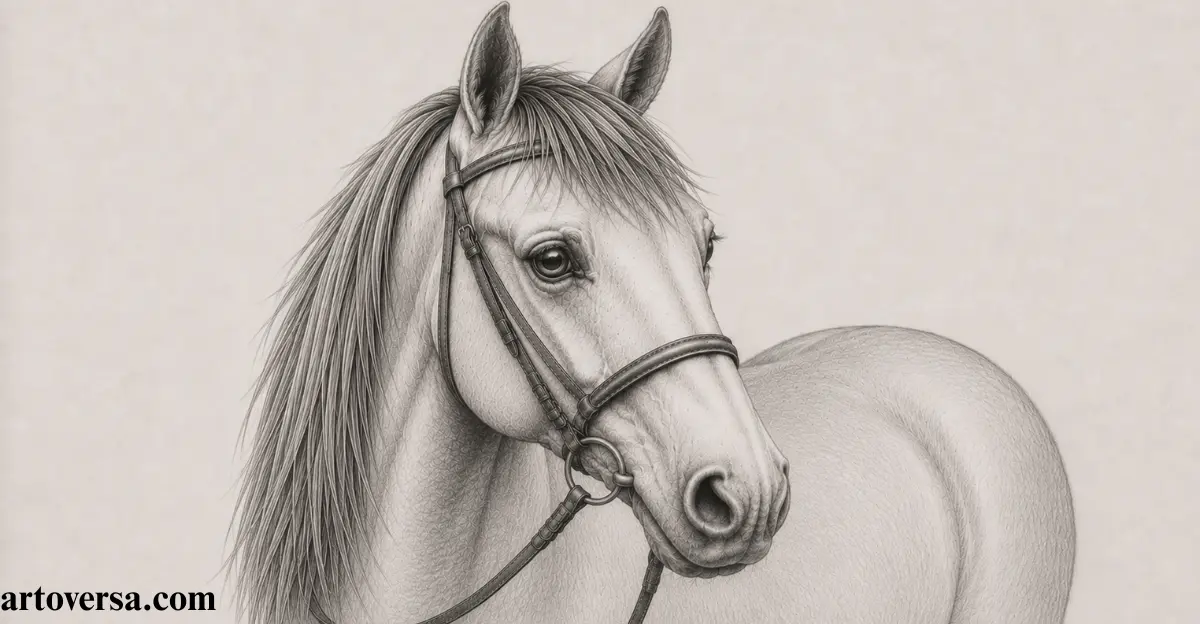
- Add soft shading to the mane with longer pencil strokes that follow the natural flow of the horse’s hair.
- Follow the direction of each strand carefully so the mane keeps a smooth appearance and matches the movement of the horse.
- Blend the marks gently after building the first layer to create a softer texture without losing the hair pattern.
- Continue working on the forelock by shaping the long hair between the ears and over the forehead area.
- Refine the lighter and darker sections together so the mane looks balanced and connects naturally with the head.
Common problems and how to overcome them
A frequent mistake is drawing the mane with straight and repeated strokes that make the hair look stiff. Observe the natural flow of the strands and vary the pressure for a smoother texture.
During the starting days of sketching horses, creating flowing hair details was challenging as the mane often appeared flat. Gradually understanding strand direction and soft blending improved the overall texture. These changes brought more life and natural movement to the drawings.
Step 15: Shading the Mouth, Face, and Veins
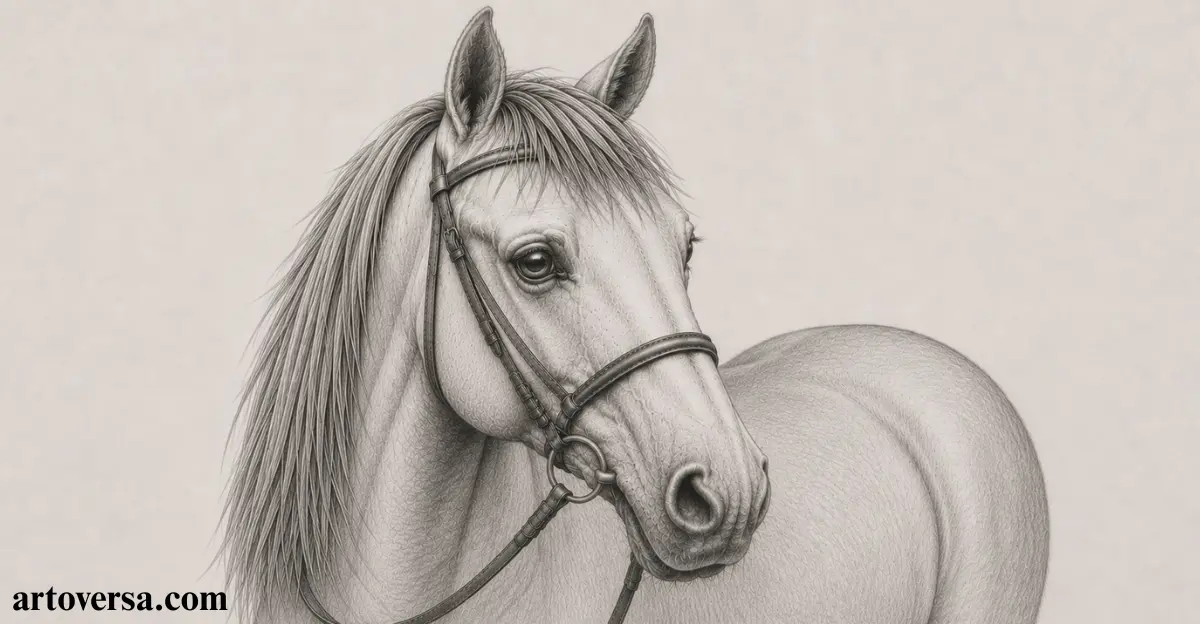
- Start refining the mouth area with simple tones and keep the lines soft to maintain the natural shape of the horse’s face.
- Use short, tiny strokes with a mechanical pencil to create the texture of the facial coat and add realistic hair details.
- Build the facial shading gradually by changing the value scales to create a subtle impression of veins.
- Control the darker and lighter areas carefully so the face gains depth without losing its smooth appearance.
- Finish the section by blending the tones together and making sure the mouth, coat, and veins connect naturally.
Common problems and how to overcome them
Many beginners apply heavy marks on the facial coat, which makes the texture look rough. Use gentle strokes and vary the pressure to create smoother details.
While learning detailed horse artwork, creating natural facial textures was challenging because small marks could easily change the appearance. Over time, better control of pencil pressure improved the coat details.
Step 16: Shading the Rest of the Horse’s Body
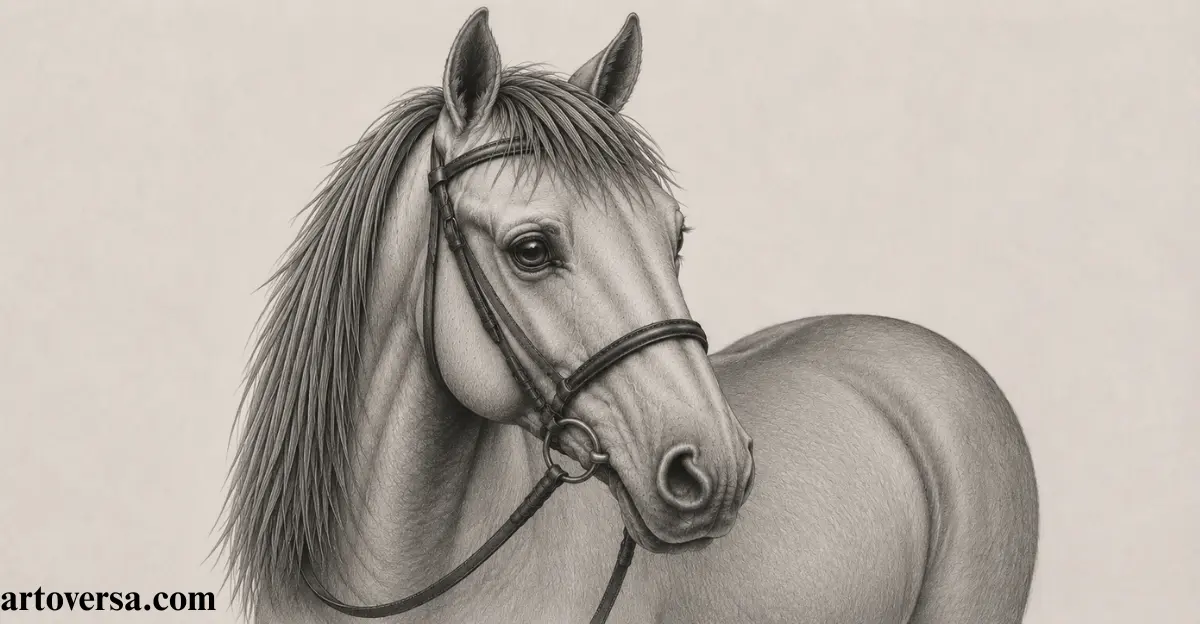
- Begin the shading process across the horse’s body by applying a light layer with an H-range pencil to create an even base.
- Cover the complete figure with soft tones first and blend the graphite smoothly before adding deeper details like creases.
- Follow the body structure with very short strokes so the texture matches the natural direction of the horse’s coat.
- Build darker areas gradually around curved sections while keeping lighter parts visible to maintain volume and depth.
- Finish the remaining details by adding gentle shading to the bridle and reins so all elements blend with the complete drawing.
Common problems and how to overcome them
A frequent mistake is adding strong shadows before creating a balanced base layer, which can make the body look uneven. Start with lighter values and increase darkness slowly for better control.
When beginning realistic horse artwork, creating smooth body shading was challenging because the tones often appeared inconsistent. Learning to build layers step by step improved the overall balance. This method created better depth and made the final sketch appear more natural.
Conclusion
Drawing a realistic horse takes time, practice, and patience, but every step helps you improve your skills. By understanding shapes, proportions, and shading, beginners can create artwork that looks more natural and detailed. Keep observing real horses and practice different techniques to build confidence in your drawing journey. Small improvements with each sketch will help you create better results over time. Enjoy learning and continue exploring new ways to bring your horse drawings to life.
FAQs
What is the best way to start a realistic horse drawing?
Begin with light guidelines and simple shapes to create the horse’s basic structure. Keep the lines soft so you can make changes easily. A strong foundation makes the final drawing look more balanced and realistic.
Why are proportions important in horse drawing?
Correct proportions help every part of the horse look natural and well-balanced. Measuring the distance between body features improves overall accuracy. Careful observation creates a more realistic finished sketch.
How can beginners improve their horse drawing skills?
Practice regularly by studying reference images and drawing step by step. Focus on structure before adding details or shading. Consistent practice builds confidence and improves drawing quality over time.
What mistakes should beginners avoid while drawing a horse?
Avoid pressing too hard with the pencil or adding details too early. Dark lines make corrections more difficult during the sketching process. Light strokes help you refine the drawing more easily.
Which pencils are best for realistic horse shading?
Graphite pencils like HB, 4B, 6B, and 8B work well for smooth shading. Using different grades creates both soft highlights and deep shadows. This combination gives the horse a more natural appearance.
How can shading make a horse drawing look realistic?
Shading adds depth and makes the horse appear more three-dimensional. Build the tones gradually instead of applying dark areas all at once. Smooth transitions create a soft and lifelike finish.
Please Write Your Comments