Easy Step-by-Step Tutorial on How to Draw a Realistic Deer
Updated: September 21, 2026
26
Learning how to draw a realistic deer is a fun way to develop your observation and pencil drawing skills. A deer’s elegant body, gentle face and natural posture make it an excellent subject for artists of every level. This step-by-step tutorial breaks the process into simple stages that are easy to follow. You will learn how to build the correct shape, add realistic details, and create smooth shading. With steady practice each drawing will look more natural and full of life. Every drawing helps improve your technique and makes it easier to create realistic wildlife artwork with confidence.
Table of Contents
Materials You’ll Need
Before starting your realistic deer drawing, gather a few basic tools that will help you create accurate shapes, smooth shading, and natural details. The right materials make the sketching process easier and allow you to build depth with better control.
- Graphite Pencils (2H, H, HB, B, and 5B): Use a 2H pencil for light guidelines and basic shapes. An H pencil helps refine small details. HB and B pencils are useful for soft shading and texture.
- Drawing Paper: Choose smooth quality paper that works well with graphite and allows easy blending while creating realistic textures.
- Deer Reference Photo: A clear reference image helps understand the deer’s structure, proportions, fur direction and natural features.
- Kneadable Eraser: Use it to lift graphite, create highlights, and improve lighter areas during the final shading process.
- Blending Stump: This helps smooth graphite layers and creates soft transitions for realistic shading effects
Drawing a Deer Step-by-Step
Simple progress in every stage creates a strong foundation and leads to a realistic finished sketch you can be proud of.
Step 1: Sketching the General Shape in 2D (2H Graphite Pencil)
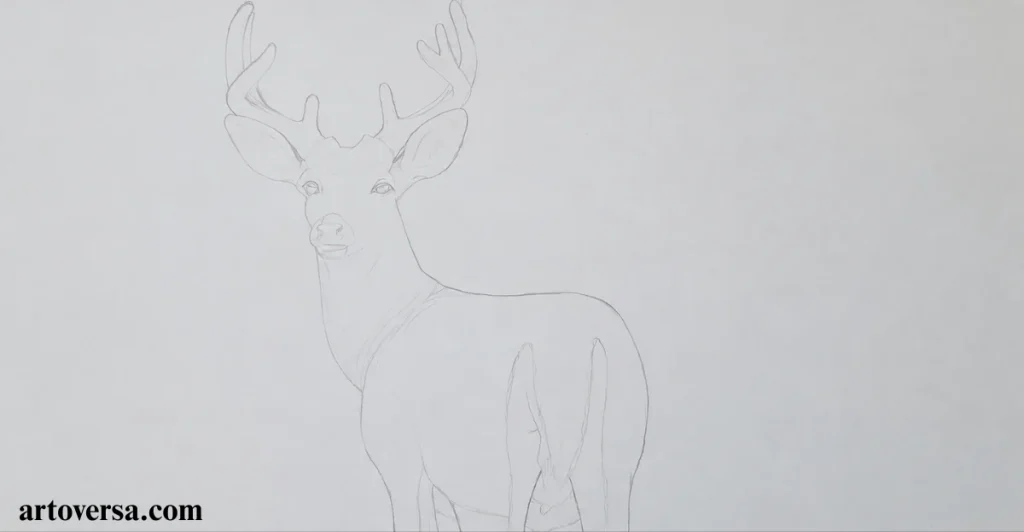
- Start with a clear and well-lit reference photo of a deer where all important features are visible. Spend around thirty minutes observing the image and understanding the complete shape before beginning the sketch.
- Study the full deer structure first instead of focusing on small parts because the overall form helps create accurate placement and natural proportions.
- Draw the basic shape of the head and antlers with light guidelines, then slowly continue toward the neck and body while keeping the structure simple.
- Notice how the deer head connects smoothly with the neck and how the rounded body shape creates a strong base for the complete drawing.
- Use a soft touch with a 2H Graphite Pencil while creating the first outline so the lines remain easy to adjust and the sketch develops naturally.
Common problems and how to overcome them
A common mistake is creating dark lines during the early sketching stage, which makes corrections difficult later. Avoid focusing on small features before completing the main structure. Soft guidelines provide better control and help build a cleaner foundation.
When I first started drawing realistic deer sketches, attention was given more to details than the overall structure. Early attempts looked uneven because the proportions were not properly planned. Practicing with lighter guidelines improved the balance and made the sketches appear more natural.
Step 2: Sketching the Details (H Graphite Pencil)
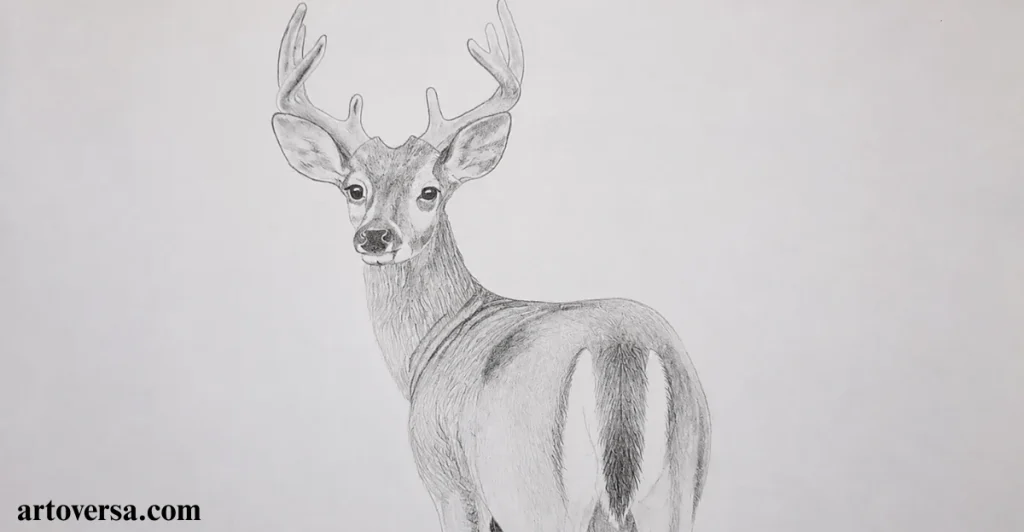
- Begin refining the previous outline with an H Graphite Pencil and carefully define the antlers, ears eyes and nose of the deer while keeping the features natural.
- Add smaller details around the face and body by studying the reference photo so each part matches the deer’s real appearance and balanced structure.
- Draw the neck texture, tail and body marks with controlled lines because these details add more character and improve the overall look of the sketch.
- Compare the progress with the original image after adding each feature to notice mistakes early and maintain accurate placement throughout the drawing.
- Take enough time during this stage because well-defined details create a strong foundation for realistic results and make the shading process easier.
Common problems and how to overcome them
A frequent issue is adding details without checking the correct placement of each feature. Compare every section with the reference before continuing further. Careful observation helps maintain balanced shapes and a realistic facial structure.
At the beginning of my drawing journey, details were often added quickly without checking the complete balance. Gradually, studying each feature before refining the lines created better results. This practice helped develop deer portraits with improved accuracy and natural expressions.
Step 3: Basic Shading 2D (HB Pencil)
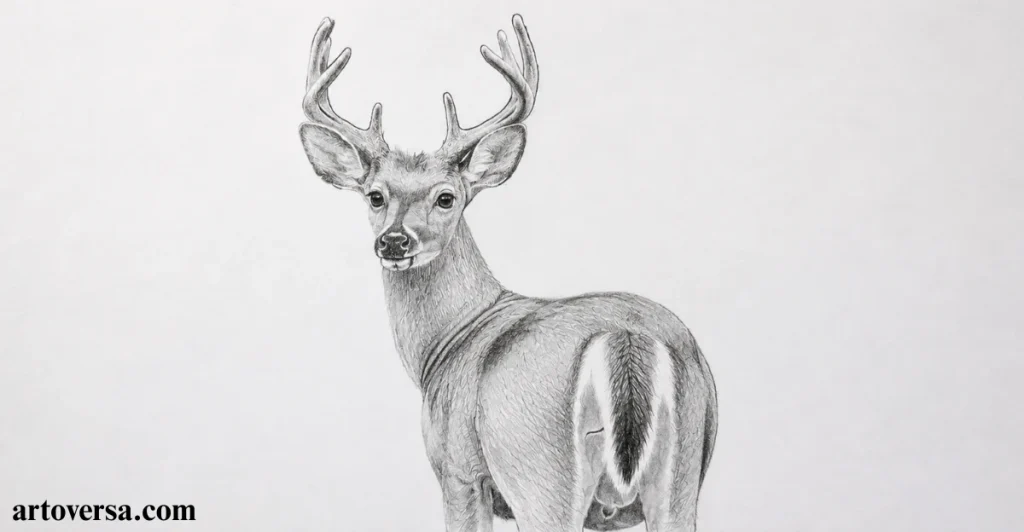
- Developing depth in the deer sketch starts with an HB Pencil by adding soft layers across the antlers, ears, face, and body to create a realistic appearance.
- Creating smooth tones requires a light pencil touch instead of dark marks because gradual shading helps build natural depth and better control.
- Following the deer’s form carefully while placing shadows helps show the shape and texture of different areas with a balanced look.
- Blending the layers gently after reaching the desired shade creates a smoother finish while keeping the important details visible and refined.
- Improving the final appearance with simple blending methods helps maintain natural shading throughout the complete deer drawing with a soft realistic effect.
Common problems and how to overcome them
A common challenge is applying heavy shading too early, which can make the deer appear flat. Build the tones slowly with soft layers and increase darkness only where required. Smooth blending creates better depth and improves the realistic texture.
Through regular sketching practice, learning soft shading techniques became an important part of improving realistic artwork. Earlier drawings appeared rough because the tones were added too strongly. Building gentle layers created smoother shadows and more lifelike deer sketches.
Step 4: Shading the Dark Details (5B Graphite Pencil)
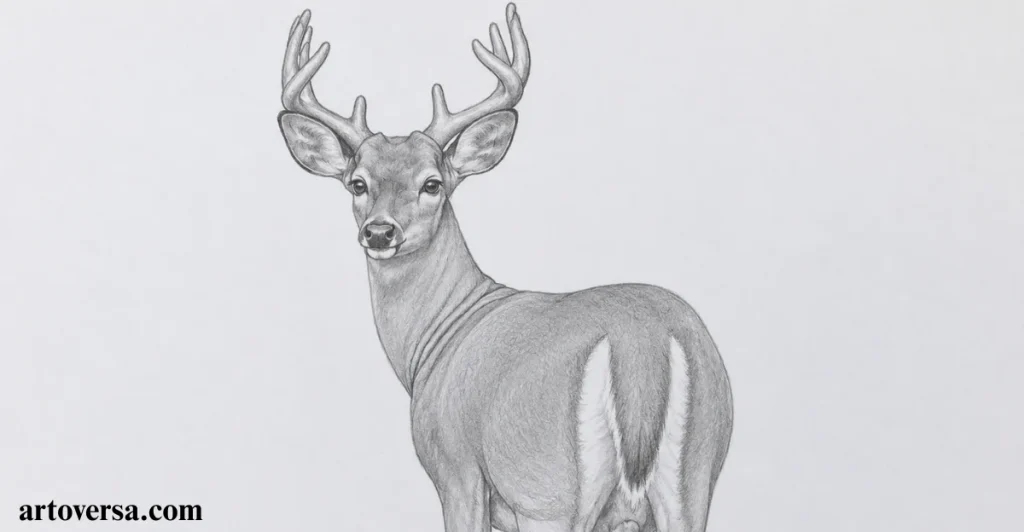
- Identifying the darker sections begins by focusing on the eyes, nose, tail, underside, and wrinkles because these areas create stronger contrast and improve the realistic look of the deer sketch.
- Adding rich shadows with a 5B Graphite Pencil helps build depth in the darker parts before moving toward softer tones and lighter areas of the drawing.
- Keeping eye reflections clear is important because the small highlights bring life to the deer’s expression and prevent the face from looking flat or unnatural.
- Applying careful blending after shading dark regions helps smooth the graphite marks while keeping the important features sharp and properly visible.
- Creating balanced contrast between deep shadows and lighter sections allows the deer drawing to appear more detailed with a natural, realistic finish.
Common problems and how to overcome them
A frequent issue is adding heavy darkness too quickly, which can hide important details. Build the shades slowly and keep lighter areas protected. Controlled layers help maintain a cleaner and more realistic appearance.
During early wildlife sketches, dark shading often became stronger than needed because the values were added too fast. Practicing gradual layers improved the control over shadows and highlights. This technique helped create more balanced and realistic animal drawings.
Step 5: Shading the Deer’s Face and Neck (B Graphite Pencil)
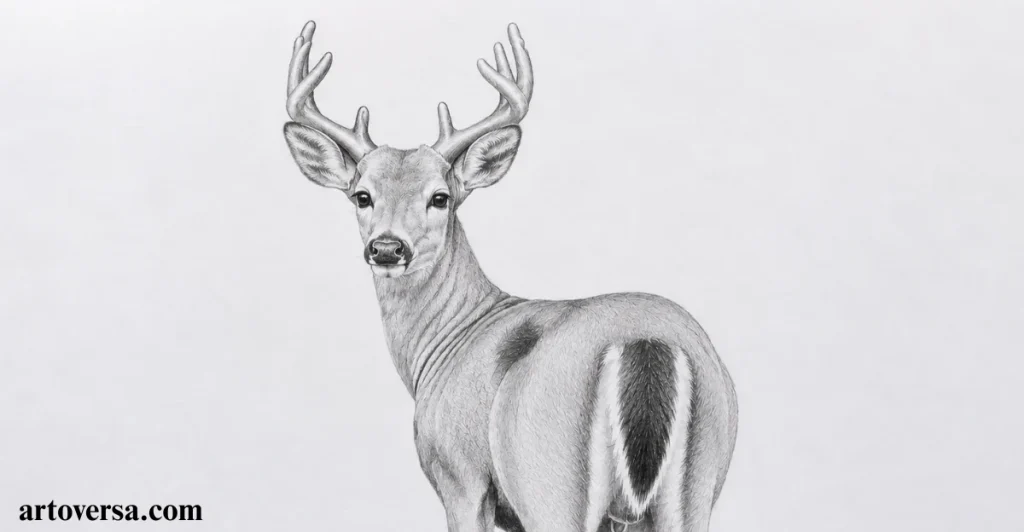
- Building facial definition with a B Graphite Pencil helps create smooth shading around the deer’s face while following the natural direction of the light source.
- Creating fur texture around the neck requires gentle strokes that follow the hair pattern and add a soft, realistic appearance to the surface.
- Maintaining pencil sharpness allows cleaner marks while developing small details around the face and creating precise neck textures.
- Following natural shadows across the facial areas helps show the structure and gives the deer a more dimensional look.
- Refining the connection between the face and neck improves the overall flow of the drawing while keeping the shading smooth and detailed.
Common problems and how to overcome them
A common challenge is drawing fur strokes without understanding their natural direction. Follow the texture carefully and avoid random lines. Proper stroke placement creates a smoother and more realistic effect.
At the start of improving realistic animal artwork, creating fur patterns required more patience and practice. Studying hair direction made the shading process easier and more controlled. This approach helped develop cleaner facial details and natural neck textures.
Step 6: Shading the Body (B Pencil)
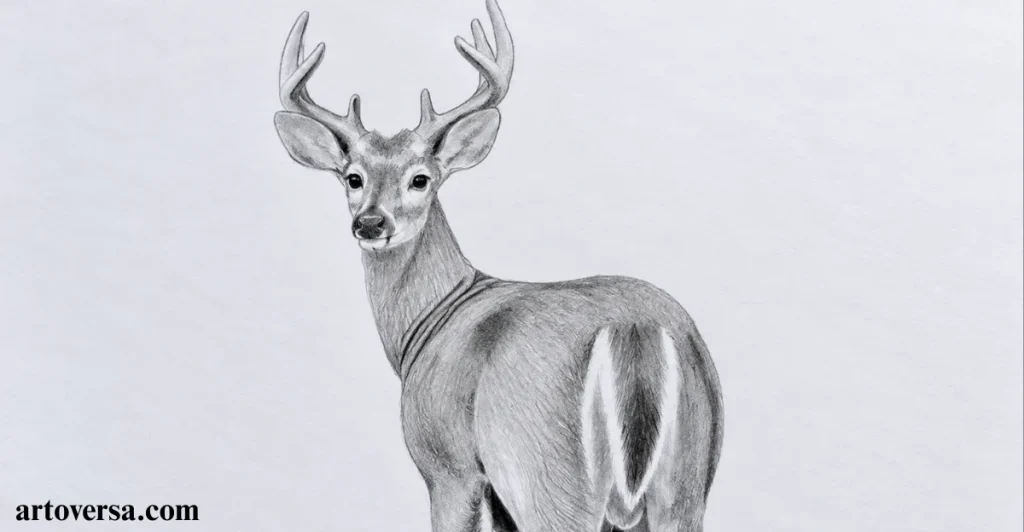
- Extending the body tones with a B Pencil continues the previous shading work across the leg abdomen tail, and other areas of the deer.
- Studying fur direction in each body section helps create realistic texture because different areas contain different hair lengths and patterns.
- Adjusting pressure levels while shading allows softer and darker values to appear naturally across the deer’s body structure.
- Creating smooth transitions between shaded sections prevents harsh changes and keeps the body appearance balanced throughout the drawing.
- Improving surface details with controlled strokes adds more depth and connects every shaded part into a complete realistic deer sketch.
Common problems and how to overcome them
A usual mistake is applying the same shading pattern across the entire body area. Notice how fur changes around different sections before adding strokes. Matching the texture creates a more natural appearance.
Through continuous sketching practice, understanding fur variation became an important part of creating realistic drawings. Earlier body shading looked too simple because texture differences were missed. Careful observation improved the depth and detail of animal artwork.
Step 7: Shading the Antlers (B Pencil)
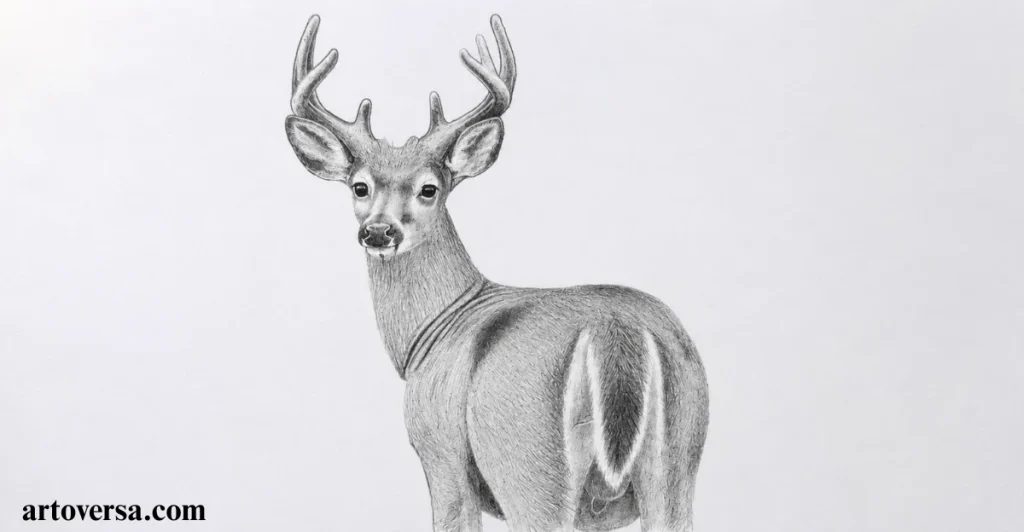
- Creating antler dimension starts by observing that the middle sections are darker while the edges need softer values for a realistic appearance.
- Changing pencil pressure with a B Pencil helps create different tones and produces a natural value range across the antler structure.
- Developing smooth layers around each section improves the solid form while keeping the unique shape and details clearly visible.
- Blending graphite carefully after completing the shading removes rough marks and creates a smoother finish across the antlers.
- Finalizing the details with a suitable blending tool brings all tones together and gives the deer drawing a polished, realistic look.
Common problems and how to overcome them
An easy mistake is making every antler section equally dark, which removes the sense of depth. Keep variations in tone to show the form properly. Balanced shading creates more realistic results.
Over time, antler shading became easier after practicing different pressure techniques. Earlier attempts lacked depth because the values were too similar. Learning controlled shading helped create stronger and more natural wildlife drawings.
Final Shading
- Enhancing the highlights is the first step, where a kneadable eraser is used to remove extra graphite and bring back lighter areas that need more brightness.
- Deepening lighter sections with a 5B Pencil helps strengthen weak shadows and improves the contrast between different parts of the deer drawing.
- Adding delicate strokes across the body creates more hair texture because much of the earlier detail becomes softer during the blending process.
- Building more volume through final layers helps the deer appear fuller and gives the sketch a realistic three-dimensional effect.
- Refining the overall finish with careful adjustments brings all shading areas together and creates a smoother natural appearance.
Common problems and how to overcome them
A common issue is adding too much graphite during the final stage, which can reduce the natural highlights. Make small adjustments and avoid heavy strokes. Balanced shading helps maintain a realistic finish.
Through continued wildlife sketching, the final shading stage became an important part of adding realism. Earlier drawings often lacked depth because the last details were rushed. Careful finishing touches helped create smoother textures and more lifelike deer artwork.
Conclusion
Drawing a realistic deer becomes easier when each step is followed with patience and careful observation. This tutorial helps you understand the importance of structure, details, shading, and texture while creating a natural wildlife sketch. By practicing different pencil techniques, you can improve your control and bring more depth to your artwork. Every stage builds confidence and helps develop stronger drawing skills over time. Keep exploring new references and continue practicing to create more detailed animal portraits. With dedication and creativity, your deer drawings can become more realistic, balanced, and full of life.
FAQs
What is the best pencil for drawing a realistic deer?
A 2H pencil is useful for creating light guidelines and basic shapes. Softer pencils like B and 5B help add shading and darker details. Using different grades creates better depth and realistic textures.
How can I make my deer drawing look more realistic?
Focus on accurate proportions before adding small details. Observe the reference image carefully and build smooth layers of shading. Adding natural fur patterns and balanced shadows improves the final appearance.
How do I draw realistic deer fur with pencils?
Follow the natural direction of the fur instead of creating random strokes. Use light pencil movements and build texture slowly with different pressure levels. Gentle blending helps create a soft and natural fur effect.
How can beginners improve their deer drawing skills?
Beginners should practice basic shapes and understand the deer structure first. Regular sketching helps improve pencil control and observation skills. Studying different references also makes drawing techniques easier to develop.
Why does my deer sketch look flat?
A deer drawing can look flat when shading lacks contrast and depth. Add darker values in shadow areas while keeping highlights lighter. Gradual layering helps create a more three-dimensional and realistic effect.
How long does it take to draw a realistic deer?
The time depends on your experience and the level of detail you want to add. A simple sketch may take a few hours, while a detailed artwork can require several sessions. Patience helps achieve better results.
How can I improve the shading in my deer drawing?
Start with light layers and slowly increase darker tones where needed. Pay attention to the direction of light and the shape of each body part. Smooth blending creates natural transitions and improves realism
Please Write Your Comments