How to Draw a Dog Head (Realistic Front View)
Updated: September 12, 2026
27
Drawing a realistic dog head is a great way to build your artistic skills while learning animal proportions and details. The front view allows you to study the shape of the face eyes nose, and ears with better balance. With simple steps and careful observation, you can create a natural-looking sketch that shows the dog’s unique expression. This guide will help you understand the basics of structure and shading to make your drawing more realistic. Discover simple techniques to draw a realistic dog head with ease and create a detailed sketch with better shape and natural features.
Table of Contents
Materials You’ll Need
Before you start drawing, gather a few simple tools to make the process smoother and more enjoyable. These basic materials will help you create clean lines, soft shading, and realistic details without needing expensive art supplies.
- Graphite Pencils (HB, 4B, and 8B): Use an HB pencil for light sketching, a 4B pencil for deeper shading and an 8B pencil for rich dark tones and final details.
- Drawing Paper: A good-quality sketch paper provides a smooth surface for shading and allows you to erase and refine your work easily.
- Kneaded Eraser: Ideal for lifting graphite, creating highlights and correcting small mistakes without damaging the paper.
- Blending Tool or Cotton Earbud: Helps blend graphite gently to create smooth transitions and natural-looking shadows.
- Mechanical Pencil: Useful for adding fine details and creating short, controlled fur strokes with better precision.
Step-by-Step Guide to Drawing a Realistic Dog Head (Front View)
With regular sketching and careful observation, you’ll create more realistic drawings while improving your confidence and artistic skills over time.
Step 1: Basic Shape and Structure Sketching
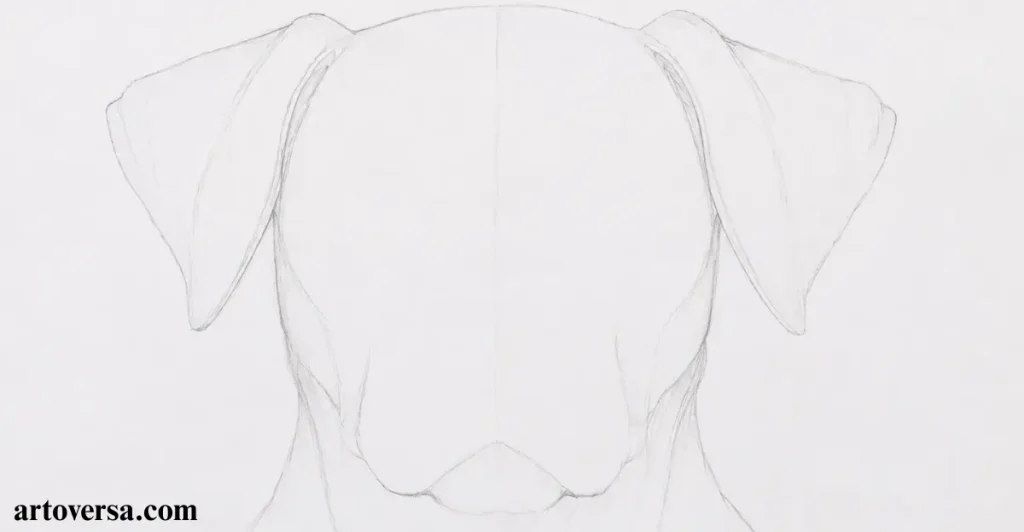
- Start with light guidelines to create the basic structure of the dog’s head and keep the realistic drawing easy to adjust before adding details.
- Use simple shapes to measure the head, ears, and neck area while focusing on correct proportions for a balanced front view.
- Build the general outline slowly by checking the placement of the ear flaps, muzzle, and neck muscles instead of rushing into small features.
- Keep your pencil strokes soft while creating the dog head sketch because lighter lines help improve accuracy and make corrections smoother.
- Once the main structure feels natural, refine the shape by adding important areas like facial curves, fur direction, and subtle folds around the neck.
Common problems and how to overcome them
Many beginners struggle with making the dog’s head too narrow or uneven because they focus on details too early. Keep the first sketch simple and use basic guidelines to maintain proper scale and structure.
When I first started drawing realistic animals, I ignored the early construction lines and jumped into details. My sketches looked less balanced and stiff. After practicing simple shapes first, my dog drawings became more natural and accurate.
Step 2: Creating Realistic Nose Details
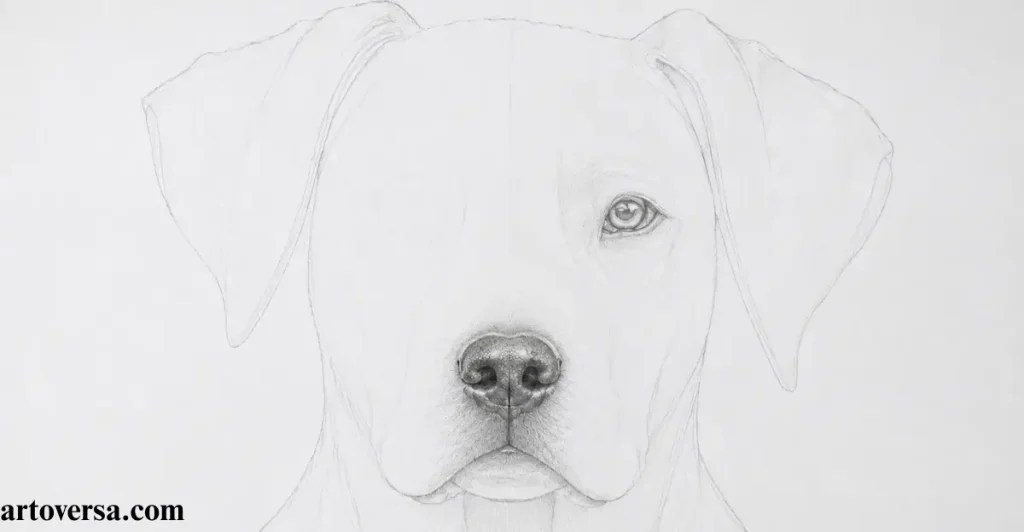
- Begin by carefully shaping the dog’s nose with accurate proportions because this small area adds a strong, realistic touch to the overall front view.
- Observe the structure of the nares and divide the nasal area into two sections to create a more natural appearance.
- Add gentle shadows around the nasal cavity while keeping the surface details soft to show depth without making the sketch look heavy.
- Focus on the tiny textures across the nose because the wet surface contains small patterns that bring more life to the realistic drawing.
- Before finalizing this part, check the light and dark areas carefully so the nose connects smoothly with the muzzle and facial features.
Common problems and how to overcome them
A common mistake is making the nose look flat because beginners often ignore small textures and shadow changes. Study the structure closely and build each section slowly for a more natural result.
While I was learning animal sketches, I used to make noses too simple and missed their small details. After practicing surface textures and shading methods, I learned how small changes can create a much more realistic dog head.
Step 3: Refining the Eye Placement and Facial Balance
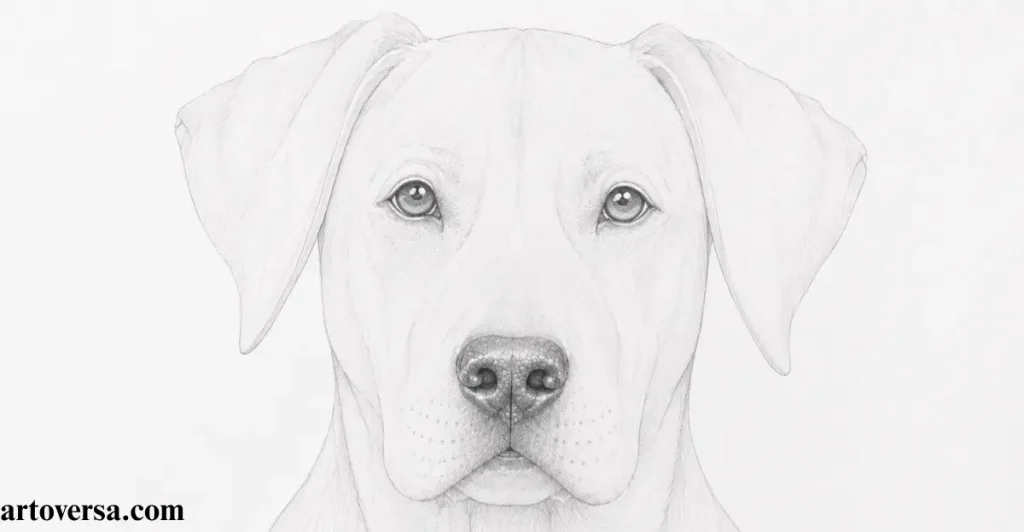
- Begin with gentle marks around the eyes to understand their position and keep the dog head proportions accurate from the front view.
- Carefully observe the eye shape because this area gives the realistic drawing its personality and helps express the animal’s natural emotions.
- Map the pupils, reflected light, and surrounding details with soft lines while avoiding heavy shading during this early stage.
- Notice the small shadows and watery pockets near the eyes because these elements create depth and make the face appear more lifelike.
- Maintain a clean sketch by adjusting the facial features slowly before adding darker tones or final details to the artwork.
Common problems and how to overcome them
A frequent issue among beginners is focusing on tiny eye details before fixing the overall placement. Keep the early outline simple and build each feature gradually to maintain a balanced appearance.
During my early drawing practice, I often added too much detail around the eyes before understanding the structure. This made the expressions look unnatural. Later, I improved by studying proportions first and creating smoother, realistic faces.
Step 4: Adding Soft Tones and Smooth Texture
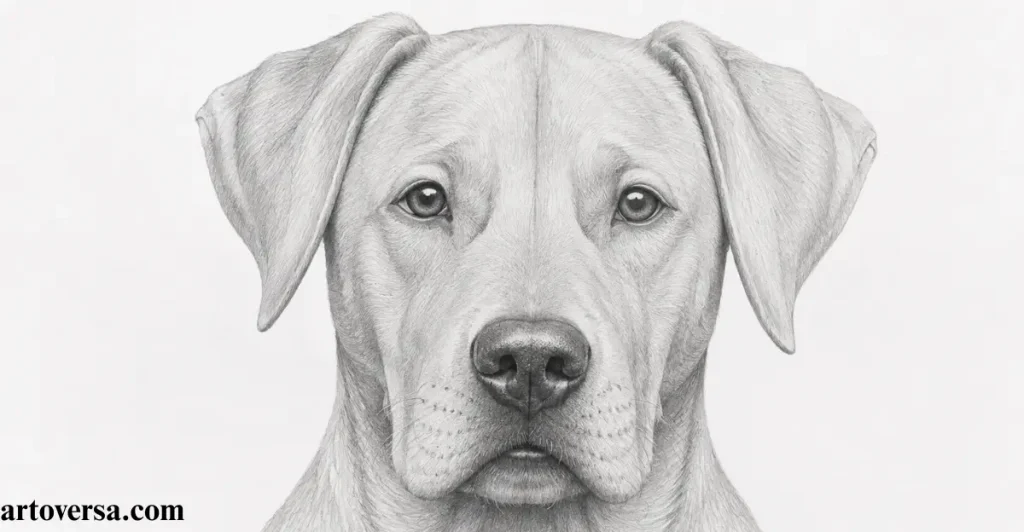
- Once the structure is ready, introduce gentle layers of shading with a graphite pencil to give the realistic drawing more depth and form.
- Choose a suitable shading method such as hatching to build even tones while keeping the texture natural across the dog head sketch.
- Work slowly around the face and leave important areas like the eyes and nose lighter so their details remain clear.
- Use a soft blending tool like a cotton earbud to merge the graphite smoothly and create a balanced transition between light and dark areas.
- Check the overall shading carefully and adjust rough patches while keeping the original facial features visible and well defined.
Common problems and how to overcome them
Many beginners apply dark shades too quickly, which can hide important features and reduce the natural look of the sketch. Build lighter layers first and blend gently to control the final effect.
At the beginning of my sketching journey, I often added heavy shading without understanding the balance of tones. My drawings looked less realistic. With experience, I learned that soft layers and careful blending create a cleaner finish.
Step 5: Enhancing Facial Features with Realistic Shading
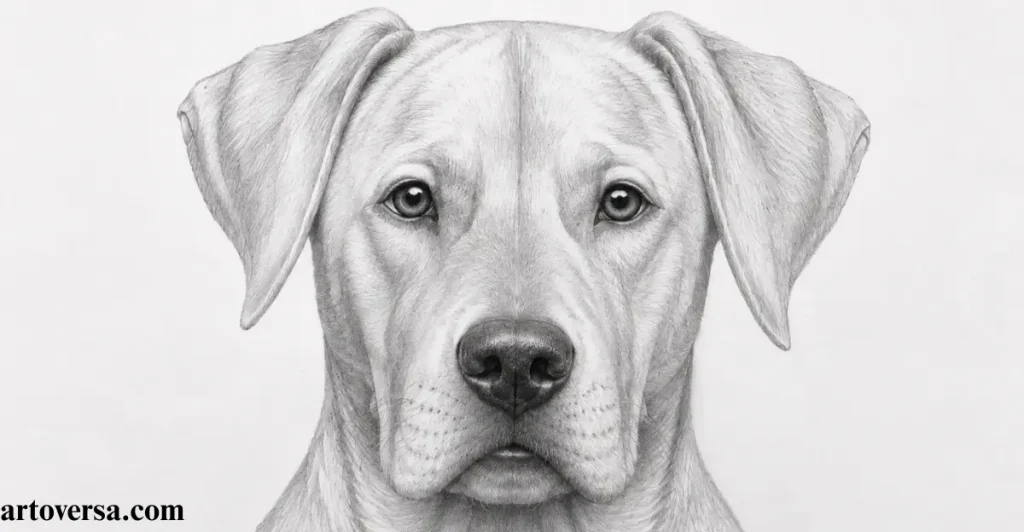
- Bring more life into the eyes and nose by carefully adding shadows that improve the realistic look of the dog’s face.
- Begin with the pupils and create deeper tones around them while keeping the reflected light visible for a natural expression.
- Select different graphite pencil grades like 8B, 4B, and HB to control dark areas and softer transitions across the features.
- Carefully shape the dog’s nostrils by observing the small circles and deeper middle sections of the nose surface.
- Blend each layer smoothly and adjust the values slowly so the facial details appear connected and balanced with the whole sketch.
Common problems and how to overcome them
Many artists struggle with adding too much darkness around facial areas, which can remove the natural expression. Use light layers first and build stronger shades gradually for better control.
During my early practice, creating realistic eyes and nose details felt challenging because the shading often looked uneven. With regular sketching, better value control developed and facial features started appearing more natural.
Step 6: Creating Natural Fur Texture Around the Facial Area
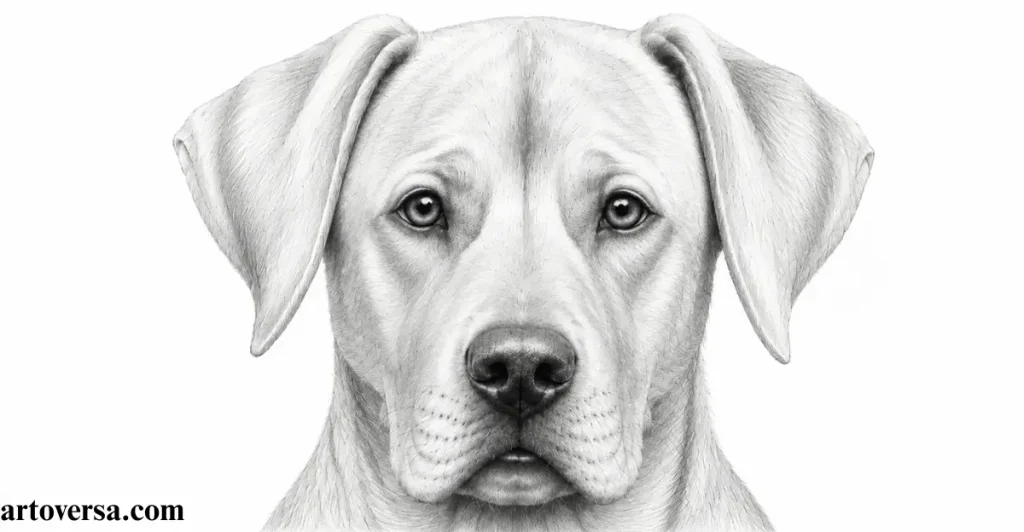
- Different breeds have unique coat patterns, so study the dog’s fur type before adding texture around the eyes and surrounding areas.
- Since this realistic drawing focuses on a short-haired breed, use small controlled strokes instead of creating long flowing strands.
- Add darker marks near the eye region to show the natural shadows where the fur changes direction and creates depth.
- Choose a suitable tool like a mechanical pencil or darker graphite pencil to form clean lines that match the short coat appearance.
- Keep each stroke consistent and follow the face structure carefully so the fur blends smoothly with the other facial details.
Common problems and how to overcome them
A usual mistake is drawing random fur lines without observing the breed’s coat pattern. Follow the natural growth direction and keep the strokes connected with the facial structure.
During my early practice fur details often looked messy because each stroke lacked proper direction. With more observation and control, creating short textures became easier and the overall sketch gained a more natural appearance.
Step 7: Building Soft Fur Texture Across the Head
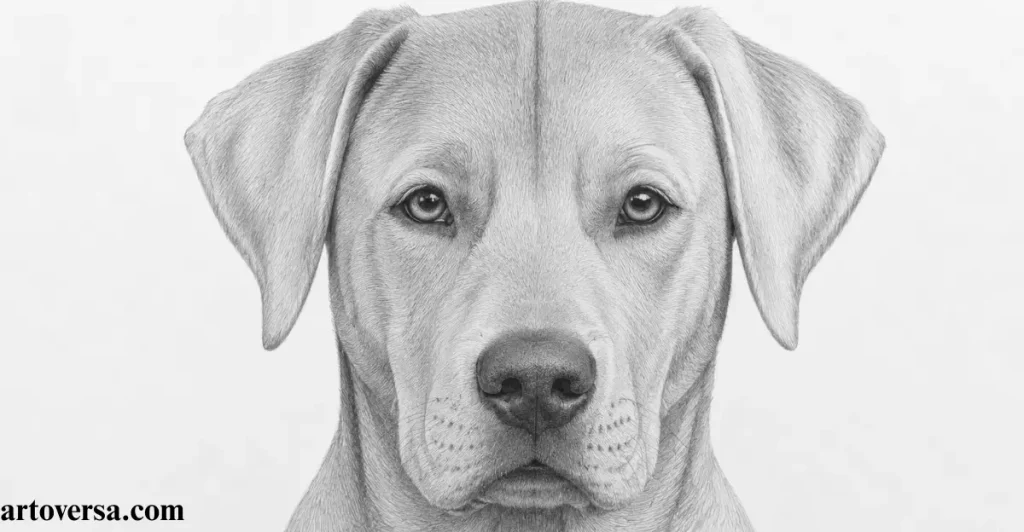
- As the sketch develops, extend the dog’s fur over the top of the head by following the natural coat direction and facial structure.
- Notice the small changes in fur flow around the forehead area to make the realistic drawing look more detailed and balanced.
- Create soft layers with controlled pencil strokes while avoiding heavy marks that can make the texture appear harsh.
- Connect the new fur patterns with the existing facial details so the entire dog head keeps a smooth and natural appearance.
- Maintain variation in stroke length and pressure because small differences help create a realistic coat effect.
Common problems and how to overcome them
One mistake seen in early sketches is adding repeated lines with the same pressure, which makes the fur appear flat. Keep the strokes flexible and follow the natural movement of the coat.
From my first attempts at animal sketching, fur details often lacked depth because the texture was added without studying direction. Careful observation improved the process and created smoother, more lifelike results.
Step 8: Creating Depth and Texture in the Ear Area
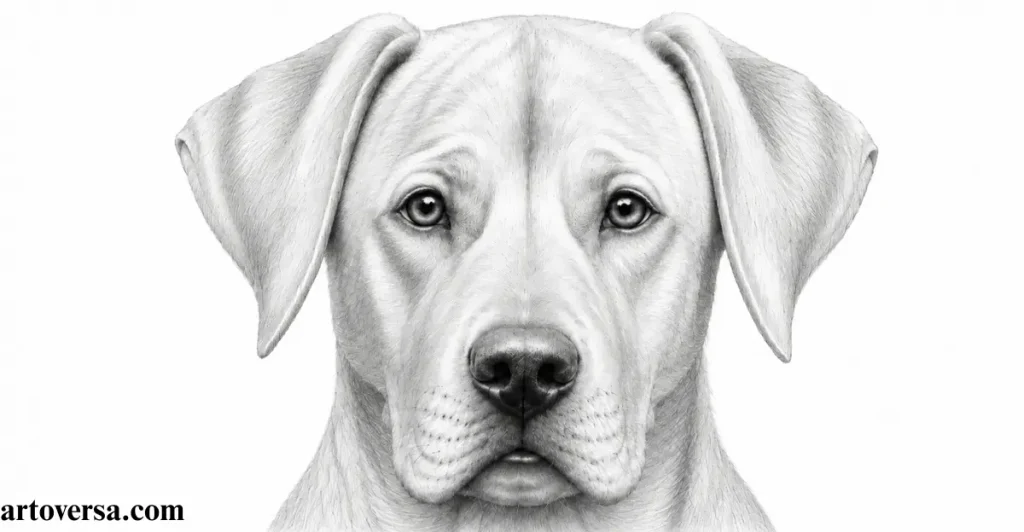
- Focus on the dog’s ears by adding short fur strokes that match the natural coat direction and follow the shape of each ear flap.
- Notice the folds and lighter edges carefully because these areas help create a realistic balance between shadows and reflected light.
- Add soft variations in pencil pressure to show texture while keeping the fur smooth and connected with the dog head structure.
- Build darker areas slowly around the folds to create depth without making the ear details appear too heavy.
- Keep the shading controlled so the ears blend naturally with the rest of the realistic drawing.
Common problems and how to overcome them
A usual challenge is creating ear details that look too flat because the shadows and light areas are not balanced properly. Focus on the fold structure and add gradual shading to keep the texture realistic and connected with the overall sketch.
At the beginning of my drawing journey, ear details often appeared unnatural because the fur direction and shadows were difficult to control. Consistent practice with light placement improved the way folds and textures were created. This method helped achieve smoother details and more realistic animal portraits.
Step 9: Creating a Natural Fur Effect with Layered Strokes
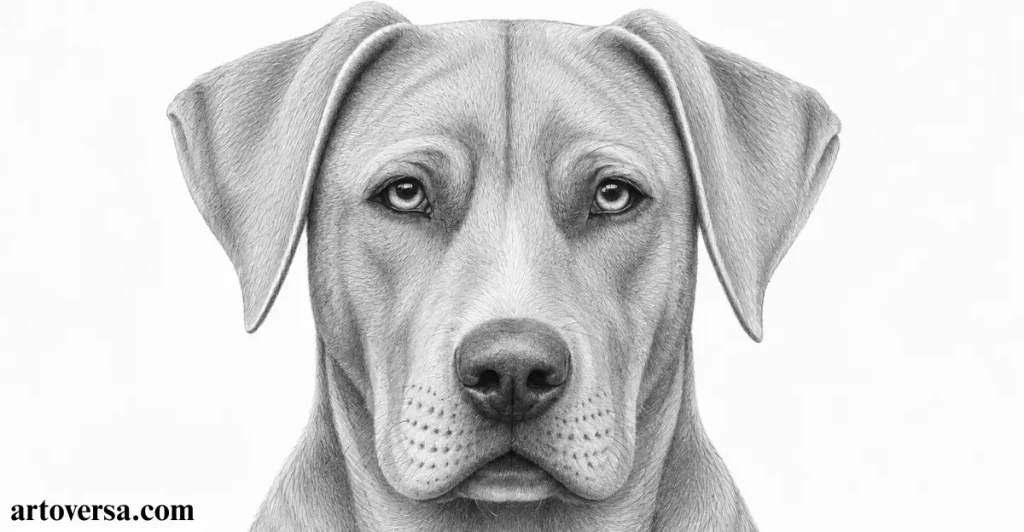
- Continue improving the dog’s fur by adding closely placed pencil strokes that create the illusion of a soft and detailed coat.
- Focus on changing the direction and length of each stroke because natural fur does not follow one exact pattern.
- Add extra layers around different areas of the head to make the realistic drawing appear deeper and more lifelike.
- Keep the pressure controlled while building texture so the surface does not look like simple pencil marks.
- Observe the overall balance and refine lighter sections with gentle strokes to complete the natural appearance of the coat.
Common problems and how to overcome them
One issue artists often face is creating fur that looks like separate lines instead of a connected texture. Avoid pressing too hard and add multiple soft layers that blend together naturally.
At the early stage of my sketching practice, fur textures often appeared too harsh because the strokes lacked variation. Learning to control pressure and follow natural patterns improved the overall depth of animal drawings. This technique helped create softer coats with a more realistic and professional finish.
Step 10: Refining the Final Touches and Enhancing Details
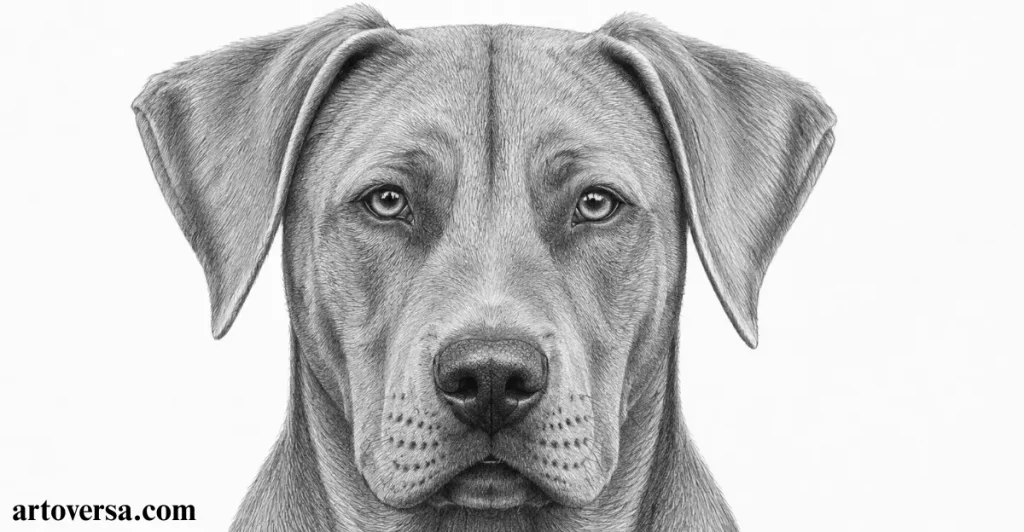
- The artwork a final review by improving the dog’s fur texture and adding darker strokes where more depth is needed.
- Strengthen the shadowed sections with a softer graphite pencil while keeping the lighter areas balanced and natural.
- Lift extra graphite from brighter sections with a kneadable eraser to create contrast and improve the realistic drawing effect.
- Check small details around the face and fur to ensure every element blends smoothly without losing the original structure.
- Complete the final adjustments carefully so the dog head appears polished with clear texture and realistic depth.
Common problems and how to overcome them
A final mistake many artists make is adding too many dark marks during the polishing stage, which can reduce the natural appearance. Keep refining slowly and protect the lighter areas to maintain a balanced finish.
At the finishing stage of my earlier sketches, overworking the details often made the drawing look heavier than expected. Learning when to add shadows and when to leave space improved the overall quality of the artwork.
Conclusion
Drawing a realistic dog head takes practice patience and a good understanding of shapes textures, and shadows. By following each step carefully, you can improve your skills and create a more lifelike sketch with better details. Small improvements in observation and technique can make your artwork look more balanced and expressive. Keep practicing different features like eyes, fur and facial structure to build confidence. Every drawing experience teaches you something new and helps you grow as an artist. Enjoy creating your own realistic dog portraits and keep improving with each new attempt.
FAQs
What tools do you need to draw a realistic dog head?
Basic supplies like graphite pencils paper eraser, and blending tools are enough to start. Different pencil shades help create soft shadows and detailed textures. These materials make the drawing process easier and more enjoyable.
How can beginners draw a dog head with correct proportions?
Begin with simple shapes and light guidelines to place the eyes nose and ears properly. Taking time to understand the structure helps create a balanced front view. Practice will improve your control and drawing confidence.
How can I make the dog’s nose look more realistic?
Study the nose shape and add small textures with gentle shading. Avoid making the area too dark because soft layers create a natural effect. Careful details help bring more depth to the facial features.
What is the easiest way to create realistic dog fur?
Follow the natural fur direction and use small pencil strokes to build texture. Avoid repeating the same lines because real coats have different patterns. Soft layers will make the fur appear smoother and more lifelike.
How do I draw realistic eyes on a dog head?
Focus on eye placement shape, and light reflections before adding darker tones. The eyes should match the overall face structure for a natural expression. Slow adjustments can make the final sketch look more realistic.
How can I improve my realistic dog drawings?
Regular practice and careful observation are important for improving animal sketches. Study shapes textures, and shading techniques to create better results. Each new drawing helps you develop stronger artistic skills.
Please Write Your Comments