How to Draw a Realistic Butterfly: Step-by-Step Guide for Beginners
Updated: September 14, 2026
30
Drawing a realistic butterfly is a wonderful way to improve your sketching skills while learning about symmetry, wing shapes, and fine details. Whether you’re a beginner or an experienced artist, starting with simple construction shapes makes it easier to create a balanced and natural-looking butterfly.
This step-by-step guide will teach you how to sketch the body, draw accurate wings, add realistic patterns, and apply smooth shading with confidence. Follow each step carefully and practise regularly, and you’ll soon be creating beautiful butterfly drawings with greater accuracy and ease.
Table of Contents
Why Learn to Draw a Butterfly?
Many beginners think butterflies are difficult to draw because of their detailed wings and perfect symmetry. However, breaking the butterfly into simple shapes makes the process easier while improving your observation skills, hand control, and understanding of proportions. Learning to draw butterflies also helps artists practise patterns, textures, and delicate details that can improve their overall drawing abilities.
Materials You’ll Need
Before you start drawing, gather these basic tools to create a clean and detailed butterfly sketch. You don’t need expensive supplies; simple materials can help you build accurate shapes, add texture, and create realistic shading and colours.
- HB Pencil – For light construction lines and the initial butterfly sketch.
- 2B and 4B Graphite Pencils – For darker outlines, shadows, and adding depth.
- Coloured Pencils – For adding realistic wing colours, patterns, and natural details.
- Drawing Paper or Sketchbook – Provides a suitable surface for smooth pencil and colour work.
- Kneaded Eraser – Helps remove unwanted lines and create soft highlights.
- Blending Stump – Used to smooth graphite transitions and blend subtle tones.
- Pencil Sharpener – Keeps pencil tips precise for fine details and wing patterns.
- Reference Photo – Helps study butterfly anatomy, symmetry, colors, and natural markings.
Understanding Butterfly Anatomy Before You Draw
Before sketching a butterfly, understanding its basic anatomy will help you create a more accurate drawing. Focus on the three main body sections: the head, thorax, and abdomen, along with important features like the antennae, compound eyes, forewings, hindwings, and wing veins. Learning how these parts connect will improve your proportions, symmetry, and ability to create a realistic butterfly structure.
Step 1 – Draw Basic Construction Shapes
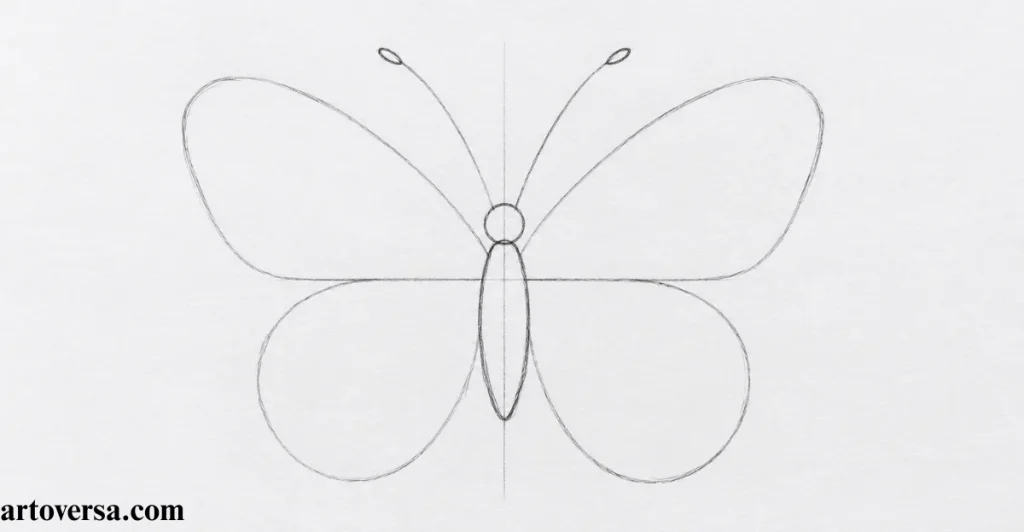
- Draw a small oval for the butterfly’s head and a longer oval for the body structure.
- Add a light center guideline to maintain the butterfly’s natural symmetry.
- Sketch simple shapes for the forewings and hindwings on both sides of the body.
- Keep all construction lines light so you can adjust the shapes easily.
- Focus on creating the overall butterfly silhouette before adding details.
Common Problems and How to Overcome Them
Many beginners start drawing wing patterns too early and ignore the basic structure. Use simple shapes first, check the balance between both sides, and make adjustments before adding any detailed features.
One pattern I’ve observed while guiding new artists is that they often focus on the beautiful wing details before establishing the foundation. After encouraging them to spend more time on basic shapes and symmetry, their butterfly sketches became much more balanced. Follow these steps patiently, and you’ll soon develop the control needed to create accurate and realistic butterfly drawings.
Step 2 – Sketch the Body Proportions
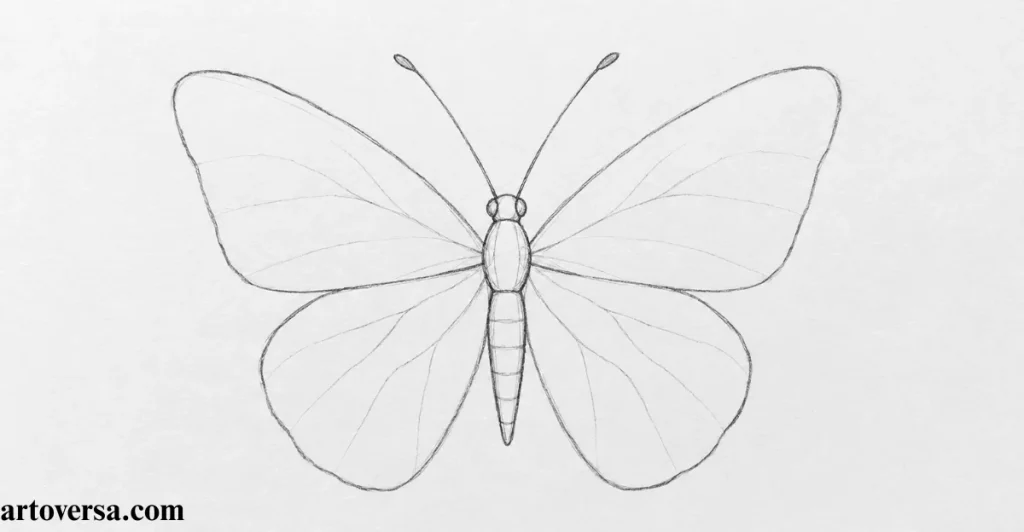
- Refine the butterfly body by defining the head, thorax, and abdomen with smooth shapes.
- Keep the thorax slightly wider because it supports the wings and movement.
- Make the abdomen longer and narrower to create a natural butterfly structure.
- Check that the body remains centered between both sides of the wings.
- Adjust the overall proportions before adding smaller features and patterns.
Common Problems and How to Overcome Them
A common mistake is making the body too thick or placing it off-center, which affects the butterfly’s balance and symmetry. Compare the body size with the wings and make small corrections before darkening your lines.
While reviewing beginner sketches, I noticed that many artists focused heavily on the wings and treated the body as a small detail. Once they understood how the body supports the entire structure, their butterflies looked more natural and well-balanced. Pay attention to these proportions early, and your final drawing will become much easier to refine.
Step 3 – Draw the Head and Antennae
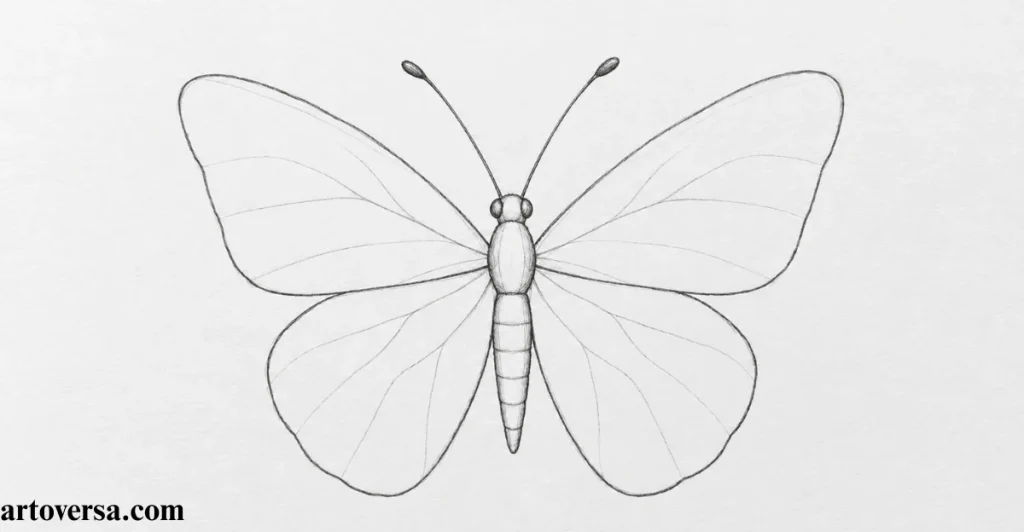
- Refine the small head shape at the front of the butterfly’s body.
- Add two thin, curved antennae extending naturally from the top of the head.
- Place the compound eyes on both sides while keeping them small and balanced.
- Add a simple curved line for the mouth area without overcomplicating the details.
- Check the head placement to ensure it connects smoothly with the thorax.
Common Problems and How to Overcome Them
Many beginners make the antennae too thick or place them unevenly, which can affect the delicate appearance of the butterfly. Use light, controlled strokes and compare both sides to maintain natural symmetry.
While observing student sketches, I noticed that small features like the head and antennae were often overlooked because artists were eager to work on the wings. Once they slowed down and treated these details as important parts of the structure, their butterflies gained more realism and character. Give attention to every small feature, and your drawing will become more refined.
Step 4 – Sketch the Upper Wings
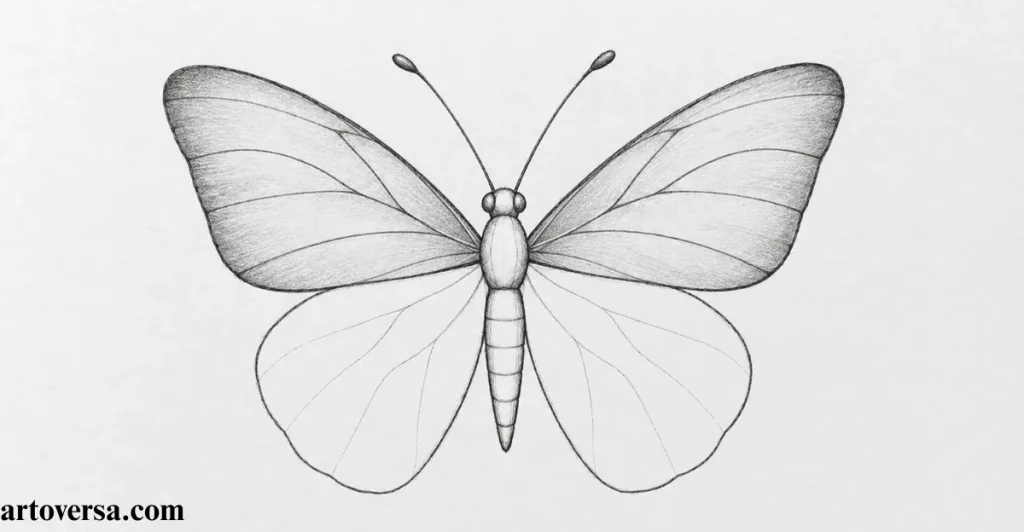
- Draw the forewings using light curved lines that extend from the thorax.
- Keep both upper wings similar in size and shape to maintain natural symmetry.
- Follow the butterfly’s natural wing structure instead of creating sharp or uneven edges.
- Adjust the wing angle based on the butterfly’s pose and reference image.
- Refine the outer wing contour before adding any patterns or textures.
Common Problems and How to Overcome Them
A common mistake is drawing both upper wings slightly different in size or shape, making the butterfly look uneven. Use the centre guideline as a reference and compare both sides before finalizing the outline.
While studying beginner artwork, I noticed that many artists rushed through the wing structure because they wanted to add colors and patterns quickly. After helping them focus on the overall shape first, their butterflies looked more balanced and realistic. Build the wing foundation carefully, and the details will become much easier to add later.
Step 5 – Add the Lower Wings
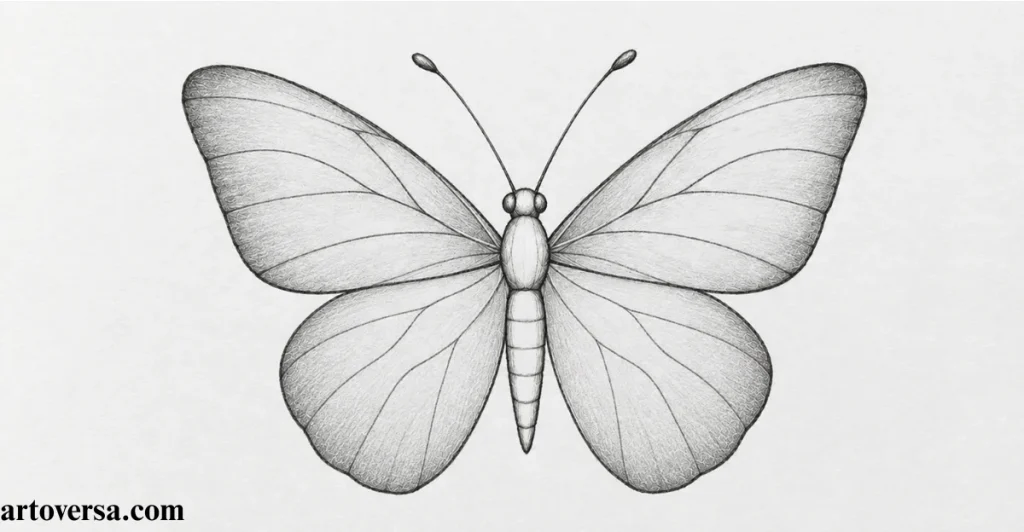
- Sketch the hindwings beneath the forewings using smooth, rounded curves.
- Keep the lower wings connected naturally to the thorax and upper wing structure.
- Match both sides carefully to maintain the butterfly’s overall symmetry.
- Adjust the size and shape of the hindwings according to the butterfly species.
- Refine the outer edges while keeping the wing shape soft and natural.
Common Problems and How to Overcome Them
Many beginners make the hindwings too small or place them too far away from the body, which breaks the natural wing structure. Compare the connection between the upper and lower wings before adding any details.
While observing butterfly sketches, I noticed that artists often gave most of their attention to the larger upper wings and ignored the lower sections. Once they understood that hindwings help define the butterfly’s complete silhouette, their drawings became more accurate and balanced. Give every wing section proper attention, and your butterfly will look more natural.
Step 6 – Draw the Wing Veins
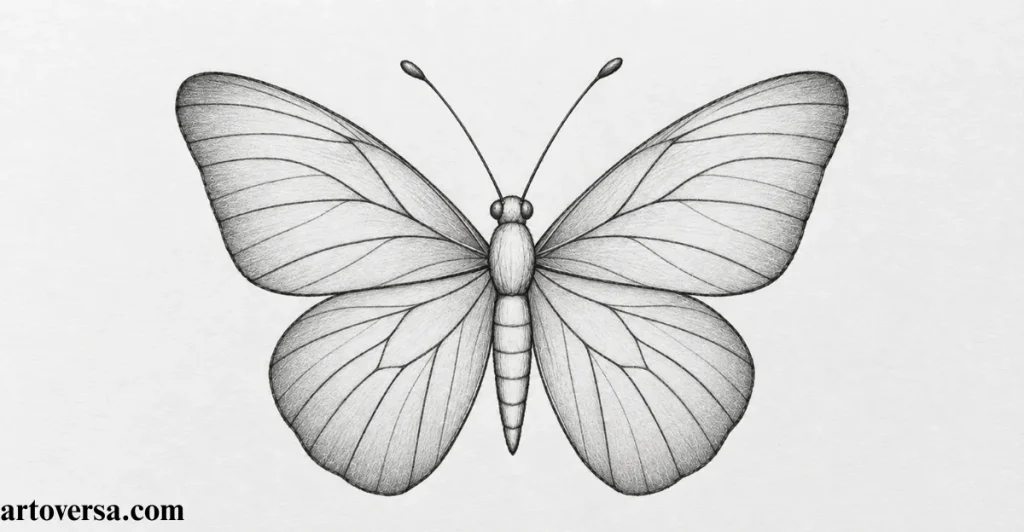
- Add light wing veins starting from the base of the wings and extending outward.
- Follow the natural branching pattern instead of drawing random lines.
- Keep the main veins slightly darker and the smaller branches lighter.
- Maintain balance between both wings to preserve natural symmetry.
- Use gentle pencil strokes so the veins blend smoothly with the wing structure.
Common Problems and How to Overcome Them
Many beginners draw wing veins too dark or create too many lines, making the wings look crowded. Start with the main structure first, then add smaller details gradually while keeping the pattern clean and natural.
While guiding artists through butterfly sketches, I noticed that many struggled because they viewed wing veins as decoration rather than part of the butterfly’s structure. Once they learned to follow the natural flow of the veins, their drawings gained more depth and realism. Study the wing structure carefully, and you’ll create patterns that look natural instead of forced.
Step 7 – Add Wing Patterns and Texture
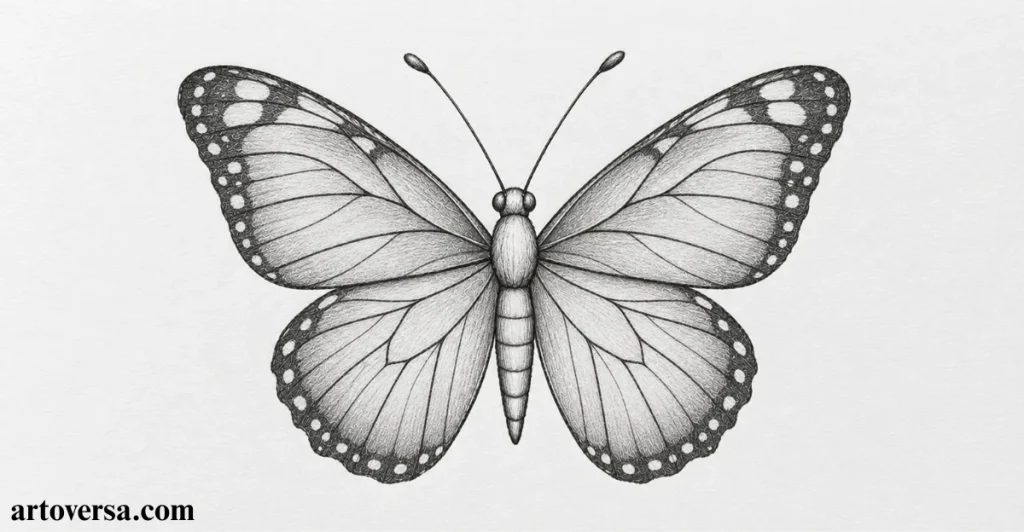
- Study the reference photo and lightly map the butterfly’s natural wing patterns.
- Add spots, lines, and markings while keeping both wings balanced and symmetrical.
- Use layered pencil strokes to create realistic texture without making the wings look crowded.
- Apply different pressure levels to create variation between light and dark areas.
- If using color pencils, build colors gradually to create smooth transitions and natural details.
Common Problems and How to Overcome Them
Many beginners focus on copying every small marking and lose the overall wing balance. Start with the main patterns first, then add smaller details while keeping the design clean and natural.
While reviewing butterfly artwork, I noticed that artists often became overwhelmed by complex wing patterns. After encouraging them to study the larger shapes and color sections first, their drawings became more organized and realistic. Build the patterns patiently, and your butterfly wings will look detailed without becoming confusing.
Step 8 – Clean the Line Art
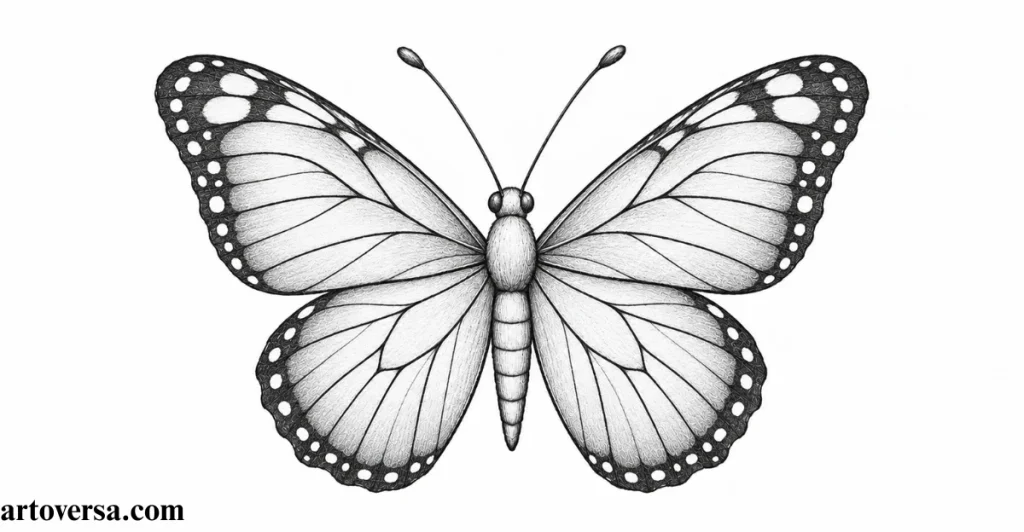
- Carefully remove unnecessary construction lines while keeping the final butterfly structure clear.
- Refine the outer contour lines of the wings, body, and antennae for a cleaner appearance.
- Strengthen important outlines while keeping delicate areas light and natural.
- Check the symmetry of both wings and correct any uneven shapes.
- Review the entire sketch before moving forward to shading and coloring.
Common Problems and How to Overcome Them
Many beginners erase too much or leave too many rough guidelines, which makes the butterfly look unclear. Remove extra lines slowly, preserve the important details, and make sure the final outline remains smooth and balanced.
While reviewing butterfly sketches, I noticed that artists often rushed this stage because they wanted to move directly into shading and colors. After guiding them to focus on clean contours first, their artwork became more polished and easier to refine. A clean line drawing creates a strong foundation for realistic shading, texture, and final details.
Step 9 – Shade the Butterfly for Realism
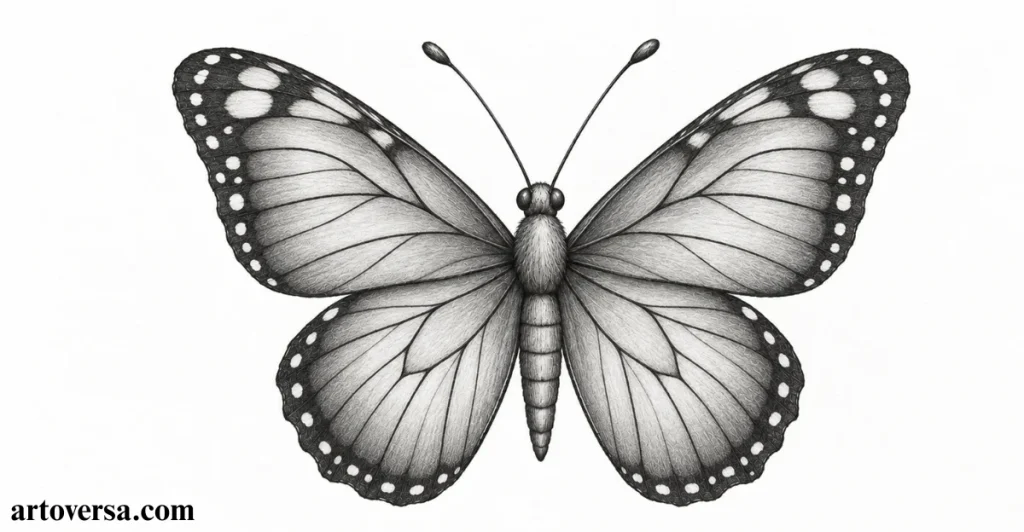
- Start with an HB pencil to create light midtones across the body and wings.
- Use 2B and 4B graphite pencils to build darker areas and add depth.
- Apply gradual layering to create smooth transitions between light and shadow.
- Add form shadows near the body, wing folds, and overlapping areas to create dimension.
- Preserve soft highlights and lighter sections to maintain the butterfly’s delicate appearance.
Common Problems and How to Overcome Them
Many beginners apply heavy graphite too quickly, making the butterfly look flat and losing the delicate wing structure. Build shadows slowly, control your pencil pressure, and create depth through multiple light layers instead of dark strokes.
While observing artists practice butterfly shading, I noticed that many focused only on making areas darker instead of understanding how light affects form. Once they learned to balance shadows, midtones, and highlights, their drawings gained a much more realistic appearance. Practice gradual shading techniques, and your butterfly will develop a softer and more natural three-dimensional look.
Step 10 – Add Final Details and Highlights
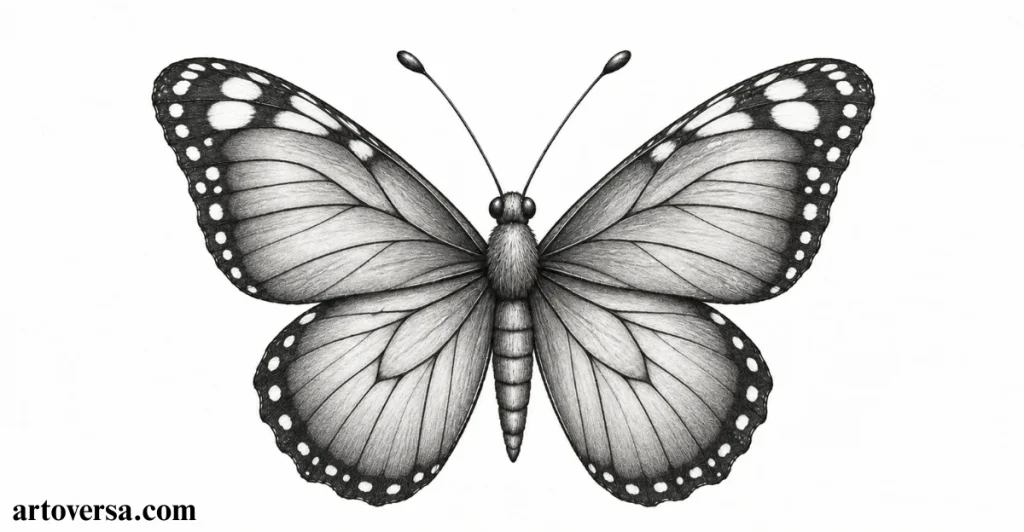
- Refine small details such as wing edges, body texture, and delicate antennae.
- Use a kneaded eraser to lift soft highlights on the wings and body.
- Add final touches to the wing patterns, spots, and textures while keeping the design balanced.
- Increase contrast in selected areas using darker graphite layers for more depth.
- Review the complete butterfly drawing and make only the final adjustments needed for a polished finish.
Common Problems and How to Overcome Them
Many beginners continue adding unnecessary details at the final stage, which can make the artwork look crowded. Focus on enhancing important areas, maintain clean highlights, and avoid overworking the delicate butterfly structure.
While reviewing finished butterfly drawings, I noticed that the most successful artworks came from artists who understood when to stop refining. After encouraging them to focus on small improvements instead of adding more marks, their drawings looked cleaner and more professional. Trust your process, and let the final details enhance the natural beauty of your butterfly.
Professional Drawing Tips
Professional artists focus on accuracy before adding details. Study a clear butterfly reference photo, use light construction lines, and check the proportions and symmetry before refining the wings and patterns. Pay attention to negative space between the wings, body placement, and the natural flow of contour lines to create a balanced sketch.
For a realistic finish, build graphite and colors gradually through layering instead of using heavy strokes. Keep your highlights clear, blend shadows smoothly, and use different pencil pressures to create depth and texture. Regular practice, careful observation, and patience will help you improve your control and create more detailed butterfly artwork.
How to Draw Different Types of Butterflies
Monarch Butterfly
The monarch butterfly is known for its orange wings, black veins, and white spots along the edges. Start by creating broad forewings and rounded hindwings, then add the distinctive black patterns and symmetrical markings to capture its recognizable appearance.
Swallowtail Butterfly
A Swallowtail Butterfly has pointed hindwings with tail-like extensions that make it unique. Focus on creating elongated wing shapes, clear wing veins, and detailed patterns while maintaining the natural symmetry of both sides.
Blue Morpho Butterfly
The Blue Morpho Butterfly is famous for its large blue wings and smooth surface. Draw wide rounded wings first, then use gradual shading or color layering to create the bright blue appearance and subtle texture.
Painted Lady Butterfly
The Painted Lady Butterfly features orange, brown, and black patterns with small white spots on its wings. Pay attention to the detailed markings, wing sections, and color transitions to create a realistic representation of this species.
Conclusion
Drawing a realistic butterfly becomes much easier when you understand its anatomy, proportions, and wing structure. By starting with simple shapes and gradually adding patterns, texture, shading, and highlights, you can create a balanced and lifelike artwork.
Keep practicing different butterfly species, experiment with pencil techniques and improve your observation skills with every sketch. With patience and the right approach, you’ll gain the confidence to create beautiful butterfly drawings with greater detail and realism.
FAQs
How do you draw a realistic butterfly step by step?
To draw a realistic butterfly, start by creating simple construction shapes for the body and wings. Then refine the anatomy, add wing veins and patterns, clean the outline, and apply shading and highlights to create depth and realism.
Is drawing a realistic butterfly difficult for beginners?
Drawing a realistic butterfly may seem challenging because of its detailed wings and symmetry, but beginners can learn easily by breaking the butterfly into basic shapes and practicing proportions, patterns, and shading techniques.
What materials do I need to draw a realistic butterfly?
You can draw a realistic butterfly using basic materials such as an HB pencil, 2B and 4B pencils, drawing paper, colored pencils, kneaded eraser, blending stump, pencil sharpener, and a butterfly reference photo.
How do you draw butterfly wings with accurate symmetry?
To create symmetrical butterfly wings, draw a light center guideline first and compare both sides while sketching the forewings and hindwings. Adjust the shapes before adding patterns and details.
How do you make a butterfly drawing look more realistic?
A butterfly drawing looks more realistic when you focus on correct anatomy, natural wing shapes, detailed patterns, smooth shading, realistic textures, and proper highlights to show light and depth.
What is the easiest way to draw butterfly wings?
The easiest way to draw butterfly wings is to begin with simple curved shapes connected to the body. Once the basic silhouette is correct, add wing veins, patterns, and textures gradually.
How do you draw butterfly wing patterns and textures?
Study a reference image and lightly map the main markings first. Add spots, lines, and color sections using layered pencil strokes while keeping the patterns balanced on both wings.
How do you shade a butterfly drawing realistically?
Use light pencil layers to build shadows gradually. Apply darker shading around the body, wing folds, and overlapping areas while keeping lighter sections for highlights and a delicate appearance.
Please Write Your Comments