7 Steps on How to Draw an Owl with Realism
Updated: September 12, 2026
49
Owls are fascinating birds known for their sharp eyes, detailed feathers, and unique features that make them a beautiful subject for realistic drawings. Many artists think drawing an owl with realism is difficult because of its complex feather patterns, textures, and lifelike details. However, with the right approach and step-by-step guidance, you can make this process much easier. Follow these 7 simple steps to learn how to draw an owl realistically and improve your drawing skills.
Table of Contents
7 Steps on How to Draw an Owl with Realism
Follow these simple steps to make drawing an owl easier, from creating the basic outline to adding realistic feathers, shading and final details for a lifelike result.
Break the reference into recognizable shapes
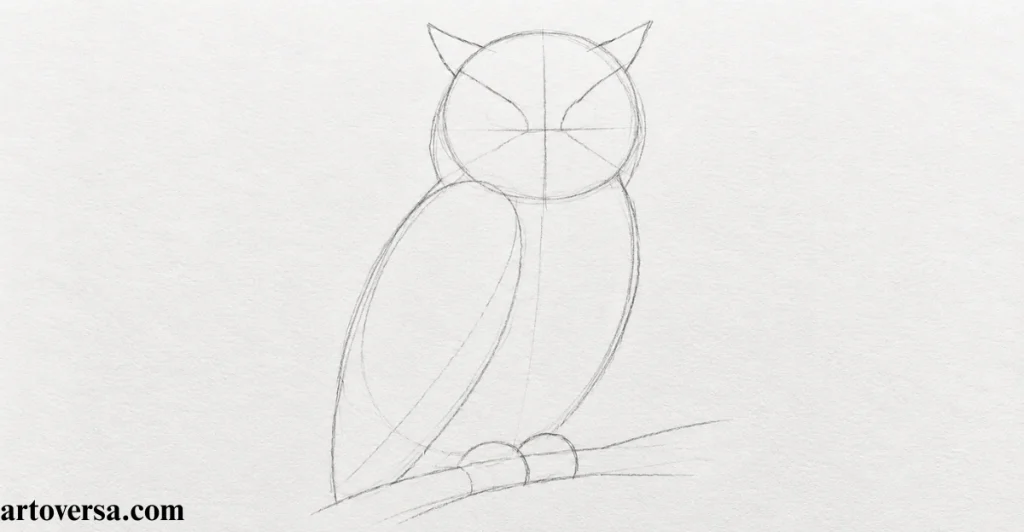
Start by studying the reference photo carefully and simplify the subject into basic shapes before adding any details.
- Begin by observing the reference photo closely and use the reference to break the subject into recognizable shapes. Spend a little time on study before you start drawing, and always use a proper reference to avoid copyright infringement.
- Once you understand the overall shape, avoid relying only on memory. Even a great artist with formal training uses drawings and references because an owl can quickly become an awkward drawing when the proportions are guessed.
- Now sketch a big circle for the head, place small circles for the eyes, then add triangles for the owl ears. Finish the face by drawing the nose as an inverted V so the main structure is complete.
- After finishing the head, draw an oval body and add the tail using a simple triangle. Keep the owl body as a light rough sketch, using only basic shapes before refining anything.
- Finally, compare your illustration with the reference observation and check the head, eyes, ears, nose, body and tail. Make small adjustments to the rough sketch so every part is ready for the next stage.
Common problems and how to overcome them
Many beginners skip the basic shapes and start drawing details immediately, making the owl body look uneven. Build the structure first, then refine the smaller features step by step.
I used to draw the owl directly from memory, and the proportions rarely looked right. Once I started studying the reference photo and building the sketch with simple circles and shapes first, the drawing became much easier to complete.
Erase the shapes and sketch the owl’s outline
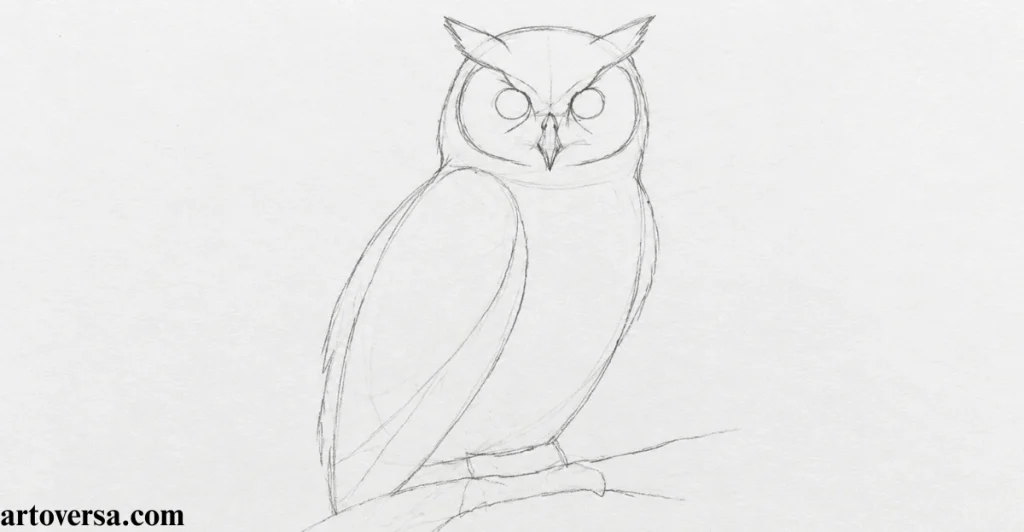
Now replace the basic construction with a clean outline by refining the sketch one section at a time instead of tracing every guiding shape.
- Start removing the guiding shapes with gentle erasing, then begin re-sketching the main owl outline. Keep the new outline sketch light so you can still make adjustments if needed.
- As the outline becomes clearer, look for any mistakes and make small corrections. If a line doesn’t look right, simply erase it and redraw the outline using a soft light sketch.
- Continue refining the drawing with a 4H pencil or H pencil to create a clean light outline. Using the correct pencil range keeps the sketch easy to edit without leaving heavy marks.
- Once the body outline is complete, focus on the eyes by adding the most noticeable details first. Improve the eye details carefully before moving on with the remaining outline refinement.
- Finally, review the full owl outline and check that all guiding shapes have been replaced through careful re-sketching and small corrections. Finish with soft light pencil strokes and a clean eye sketch before starting the shading stage.
Common problems and how to overcome them:
A common mistake is pressing too hard while re-sketching, making later corrections difficult. Keep every light outline soft until you’re completely satisfied with the shape.
I used to erase all the guiding shapes before checking the new outline, which often meant drawing the same areas again. Now I refine each section first and erase gradually, making the entire owl outline much cleaner and easier to finish.
Sketch Out the Minor Details
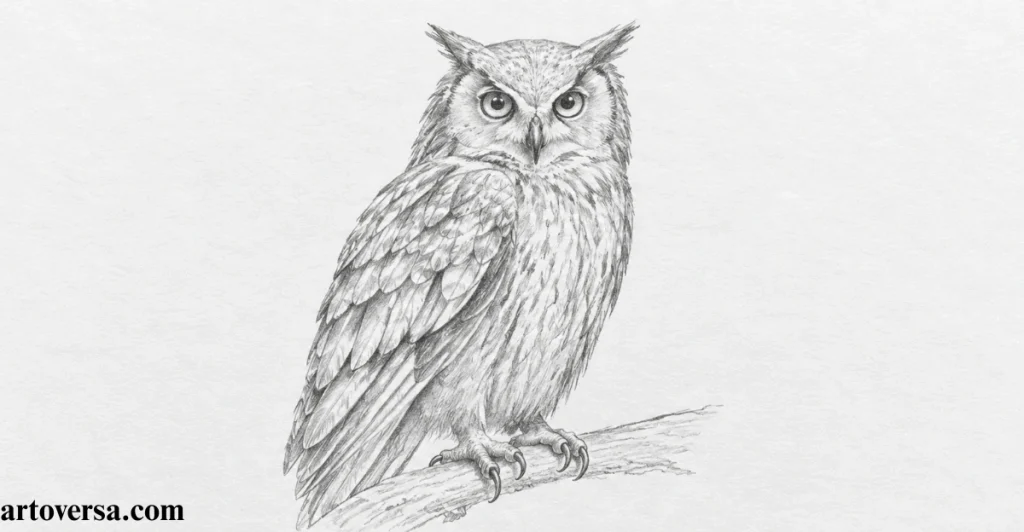
Add the small details carefully to bring your sketch closer to a realistic and refined look.
- Start adding the minor details by refining the main parts like the head and body before moving toward smaller features. Keep your lines light so the structure stays clean and easy to adjust.
- Build the feather details with soft strokes that follow the natural direction of the feathers. Focus on creating feather texture gradually instead of drawing every feather separately.
- Improve the eyes, ears, and nose because these facial details make the subject more recognizable. Keep these features balanced so they enhance the drawing without making it look crowded.
- Plan the strong shadows by studying the shadow placement around the head and body. These marks will work as a shading guide and help prepare the sketch for realistic shading.
- Finish the outline refinement by adding important visible details and improving the overall sketch refinement. Make sure the feather shadows and final lines support the form before starting detailed shading.
Common problems and how to overcome them:
A common mistake is adding too many details too early, which makes the sketch messy and difficult to control. Avoid drawing random feather lines and focus on important areas first. Keep details simple, controlled and connected with the overall structure.
When I first worked on minor details, I added too many lines thinking they would improve realism. Later, I learned that careful placement creates better results than extra marks. After practicing, I started focusing on important details that actually improve the final drawing.
Initial Shading and Blending
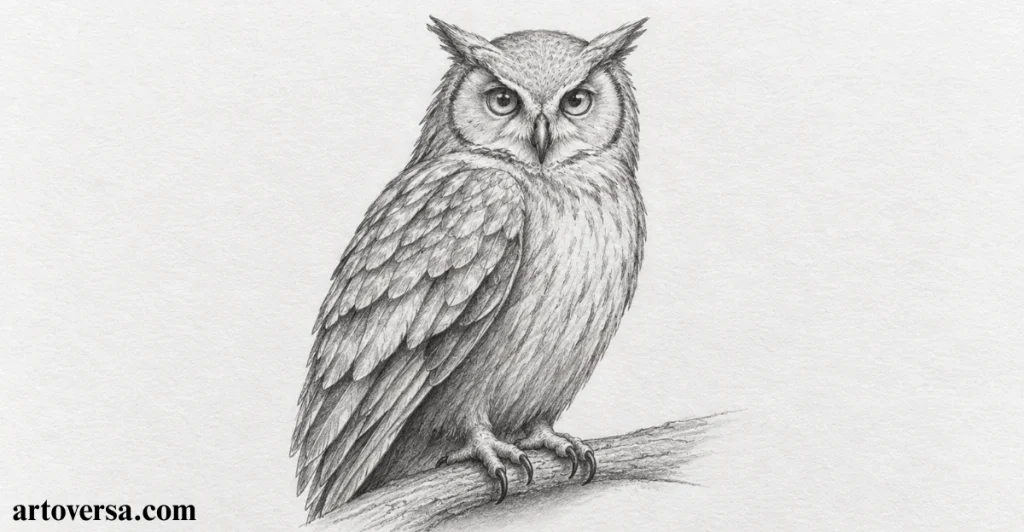
Start building smooth depth and realistic texture by creating the first shading layer with controlled blending techniques.
- Begin the initial shading by applying a light first layer of graphite across the main areas of the drawing. Keep the pressure soft so the sketch details remain visible and the foundation stays easy to adjust.
- Use an HB pencil to create gentle tones, then add a small amount of graphite powder with an artist’s knife if needed for smoother coverage. Apply it carefully on the paper to avoid damaging the sketch.
- Blend the graphite application using a Q-tip or blending tool to create smooth shading. Make sure the evenly distributed graphite creates soft transitions instead of patchy or uneven areas.
- Start developing the main shadows around important areas like the owl eyes, owl ears, and owl nose. Build the darker values slowly while keeping the lighter areas clean.
- Add bold details gradually while protecting the original structure of the sketch. Maintain the balance between shading, visible details and sketch preservation so the drawing stays realistic.
Common problems and how to overcome them:
Many beginners apply too much graphite in the first layer, making the drawing dark and difficult to control. Another issue is over-blending, which removes important texture and details. Use light layers, blend slowly, and build shading step by step.
When I first started shading, I pressed too hard because I wanted quick dark results. It made my graphite look uneven and removed some sketch details. After practicing layered shading and controlled blending, I learned that smooth realism comes from patience rather than heavy pressure.
Marking Out the Shadows
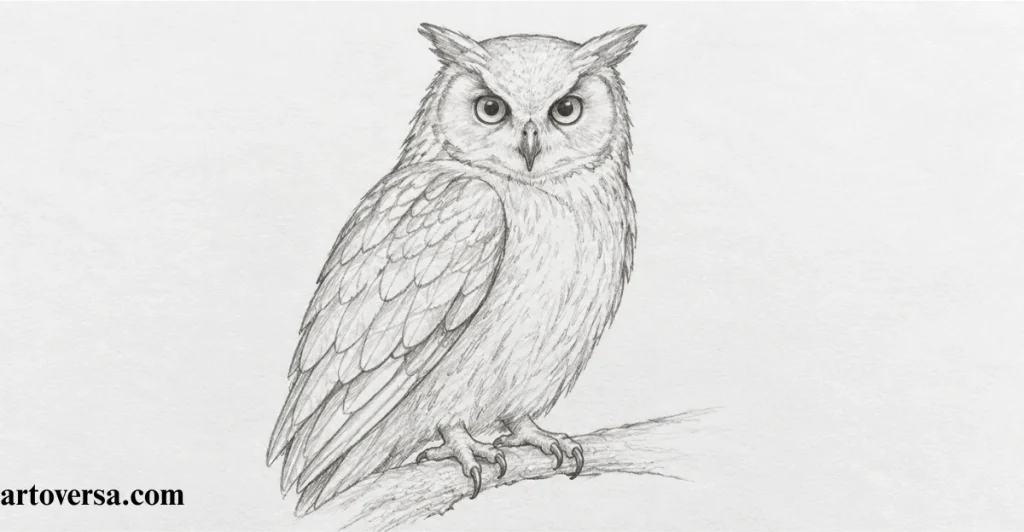
Identify and build the main shadow areas to create depth and prepare your sketch for realistic shading.
- Start placing the shadow details by observing where light does not reach the subject. Use a dark pencil lightly to mark the first main shadows while keeping the original sketch visible.
- Switch to a 6B pencil for deeper dark values and begin improving the contrast in important areas. Build the pencil shading slowly so the shadows look natural instead of harsh.
- Focus on the main shadow areas and connect them with the existing sketch details. This shading preparation helps create a strong base before adding more realistic tones.
- Use soft shadow marks to improve the depth and form of the subject. Control the pressure of the dark pencil to create smooth tonal values and avoid flat-looking areas.
- Complete the first stage of shadow rendering by checking the balance between shadows, 6B pencil work, and the remaining main details. Keep refining the sketch while building realistic shading.
Common problems and how to overcome them:
A common mistake is making shadows too dark at the beginning, which removes the ability to create smooth transitions. Many beginners also ignore the direction of light and place shadows randomly. Build tones gradually and compare the values before increasing darkness.
When I first practiced shadow rendering, I used heavy pressure with a dark pencil and lost control of the values. I learned that realistic shadows need multiple layers instead of one strong mark. After improving my shading process, my drawings started looking deeper and more natural.
Shading the Owl’s Feathers
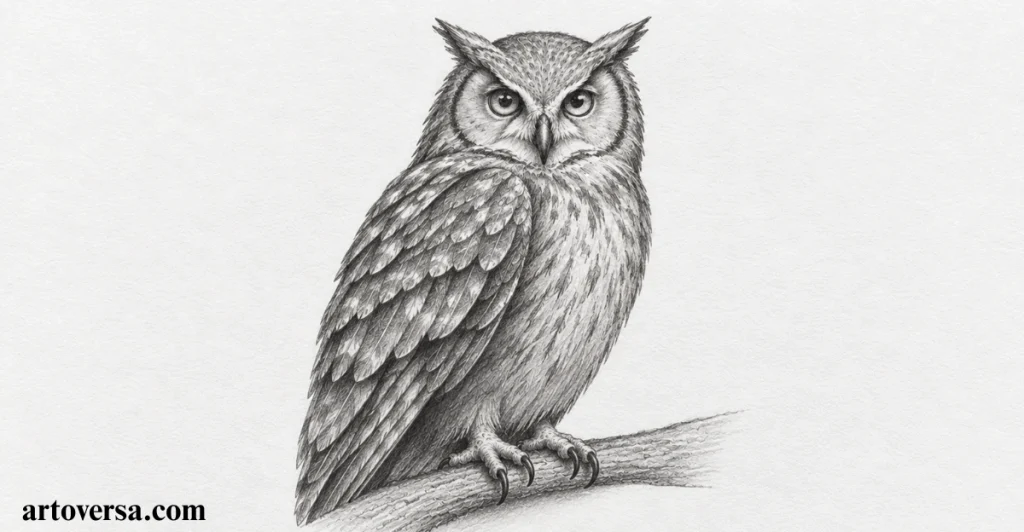
Build realistic feather depth by carefully observing patterns, texture, and light while shading each feather layer.
- Begin shading the owl feathers by studying the reference photo and noticing how light affects different areas. Start with light layers to create the base for soft feathers and maintain a natural appearance.
- Focus on the wing feathers, head feathers and breast feathers by following their direction and structure. Observe the feather pattern carefully so the shading matches the natural flow of the owl.
- Add darker areas to the patterned feathers while keeping some sections softer. This contrast between strong feathers and softer feathers helps create realistic depth and improves the overall feather texture.
- Continue shading feathers by slowly building the drawing pattern instead of adding random marks. Careful observation will help create a more realistic texture and natural feather appearance.
- Complete the feather rendering by refining the wing feathers, head, and breast areas with patience. Layered feather shading will create detailed and realistic feathers without making the drawing look heavy.
Common problems and how to overcome them
Many beginners shade every feather with the same darkness, which makes the owl look flat. Another common issue is ignoring the natural feather direction from the reference. Build layers slowly, vary the pressure, and follow the feather structure for better realism.
When I first shaded owl feathers, I tried to make every feather equally detailed, but the result looked unnatural. I learned that realism comes from understanding patterns, light, and texture rather than adding more lines. After practicing with patience, my feather rendering became smoother and more believable.
Shading the Feet and Finalizing the Details
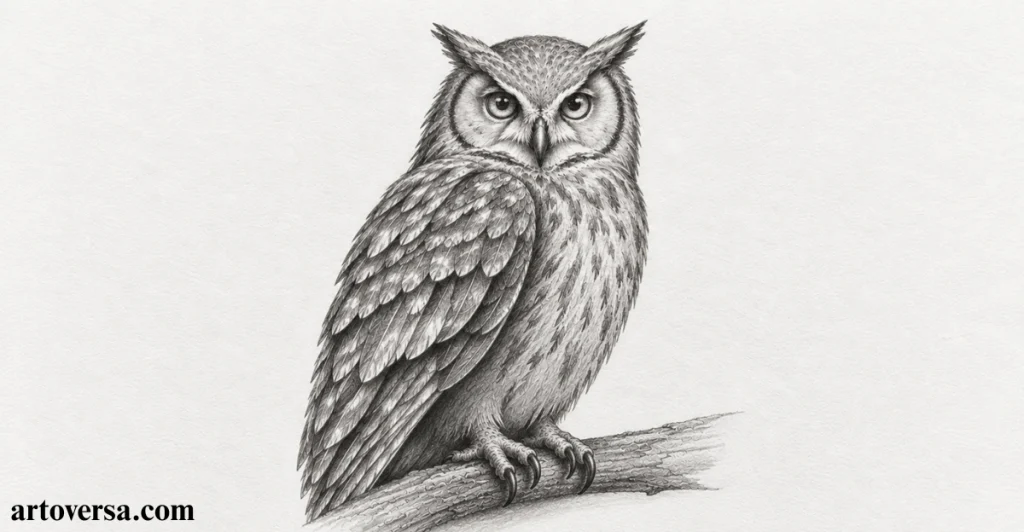
Complete your drawing by adding realistic feet shading, stronger contrasts, and final details that bring the artwork together.
- Begin the feet shading by carefully adding tones around the feet and claws. Use an 8B pencil for the darkest areas while keeping some lighter sections to maintain a realistic texture.
- Add deeper shadows beneath the feet and around the claws to create a stronger connection with the surface. Gradually increase the darkness to achieve better realistic contrast without losing details.
- If adding a tree stump, start the tree stump shading by following its texture and form. Use controlled strokes to separate the stump from the subject and make the overall drawing feel more complete.
- Use a kneadable eraser to lift graphite from bright areas and create natural highlights. Adjust the highlight intensity carefully so the light areas balance with the darker shading.
- Finish by checking all final details including the feet, claws, shadows, and tree stump. Refine the contrast with an 8B pencil and make small adjustments until the drawing feels polished.
Common problems and how to overcome them:
Many artists make the feet and claws too dark without considering the surrounding values, which can make them look unnatural. Another mistake is adding too many highlights that reduce depth. Keep the contrast balanced and adjust shadows and highlights gradually.
When I first finalized my drawings, I often focused only on the main subject and ignored small areas like feet and shadows. I noticed those missing details made the artwork feel unfinished. After practicing, I learned that small finishing touches create the final realistic effect and bring the entire drawing together.
Conclusion
Drawing an owl with realism may seem challenging at first, but breaking it into simple steps makes the process much easier. By focusing on the basic shapes, detailed feathers, shading, and final touches, you can create a more lifelike owl drawing. Each step helps you understand how to add depth, texture, and realistic details to your artwork. With practice and patience, you can improve your pencil drawing skills and create stunning animal sketches. Keep experimenting with different techniques and enjoy the process of bringing your owl drawing to life.
FAQs
What pencil is best for drawing a realistic owl?
A range of pencils like 4H, HB, 2B, 4B, and 8B is useful for creating different shades, textures, and realistic details in an owl drawing.
How can I make owl feathers look realistic?
To make feathers look realistic, focus on their direction, layer different tones, and use shading techniques to create depth and texture.
Why is drawing an owl considered difficult?
Drawing an owl can be challenging because of its detailed feathers, sharp facial features, and the need to create realistic light and shadows.
Do I need advanced drawing skills to draw a realistic owl?
No, beginners can draw a realistic owl by following step-by-step instructions and practicing basic sketching and shading techniques.
How can I improve my realistic animal drawings?
You can improve by studying reference images, practicing different shading methods, and paying attention to small details like texture, proportions, and highlights.
Please Write Your Comments