A Beginner’s Guide to Drawing Tulip Flowers
Updated: September 12, 2026
22
Tulips are beautiful flowers admired for their elegant shapes, soft petals and vibrant natural details making them a wonderful subject for artists to draw. Many beginners think drawing tulip flowers is difficult because of their delicate curves overlapping petals and realistic shading. However with the right guidance and simple techniques anyone can learn to create a beautiful tulip drawing. This beginner-friendly guide will take you through each step to help you sketch, shade and add realistic details to your tulip artwork with confidence.
Table of Contents
How to Draw Tulips Step by Step for Beginners
Follow each step below to learn how to draw realistic tulips with simple sketching, smooth shading, and natural highlights that make the flowers come to life.
Materials Needed
Gather these essential drawing supplies before you begin to make the sketching and shading process smoother and achieve more realistic tulip drawings.
- Graphite Pencils (3H, 2H, H, HB & 2B) – For creating light sketches, building smooth shading, and adding darker values.
- Drawing Paper or Sketchbook – A smooth, good-quality paper that allows easy blending and clean erasing.
- Kneaded Eraser & Precision Eraser – For correcting mistakes and lifting graphite to create soft highlights.
- Blending Stump or Paper Tortillon – To smooth pencil strokes and create natural-looking transitions between tones.
- Reference Photo of Tulips – A clear reference image to accurately observe petal shapes, lighting, and proportions.
Easy Sketch of the Tulips
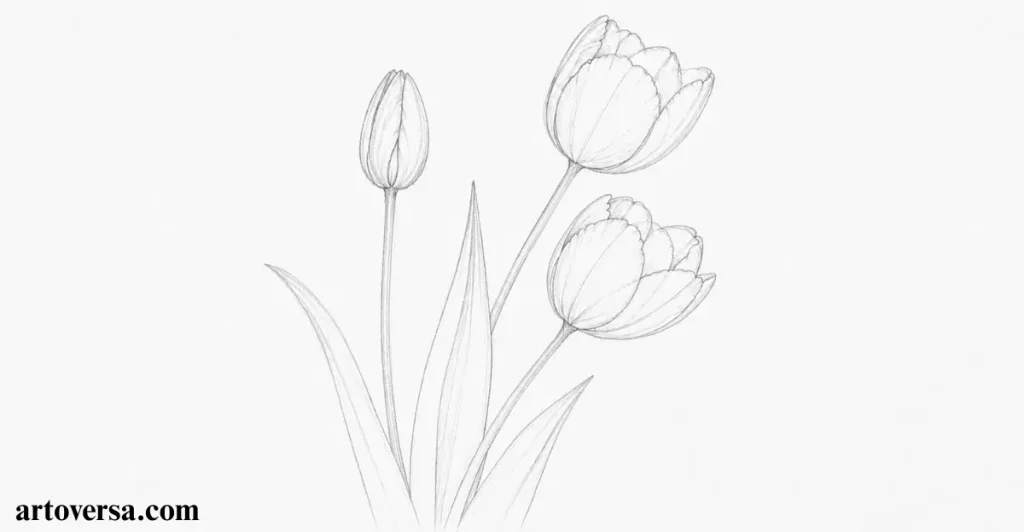
Start your tulip drawing with simple shapes and light construction lines to create a clean foundation for realistic results.
- Begin with a light sketch using a 3H pencil on your paper or canvas. Keep your pencil pressure soft because hard pencils help create light lines that are easier to adjust later.
- Study your reference photo and break the tulip flowers into simple recognizable shapes before adding details. Start with a group of flowers by placing two flowers, three flowers or a mix of an open flower medium flower and bud.
- Build the basic flower structure by drawing the outer shape of the petals first. Keep the irregular petals natural instead of making them perfectly identical, as real tulips have small differences in every bloom.
- Add the slim stalk and create the leaves with long, flowing shapes. Draw long leaves and slender leaves carefully so they follow the natural direction of the flower and improve the overall balance.
- Refine your sketch by checking proportions and improving the shapes before moving toward shading. Use graphite pencils carefully and focus on sketch refinement, observing, and building the foundation needed for realism.
Common problems and how to overcome them:
Many beginners press too hard while creating the first sketch, making visible lines difficult to erase and affecting paper damage and sketch quality. Keep the first marks light, avoid rushing details and adjust the structure before adding shading.
When I first sketched tulips, I tried to make the petals perfect, which made the flowers look artificial. I learned that observing small irregularities creates more realistic results. After practicing with lighter lines and simple shapes, my tulip sketches became cleaner and easier to refine.
Shading the First Layer
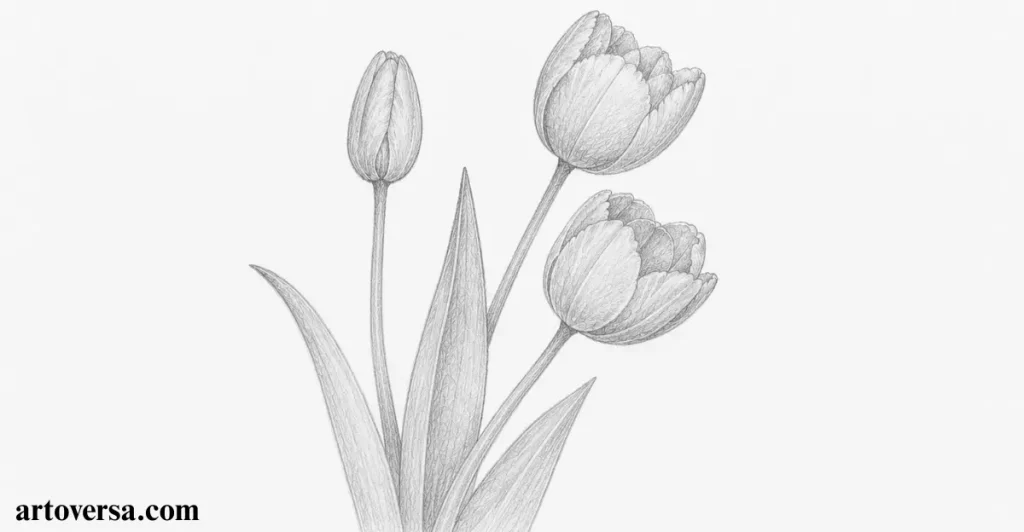
Build the foundation of your tulip artwork with a soft first shading layer that creates depth without losing the clean sketch.
- Start the basic shading by applying the first layer across the entire drawing using a controlled single pencil. Keep this stage as simple shading with light uniform strokes to create an even base.
- Maintain uniform pressure while shading and adjust your pencil angle to control the darkness. Use a relaxed free hand movement so the shading process feels smooth and natural.
- Choose an HB pencil for the first tones and gently build the tulip color areas. Use an H pencil or 2H pencil where you need lighter values to keep the tulip flowers looking bright.
- Continue with stem shading and leaves shading by following their natural direction. This pencil shading step adds form to the tulip drawing while keeping the basic structure clean.
- Use a slight pencil tilt for softer marks and create vertical shading where needed. Keep the strokes light and controlled to achieve a smooth shade and complete the first shading layer.
Common problems and how to overcome them:
A common mistake is applying uneven pressure, which creates patchy shading and removes the softness of the first layer. Many beginners also darken areas too quickly before building a base. Use light strokes, keep the pencil movement consistent, and slowly develop the tones.
When I first worked on the first shading layer, I focused too much on making the drawing dark immediately. It made the tulips lose their soft appearance and became difficult to correct. After practicing lighter layers, I learned that a smooth foundation creates much better depth later.
Defining values and shading the shadows
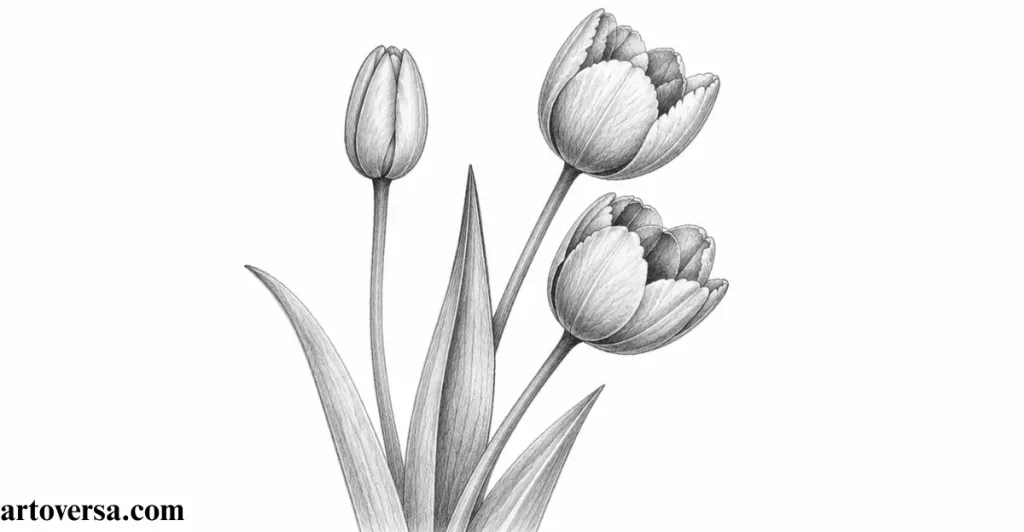
Add depth and realism to your tulips by learning how to place shadows correctly and create a natural three-dimensional effect.
- Begin shading shadows by studying the light direction and creating a simple value scale to understand where the darkest and lighter areas should appear. This shading technique helps you build a clear drawing system instead of adding random dark marks.
- Focus on the tulip petals and carefully observe the petal overlap where shadows naturally form. Add darker tones to the dark areas, especially between the front petals and back petals, to create more depth.
- Gradually increase the darks to develop a three-dimensional effect and improve flower realism. Smooth transitions between values will create better visual depth and make the tulip appear more natural.
- Add shadows around the flower stalk and improve stem shading by considering areas where light becomes blocked. Continue with leaves shading while following the natural light direction of the reference.
- Complete the stage by improving small shading details through careful drawing observation. Focus on the captured details of the tulip flower and adjust tones until you achieve a more realistic effect.
Common problems and how to overcome them:
Many beginners place shadows randomly without checking the light source, which makes the flower look flat. Another common issue is making all petals equally dark and losing the natural overlap. Observe where shadows actually appear and build values slowly.
When I first shaded tulip petals, I focused only on making dark areas stronger instead of understanding why they appeared. The flowers looked heavy and lacked softness. After practicing observation and value control, I learned that correct shadow placement creates realism more than adding extra darkness.
Final Tulips Drawing with Highlights
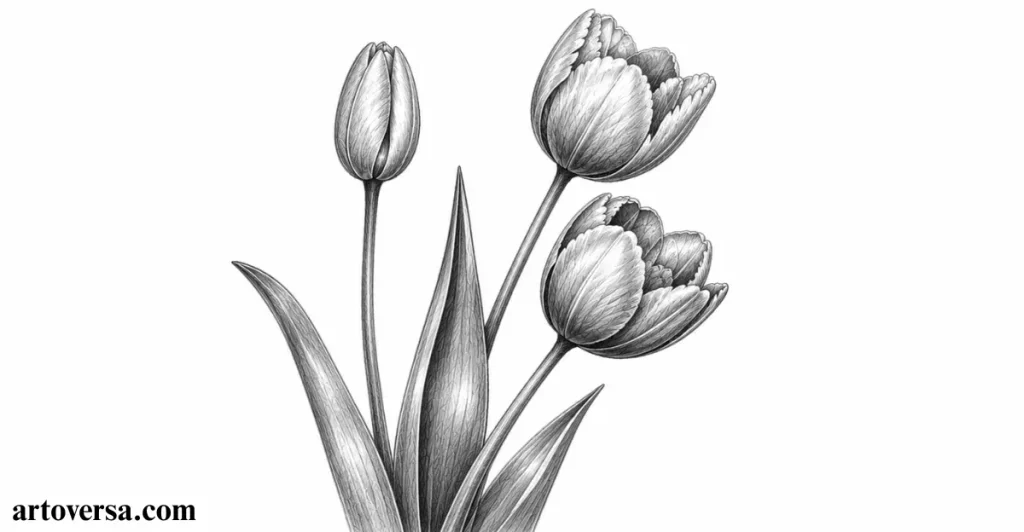
Add the finishing touches with controlled highlights and contrast to transform your tulip sketch into a realistic artwork.
- Start refining the final drawing by reviewing the overall tulips and checking the balance between shadows and light. Add subtle highlights carefully to create a natural realistic effect without making the artwork look over-edited.
- Use value scales to compare the dark values and light areas throughout the drawing. Adjust the smooth contrast by checking your shading evaluation and making small changes where the tones need more balance.
- Add detailed highlights around the petal tips, edges, leaf veins, and stem where natural light reflection appears. These small improvements help the flower structure feel more realistic and refined.
- Use a pointy eraser for precise highlight creation and lift small areas of graphite to show reflected light. Blend surrounding tones gently with a blending stump to keep transitions smooth.
- Finish with soft highlights and restrained highlights to enhance the shiny petals without creating a fake glass effect. Use careful graphite blending to complete a realistic tulip drawing with natural depth.
Common problems and how to overcome them:
Many artists add too many highlights, making petals look shiny like plastic instead of natural. Another mistake is creating strong light spots without balancing the dark values. Keep highlights soft, compare the contrast, and add only the areas where light truly reflects.
When I first added highlights to flower drawings, I thought brighter marks would automatically create realism. Instead, the petals started looking artificial and overworked. I learned that controlled highlights and balanced contrast make a bigger difference than adding more brightness. After practicing, my tulip drawings became softer and more natural.
Conclusion
Drawing tulip flowers is a great way to practice your observation skills and improve your pencil drawing techniques. By following each step carefully, you can learn how to create accurate shapes, smooth petal curves, realistic shading, and beautiful details. Even if you are a beginner, patience and regular practice can help you create a more natural-looking tulip drawing. Focus on understanding light, shadows, and textures to bring your artwork to life. Keep exploring different flower drawings and enjoy the creative journey of improving your skills.
FAQs
What is the easiest way to start drawing a tulip flower?
The easiest way is to begin with simple shapes to create the basic outline of the tulip, then gradually add petals, stem, leaves, and details.
Which pencils are best for drawing realistic tulips?
Using a range of pencils like 2H, HB, 2B, and 4B can help create light outlines, smooth shading, and darker shadows for realistic effects.
How can I make tulip petals look more realistic?
You can make petals look realistic by adding soft shading, following the natural curves, and creating highlights where light reflects on the surface.
Is drawing a realistic tulip difficult for beginners?
No, beginners can easily learn to draw a realistic tulip by practicing basic shapes, studying references, and following step-by-step instructions.
How can I improve my flower drawing skills?
You can improve by practicing different flowers, observing real plants, experimenting with shading techniques, and focusing on small details like texture and light.
Please Write Your Comments