Drawing a Realistic Koala – How to Draw a Koala with Pencils
Updated: October 7, 2026
16
Drawing a realistic koala is a great way to build your pencil drawing skills and enjoy creating wildlife art. Its soft fur, round ears and gentle face make it an interesting subject for artists of every skill level. This guide breaks the process into simple steps that are easy to understand and follow. You will learn how to create the correct shape add realistic fur and build smooth shading with confidence. Take your time with each stage and you will finish with a koala drawing that looks natural and full of life. Keep practicing with your pencils and watch each sketch become more detailed, more natural and more confident.
Table of Contents
Needed Material
Before you begin gather a few basic drawing tools to make the process easier and more enjoyable. These simple materials will help you create accurate shapes, soft fur textures, and smooth pencil shading.
- Graphite Pencils (HB, 2B, and 4B): Use an HB pencil for the basic sketch, a 2B pencil for outlines, and a 4B pencil to add darker shadows and realistic fur details.
- Drawing Paper: Choose smooth or lightly textured paper that works well for sketching and blending.
- Kneaded Eraser: Lift highlights, clean small areas, and correct mistakes without damaging the paper.
- Blending Stump: Blend pencil marks smoothly to create soft fur and natural-looking shading.
- Pencil Sharpener: Keep your pencils sharp for drawing fine details around the eyes, nose, ears and fur edges.
How to Draw a Koala Step by Step with Pencils
Follow these simple pencil steps to create a realistic koala with better shapes soft fur and natural shading.
Step 1: Draw the Main Segments
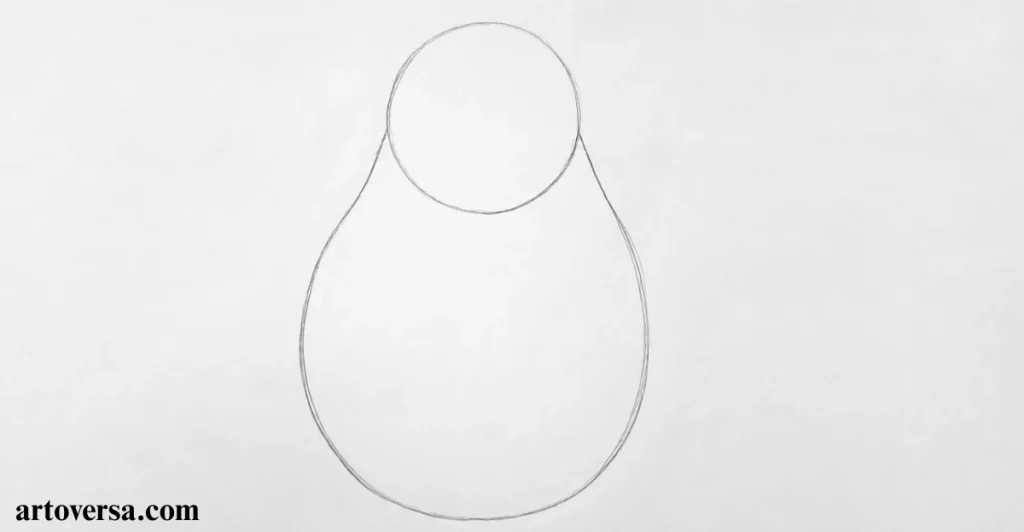
- Begin by dividing the koala into two simple main shapes instead of chasing small details. This creates a strong base and makes the early drawing much easier to control.
- Sketch a light circle for the head and connect it with a soft tapered oval for the body. Keep every line loose so changes can be made without leaving heavy marks.
- Compare the proportions while sketching and remember the body should be about twice the size of the head. This keeps the overall shape looking balanced and natural.
- Notice how the lower part of the body looks similar to a butternut squash. Using this simple shape helps build the correct form before adding realistic features.
- Step back and check both segments together before moving ahead. A balanced foundation makes every later stage of the koala sketch much smoother.
Common problems and how to overcome them
Many beginners rush this stage and ignore the proportions between the head and body. Keep the main shapes light and adjust the segments until the overall drawing looks balanced before adding details.
When I first started drawing animals, I skipped the basic structure and focused on details too early. After practicing with simple main shapes, my koala sketches became more accurate and much easier to complete.
Step 2: Draw the Basic Shapes
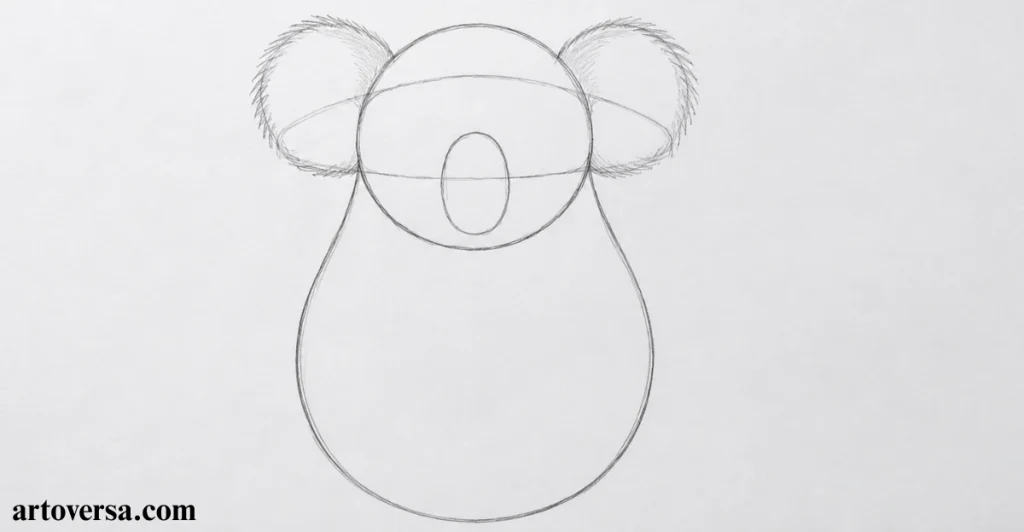
- Draw the basic shapes by sketching a light top oval that crosses the head circle through the center. Keep every line soft because these guides will help place the next features more accurately.
- Continue by placing the koala ears inside the top oval at the opposite ends. Give both ears the same amount of space so the head keeps a balanced appearance.
- Add a smaller oval inside the circle to mark the position of the nose. Keep it close to the middle because this guide will support the facial structure later.
- Now compare each guiding shape before moving ahead with the sketch. Small adjustments at this stage are much easier than fixing the full face afterward.
- Look over the head circle top oval koala ears and smaller oval together. When every shape feels balanced, you are ready to continue with confidence.
Common problems and how to overcome them
Many artists draw the top oval too wide or place the smaller oval away from the middle of the head circle. This makes the koala ears and nose look uneven. Keep every guiding shape light and compare both sides before moving to the next step.
The first few times I drew a koala, I rushed through the guides and the face never looked balanced. After I slowed down and checked each basic shape one by one, the sketch became cleaner and much more natural to finish.
Step 3: Sketch the Complete Outline of the Koala
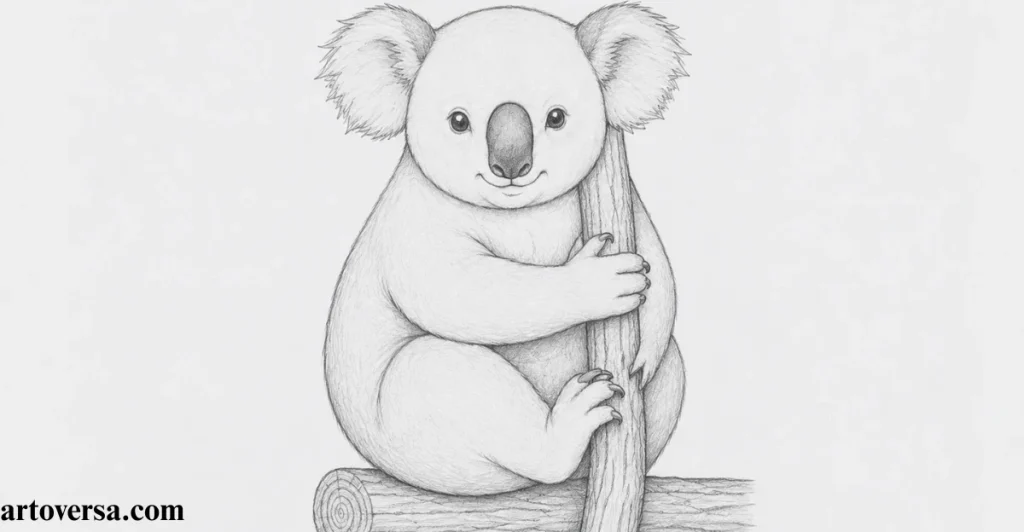
- Begin with the four shapes already on the page. Use the circle for the head, the two ovals for the ears and nose, and the large oval to shape the body.
- Continue by joining the guides into one smooth outline. Form the head first, then shape the ears before placing the eyes, nose, and a soft curved mouth.
- Move on to the visible front limbs and back limbs. Draw them with gentle lines and leave the second pair hidden because the koala is facing slightly to one side.
- Add the tree trunk beside the koala and sketch the stick resting between its paws. Keep both lines simple so they support the pose without taking attention away.
- Finish by checking the complete outline from top to bottom. Make small changes where needed before darkening the final drawing.
Common problems and how to overcome them
Rushing into the final outline before checking the head, body, and limbs can throw the whole koala out of balance. Follow the original shapes until every feature sits in the right place. Darken the lines only after the full sketch looks correct.
During my early practice, small mistakes in the guide shapes made the finished outline look uneven. Careful observation and slow adjustments produced cleaner koala sketches with a much more natural appearance.
Step 4: Cleaning Up
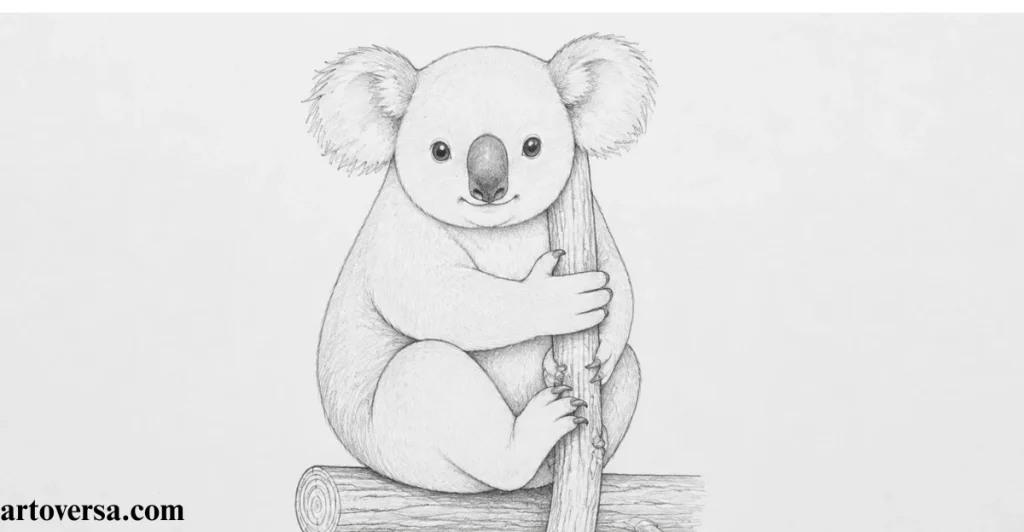
- Begin by erasing the construction shapes used to build the koala. Remove each guide line carefully and leave the final outline clear and easy to see.
- Pick up a battery eraser and clean the remaining light marks. Work gently so the paper stays smooth and the important lines remain untouched.
- After that, examine the complete sketch from top to bottom. Look around the head, body, and tree trunk for any guide marks that still appear.
- Then erase every accidental stroke found inside or outside the sketch. Keep only the finished drawing before moving to the next stage.
- Review the complete outline one last time. Make sure every unwanted line has disappeared, and the koala looks neat before shading begins.
Common problems and how to overcome them
Leaving extra guide lines behind can make the finished sketch appear messy. Clean the outline little by little instead of erasing everything at once. This keeps the koala ready for the next step.
Steady practice showed that careful cleaning improved every finished drawing. Using a battery eraser with light pressure produced a much cleaner sketch. The final outline always looked sharper before shading.
Step 5: Basic Shading
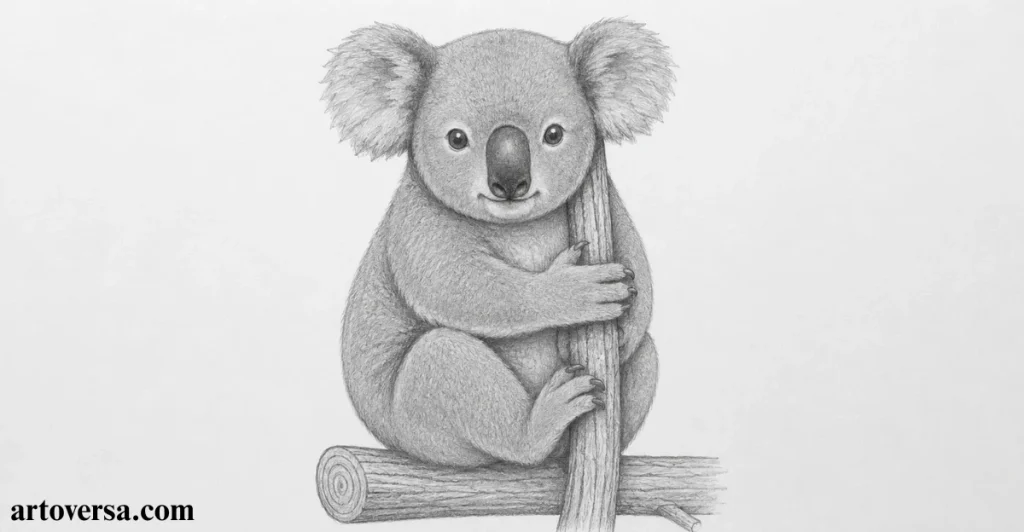
- Start by covering the entire sketch with a light layer of graphite. Leave the eyes untouched so they stay clean for the later details.
- Continue using an HB pencil with soft circular strokes across the drawing. Build the tone slowly instead of making dark areas too soon.
- Choose the hatching method if you prefer visible pencil texture. Keep the strokes close together so the shading looks even.
- Apply graphite powder with a Q-tip whenever a smoother finish is needed. Spread the tone gently across the surface.
- Finish by blending the shaded areas until the texture looks soft and even. This gives the koala a natural base before adding darker details.
Common problems and how to overcome them
Adding dark graphite too early can flatten the sketch and hide the lighter tones. Build the shading in thin layers and use blending after each pass. This creates better depth across the koala.
Over several drawings, lighter shading proved much easier to control than heavy pencil pressure. Gentle blending created smoother transitions across the graphite. The finished koala looked softer and more realistic.
Step 6: Shading the Koala’s Nose, Eyes, Ears, and Mouth
- Begin by filling the eyes with an 8B pencil while leaving the tiny highlights white. This keeps the eyes bright and full of life.
- Shade the nose using a 6B pencil and build the darker value slowly. Keep the edges soft to maintain a natural appearance.
- After that, add gentle shading inside the ears and compare both sides carefully. Match the tones before moving to the next feature.
- Then darken the mouth with a soft curved line that follows the smile. Avoid making the curve too thick or too dark.
- Smooth the eyes with a blending stump and blend the remaining areas using a Q-tip. Keep every feature soft and connected.
Common problems and how to overcome them
Darkening the eyes, nose or mouth too quickly can hide the smaller details. Build each tone with the 8B pencil, 6B pencil, and gentle blending. Protect the highlights until the shading is complete.
Repeated sessions made careful shading much more consistent than rushing the darker areas. Saving the highlights until the end improved every facial feature. The finished koala always appeared more lifelike and balanced.
Step 7: Shading the Body
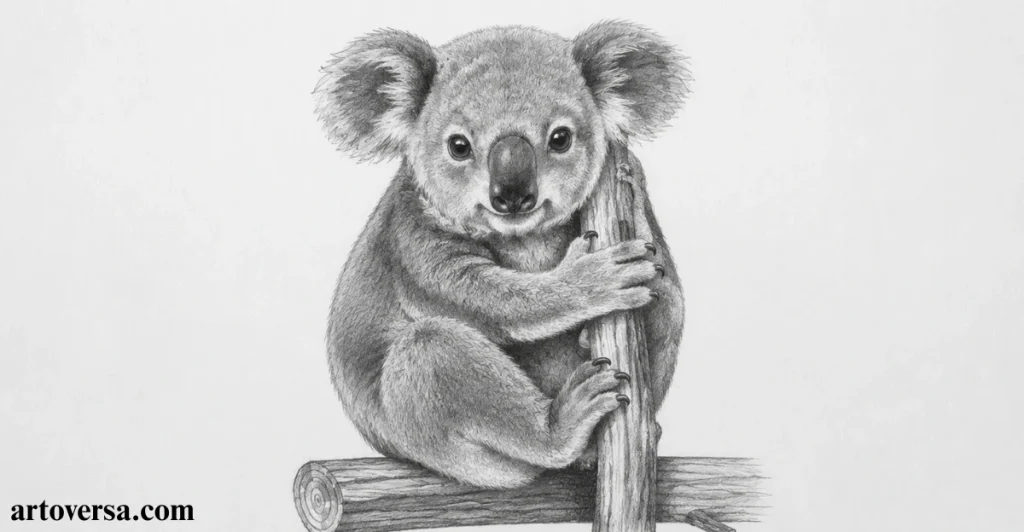
- Apply the darkest shadows across the body before working on the lighter areas. This makes the value scales easier to control and keeps the shading balanced.
- Build the midtones little by little until they blend smoothly into the darker sections. Keep every layer soft so the surface looks natural.
- Add the lighter reflections only after the main tones are complete. This helps show how light falls across the drawing subject.
- Blend the graphite after each stage instead of waiting until the end. Smooth transitions create a softer and more realistic finish.
- Review the full body before adding extra darkness. A smooth shade should clearly show how light interacts with the drawing subject.
Common problems and how to overcome them
Building dark shadows across the whole body too early can hide the midtones and reflections. Develop the value scales gradually and smudge the graphite after each stage. This keeps the shading soft and realistic.
Regular observation made it easier to understand how light changes every surface. Careful control of the value scales created smoother shading throughout the body. Each drawing looked more natural with patient blending.
Step 8: Shading the Koala’s Fur
- Study the direction of the fur across each part of the koala before making any pencil marks. Every section grows differently and should follow its natural flow.
- Focus on the head first and continue toward the rest of the body. Following one area at a time keeps the texture more consistent.
- Create small marks with a kneadable eraser or battery eraser to separate the lighter strands. Keep the marks soft and evenly spaced.
- Draw short strokes with a mechanical pencil or a sharpened 4B pencil. Follow the direction of growth so the fur looks soft and realistic.
- Soften the fur farther from the eye with gentle smudging while keeping the area near the eye sharper. This creates a natural sense of depth.
Common problems and how to overcome them
Ignoring the natural direction of the fur can make the koala look flat and untidy. Follow the growth pattern before using the mechanical pencil or 4B pencil. Use gentle smudging only where the texture should appear softer.
Careful practice revealed that realistic fur depends more on direction than dark shading. Small strokes and controlled smudging produced a softer texture across the koala. The final result became much more lifelike with every attempt.
Step 9: Detailed Shading
- Deepen the darkest shadows across the koala before adjusting the lighter areas. Strong contrast helps every feature stand out with a more realistic appearance.
- Brighten the highlights by lifting small amounts of graphite with a kneadable eraser. Keep each highlight soft so the light looks natural on the fur.
- Strengthen the darker fur using a sharp 6B pencil in the shadowed parts of the body. Build the texture with short controlled strokes instead of heavy lines.
- Shade the tree log with smooth layers that match the lighting on the koala. Keep the tones balanced so the subject remains the main focus.
- Inspect the complete drawing from top to bottom before finishing. Make small adjustments to the shadows, highlights, and fur until everything looks balanced.
Common problems and how to overcome them
Overworking the final shadows or removing too many highlights can reduce the natural depth of the drawing. Add the darker tones with a 6B pencil little by little and lift graphite carefully with a kneadable eraser. This creates a balanced and realistic finish.
With every completed portrait, the final adjustments became easier to judge. Careful attention to the highlights, fur and tree log added a stronger sense of realism. Patient finishing touches always brought the koala to life.
Conclusion
Drawing a realistic koala is a rewarding way to improve your pencil techniques while developing better observation skills. Every stage brings more confidence and helps create cleaner shapes, smoother shading, and softer fur. Stay patient throughout the process and allow each detail to develop naturally. Mistakes are part of learning, and every completed sketch adds valuable experience. Continue practicing different animal subjects to strengthen your artistic ability and refine your style. Regular effort will make each new drawing look more realistic and full of character. Keep your pencils ready and enjoy the progress that comes with every creative session.
FAQs
What materials do I need to draw a realistic koala?
Use graphite pencils, drawing paper a kneadable eraser, and a blending stump. These simple tools help you create clean sketches with smooth shading. They also make fine details easier to draw.
How can I make the koala’s fur look soft and natural?
Draw short pencil strokes that follow the natural direction of the fur. Blend the shading gently and lift small highlights with a kneadable eraser. This gives the fur a soft and realistic appearance.
What pencils are best for drawing a realistic koala?
Start with an HB pencil for the basic sketch. Use 4B, 6B, and 8B pencils to build darker values and stronger contrast. Different grades help create a more realistic drawing.
Why should I start with simple shapes before adding details?
Simple shapes help you build the correct proportions from the beginning. They make changes easier before adding facial features and fur. A strong foundation leads to a better final result.
How do I improve shading in a koala pencil drawing?
Apply light layers of graphite instead of pressing hard. Blend each layer before making the shadows darker. This creates smooth tones with natural depth.
How long does it take to complete a realistic koala drawing?
The time depends on your experience and drawing speed. A detailed sketch may take several hours to finish. Working patiently produces the best outcome.
Please Write Your Comments