An Easy Tutorial for Drawing a Single Feather
Updated: October 14, 2026
16
Drawing a single feather is a simple and enjoyable way to practice your sketching skills while learning to create delicate details and natural textures. With a few basic lines, gentle curves, and light shading, you can turn an ordinary outline into a beautiful feather drawing. This easy tutorial for drawing a single feather will guide you through each step, from shaping the central shaft to adding fine barbs that give your sketch a realistic appearance. Grab your pencil and paper, follow along and create your own feather drawing with confidence.
Table of Contents
Wing Feather Anatomy (Parts)
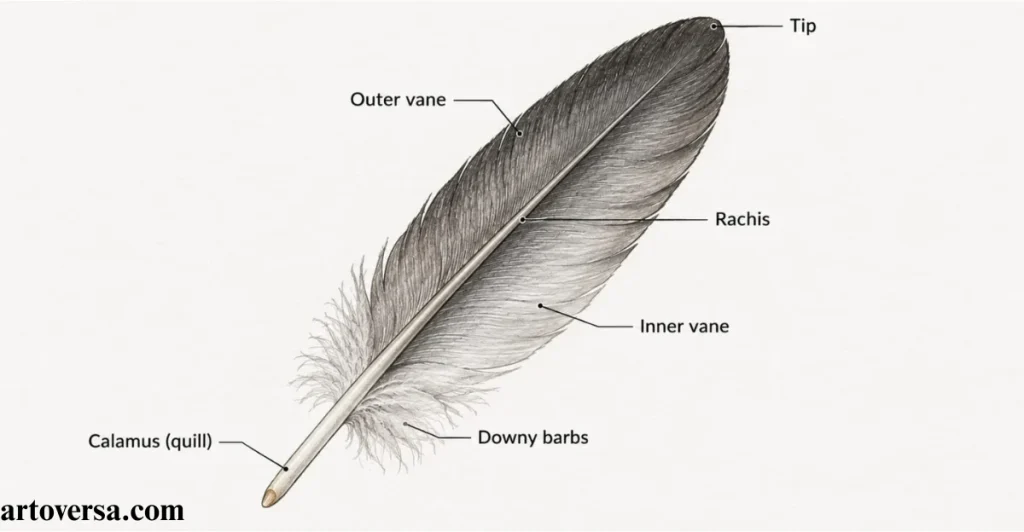
Understanding feather anatomy can make your drawing more accurate without requiring you to memorize complicated scientific terms. Explore the main structures below to learn how each part contributes to a feather’s natural shape, texture and appearance.
- Start with the basic structure by identifying the central shaft, broad vane and delicate strands that form the feather’s surface.
- Observe the natural arrangement of its parts, noticing how the shaft supports the vane and how smaller strands extend outward.
- Pay attention to proportions because the length of the shaft and width of the vane determine the feather’s overall appearance.
- Notice subtle irregularities along the edges as natural feathers rarely have perfectly even sides or identical strands.
- Study a clear reference image to understand how light, shadows and overlapping structures affect the feather’s appearance.
In my drawing practice, understanding the basic anatomy helps me organize the sketch before adding details. I focus on the shaft and vane because they establish the feather’s main structure. Observing natural irregularities also prevents the drawing from looking artificial. This foundation makes later shading and detailing much easier.
Hollow Shaft (Calamus) and Rachis
Ready to create the backbone of your feather drawing? Focus on the hollow base and solid upper shaft to establish a natural curve and give the entire sketch a strong foundation.
- Begin by drawing a light central line that gradually tapers from the base toward the upper tip of the feather.
- Identify the calamus as the hollow lower section that attaches to the bird’s body, keeping its shape slightly rounded.
- Extend the rachis upward from the calamus, allowing the shaft to become narrower and more defined as it approaches the tip.
- Adjust the curve according to your reference image because a slight bend can make the feather appear more natural than a perfectly straight line.
- Consider the direction of the light source when adding a soft shadow along one side of the shaft to suggest depth.
I usually establish the shaft before outlining the outer feather shape. This gives me a reliable guide for placing the smaller strands. A gentle curve helps the drawing feel more organic. Keeping the first lines light also makes proportion corrections easier.
Vane
Give your feather its recognizable silhouette by carefully outlining the vane on both sides of the shaft. A balanced outer shape and naturally uneven edges can make even a simple graphite sketch look more convincing.
- Sketch the outer boundaries of the vane using the reference image to guide its length, width and overall direction.
- Compare both sides of the shaft, allowing one vane to be slightly wider or longer when the reference shows natural asymmetry.
- Leave small variations along the edges instead of creating a perfectly smooth outline that makes the feather look artificial.
- Connect the outer contour to the pointed tip with gradual curves that follow the feather’s natural growth pattern.
- Divide the vane visually into smaller sections by planning the direction and spacing of the barbs before beginning detailed shading.
I have found that the outer silhouette strongly influences how realistic a feather appears. When both sides are made identical, the result can look too mechanical. Studying the reference helps me identify small differences in width and curvature. Once the outline feels balanced, adding texture becomes much easier.
Barbs and Barbules
Bring your feather to life by studying the fine strands that create its soft, layered surface. Use directional pencil strokes to suggest their arrangement without attempting to draw every microscopic detail individually.
- Start near the central shaft and create short, tapered strokes extending outward to represent the barbs.
- Vary the length and spacing of these strands so the vane looks naturally arranged rather than uniformly patterned.
- Use lighter marks in delicate areas and slightly darker strokes where the strands overlap or create subtle shadows.
- Remember that barbules are tiny structures connecting neighboring barbs, so suggest their effect through texture instead of drawing every individual hook.
- Follow the feather’s natural direction throughout the vane to maintain a consistent flow and avoid scattered, disconnected marks.
When adding feather texture, I find that directional strokes work better than random lines. Changing their length slightly helps create a natural surface. I also avoid overcrowding the vane with excessive details. This approach keeps the sketch soft while preserving the impression of individual strands.
Afterfeather
Add a softer touch to your artwork by exploring the fluffy structure near the base of certain feathers. Gentle loose strokes can distinguish this area from the smoother and more organized main vane.
- Examine the lower portion of your reference to determine whether an afterfeather is visible around the calamus.
- Use loose graphite strokes to suggest the soft, fluffy texture without creating a hard outline around the entire area.
- Keep the strands irregular in length and direction to distinguish the afterfeather from the more structured barbs.
- Apply light shading gradually, building a subtle tonal difference between the fuzzy base and the main feather surface.
- Preserve a few lighter spaces between the strokes to maintain an airy appearance rather than producing a solid, dark patch.
I treat the afterfeather as a softer texture than the main vane. Short, loose strokes help me create this difference without using heavy outlines. Leaving small gaps between the marks makes the area feel lighter. I also check the reference carefully because this feature is not equally visible on every feather.
Drawing a Single Feather – Steps to Follow
Now that you understand the main parts of a feather, it is time to combine them into a complete drawing. Follow these stages in order to build the structure and refine the smallest details with graphite pencils.
- Choose a suitable reference image that clearly shows the feather’s outline, central shaft, and texture.
- Prepare your graphite pencils, eraser, and paper before beginning so you can move smoothly between sketching and shading.
- Establish the main proportions with light lines, checking the feather’s length, width and direction before refining the shape.
- Develop the surface gradually by adding the barbs, shaft shading and softer details in separate stages.
- Finish by balancing shadows and highlights, making small corrections wherever the drawing looks too dark, uneven, or artificial.
I prefer working from a clear reference because it provides useful information about the feather’s shape and texture. Breaking the drawing into stages prevents the details from becoming overwhelming. It also allows me to correct the structure before shading begins. A gradual approach usually produces a cleaner and more controlled result.
Reference and Sketching the Central Shaft
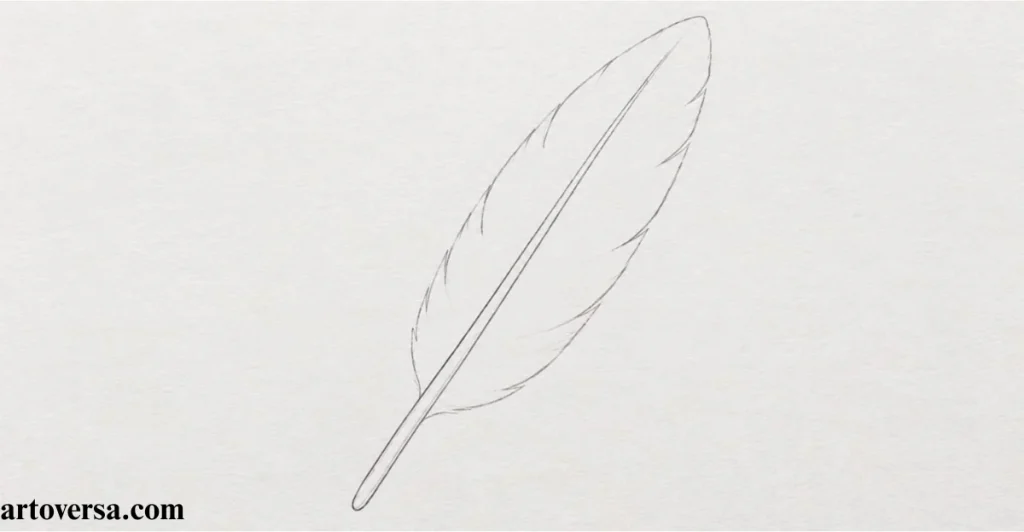
A well-chosen reference can guide every decision in your feather drawing, from its curvature to the arrangement of its strands. Begin with the central shaft to create a dependable guide for the rest of the sketch.
- Select a reference photograph that clearly displays the feather’s base, tip, and overall structure.
- Lightly mark the starting point and tip before connecting them with a gently curved graphite line.
- Shape the calamus at the base and continue into the rachis, keeping the transition smooth and proportionate.
- Check the shaft’s angle against the reference to make sure the feather does not lean too far in either direction.
- Keep your initial marks faint and editable, allowing the surrounding vane to be adjusted around the central structure.
I find that a carefully positioned shaft makes the rest of the feather easier to construct. It provides a guide for the outer shape and the direction of the barbs. Checking the angle early prevents major corrections later. Light graphite lines also help preserve a clean drawing surface.
Outline the Overall Feather Shape (Vane)
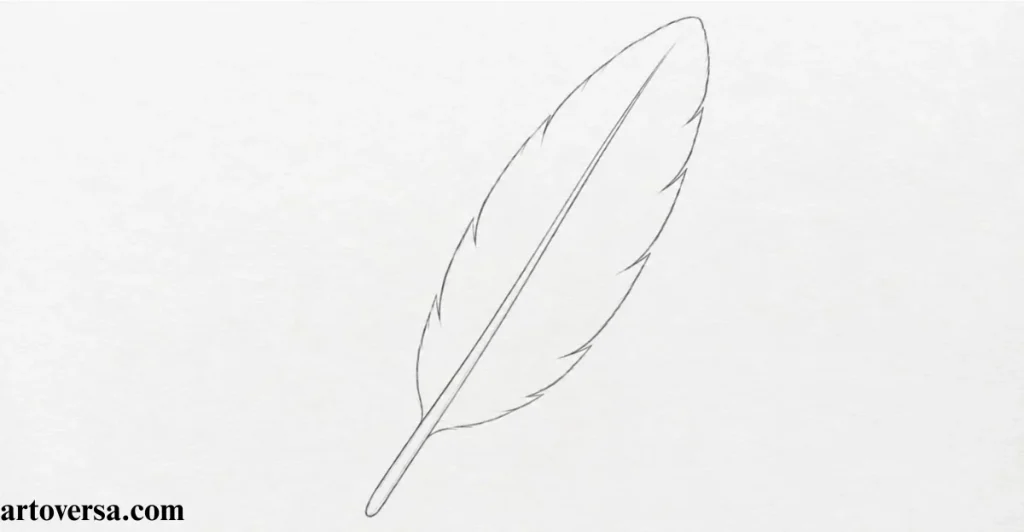
Create a recognizable feather silhouette by connecting the outer edges of the vane around your central shaft. Concentrate on the overall form first, then prepare the outline for the detailed strands and shading that follow.
- Trace the broad outer contour on both sides of the shaft using gentle curves rather than rigid geometric lines.
- Compare the width at the base, middle and tip to maintain a natural transition throughout the feather.
- Introduce slight irregularities along the edges where individual barbs create a fine uneven outline.
- Leave enough room inside the vane for the strands to spread outward without becoming cramped or overcrowded.
- Review the completed silhouette against the reference before proceeding, correcting any uneven curves or misplaced sections.
I usually step back from the sketch to judge the silhouette before adding texture. This helps me notice proportions that may be difficult to recognize up close. Small adjustments to the outer edges can improve the entire drawing. A balanced outline also makes later shading more effective.
Shade the Barbs That Make Up the Vane
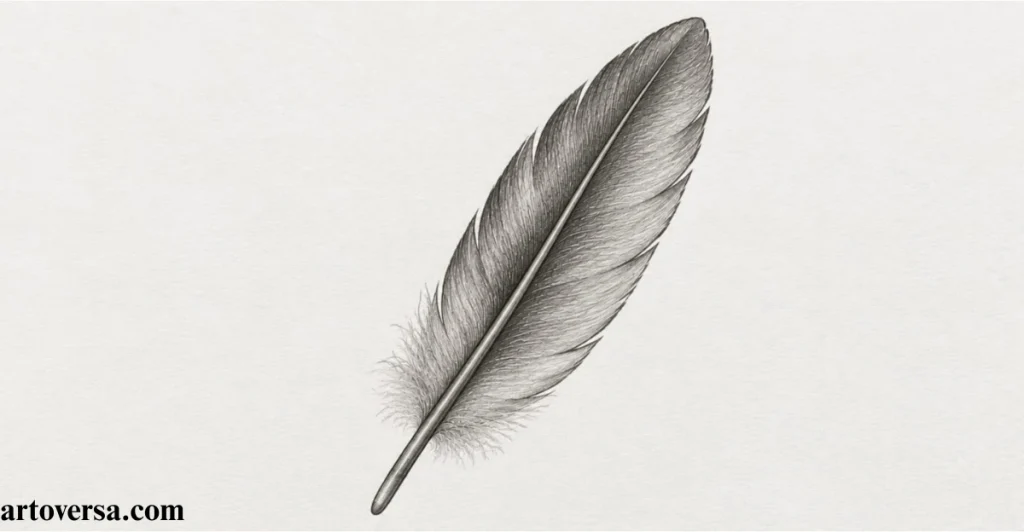
Build the feather’s surface with controlled graphite strokes that follow the direction of its natural strands. Start with a soft base tone then develop texture gradually while maintaining a consistent flow from the shaft toward the edges.
- Apply a light layer of graphite across the vane using an HB pencil to establish an even foundation.
- Use short, tapered hatching strokes that begin near the shaft and flick outward in the direction of the barbs.
- Vary the pressure slightly to create subtle differences between lighter strands and the shaded spaces around them.
- Blend selected areas gently with a blending stump, clean brush or cotton swab while preserving the directional texture.
- Leave the smallest details for later so the initial shading remains smooth and the feather’s overall form stays clear.
I prefer building the vane’s tone gradually instead of pressing hard at the beginning. Short directional strokes help preserve the feather’s natural flow. Gentle blending can soften the base tone without removing every strand. This balance between smooth shading and visible texture gives the drawing more depth.
Shade the Central Shaft and Afterfeather
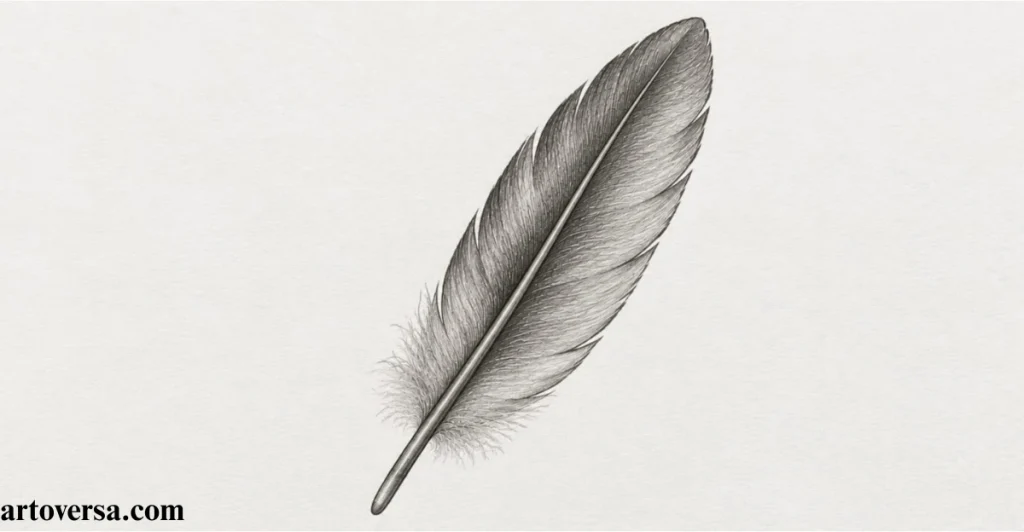
Refine the feather’s structure by adding tonal variation to its shaft and the softer area around its base. Careful contrast will help separate the central rachis from the vane while keeping the afterfeather light and fluffy.
- Introduce a soft shadow along one side of the shaft to suggest its rounded form and the direction of the light.
- Keep the calamus relatively light where appropriate, then add gradual tonal changes along the rachis.
- Deepen a narrow section near the center of the rachis if the reference shows a darker line or shadow.
- Sketch the afterfeather with loose, irregular strokes around the base avoiding the firm edges used for the main vane.
- Compare the contrast between the shaft, vane, and fluffy base to ensure that each part remains visually distinct.
I find that the shaft looks more realistic when its shading follows its length rather than crossing it randomly. A subtle gradient can suggest a rounded surface without making it too dark. Loose marks are especially useful around the afterfeather. These differences in texture help separate the feather’s individual structures.
Deepen the Shadows and Refine Feather Highlights
Complete your feather drawing by strengthening selected shadows and restoring delicate highlights. This final stage brings out the layered strands, improves contrast, and helps the feather appear softer and more dimensional.
- Switch to a sharpened 2B pencil to strengthen the darker areas between selected barbs and near the central shaft.
- Deepen the shadows around the edges where needed, following the reference rather than applying equal darkness across the entire vane.
- Refine the outer contour and individual strands with controlled strokes to clarify the feather’s shape without making it look rigid.
- Lift small amounts of graphite with a kneaded eraser to create fine highlights and suggest light catching the feather’s surface.
- Inspect the finished drawing for excessive darkness, uneven texture, or missing details, making final adjustments to maintain a natural appearance.
I leave the strongest contrast until the final stage because it is easier to judge the drawing once the basic tones are established. A sharpened pencil helps define selected strands without overwhelming the surface. Carefully lifted highlights can restore brightness where needed. Taking time to review the complete sketch helps create a more balanced finish.
Conclusion
Drawing a single feather becomes much easier when you focus on its simple outline, curved shaft, and delicate details one step at a time. By practicing the basic shape first and gradually adding fine lines and gentle shading, you can create a sketch that looks natural and graceful. Remember to keep your strokes light, vary the length of the barbs, and avoid making both sides too perfect, as small differences can give your feather a more realistic appearance. Whether you are a beginner or simply looking to improve your drawing skills, this easy tutorial provides a great starting point. Keep practicing with different feather shapes and sizes to build confidence and develop your own artistic style.
FAQs
What is the easiest way to draw a single feather for beginners?
Start by sketching a light central shaft, then create the outer feather shape with gentle curves. Add thin lines for the barbs and use soft shading to give the feather a realistic appearance.
Which pencils are suitable for a realistic feather drawing?
An HB pencil works well for the initial sketch, while 2B and 4B pencils help create darker shadows and depth. A sharp pencil is especially useful for drawing fine barbs and delicate details.
Why does my feather sketch look flat instead of realistic?
A feather may look flat when the shading lacks contrast or the barbs appear too uniform. Adding darker tones near the central shaft and keeping some areas lighter can create a more natural sense of depth.
How can I make the barbs and rachis look more detailed?
Use short, fine pencil strokes that extend outward from the central shaft at slightly different angles. Keep the rachis clearly defined and vary the length and darkness of the barbs to avoid an artificial appearance.
Where should beginners add shadows when sketching a feather?
Focus on the areas beside the central shaft, beneath overlapping barbs, and around the lower feather section. Build the shadows gradually with light layers so the delicate texture remains visible.
Please Write Your Comments