How to Draw an Ear From the Front Step by Step
Updated: October 16, 2026
12
Drawing an ear from the front can feel tricky for beginners because its curves, folds, and subtle shadows are not always easy to capture. However, learning to break the shape into simple lines and basic forms makes the process much more manageable. With a little patience, you can outline the outer ear, sketch the inner details and add shading to give your drawing a natural appearance. This step-by-step tutorial will guide you through each stage of drawing an ear from the front, helping you improve your observation skills and create a more realistic result.
Table of Contents
Make a Construction Line Drawing of the Outer Shape of the Ear
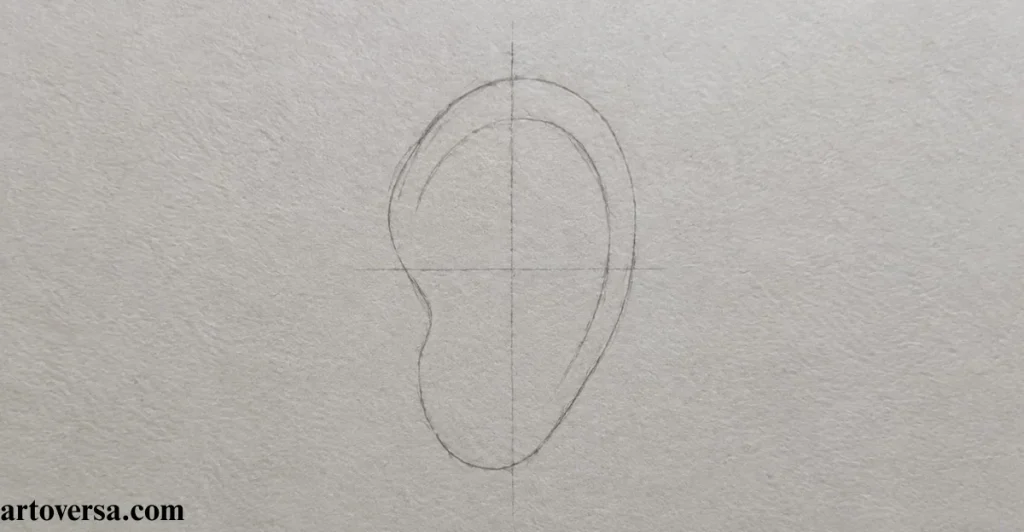
Start by creating a simple construction frame to establish the ear’s overall shape and proportions. Follow these points to make the outline easier to draw accurately.
- Draw a light oval or curved shape to represent the overall size of the ear. Keep the outline loose so you can adjust its proportions easily.
- Make the upper part slightly rounded and the lower part narrower. This helps create a natural ear shape instead of a perfect oval.
- Add light guidelines to mark the top, bottom and middle of the ear. These lines will help you position the inner structures accurately.
- Check the width and height of your construction frame before moving forward. Adjust any uneven proportions while the lines are still light.
- Use gentle pencil strokes throughout the construction stage. This makes unwanted guidelines easier to erase when refining the final outline.
From my practice, outlining the ear first helps me understand its overall structure before adding details. It keeps the proportions balanced and makes the drawing easier to refine. Light construction lines allow quick adjustments without damaging the outline. This simple method helps create a more accurate ear drawing.
Make a Construction Line Drawing of the Inner Shape
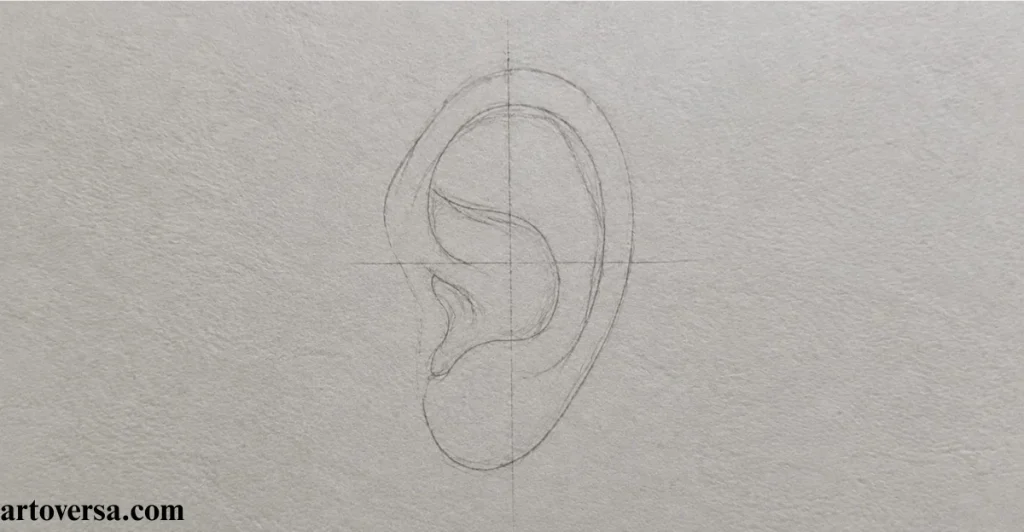
Once the outer frame is ready, begin placing the main folds and curves inside the ear. These guidelines will help you understand how the inner structures connect naturally.
- Trace the outer edge of the ear with smooth controlled pencil strokes. Follow the original construction frame while correcting any uneven sections.
- Refine the upper rim and connect its curves naturally. Avoid making the outline too dark until you are satisfied with its shape.
- Define the inner folds using gentle curved lines. Keep their edges natural instead of making every section look sharp or angular.
- Check the shape of the lower earlobe and its connection to the outer contour. Make small adjustments to ensure the bottom portion looks balanced.
- Erase the extra construction lines carefully after completing the main outline. Leave the important contours visible so the ear is ready for shading.
One thing I have noticed is that the inner folds give the ear its recognizable appearance. Building these shapes gradually prevents the drawing from looking crowded. Comparing each curve with the outer frame helps maintain balance. Careful construction also makes shading easier later.Taking time to refine each curve also helps the ear look more natural and realistic.
Make a Line Drawing Inside the Construction Lines
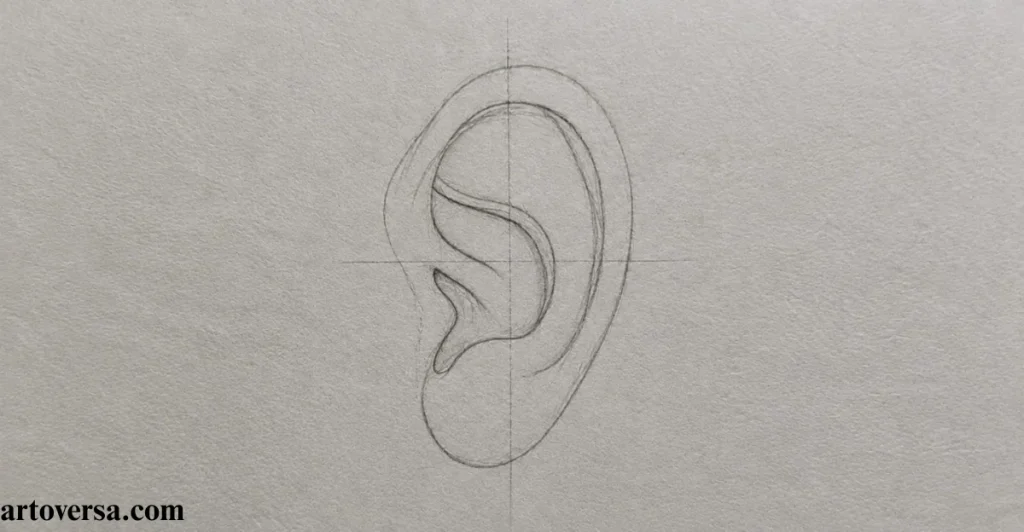
Now turn your rough guidelines into a clean line drawing by refining the outer contour and the inner folds. Keep the lines smooth and erase unnecessary construction marks when the shapes look correct.
- Lightly shade the lower portions of the ear’s curved structures. Use soft strokes to build a gradual transition between the lighter and darker areas.
- Darken the deepest folds where very little light reaches. Apply additional graphite carefully to create depth without hiding the inner details.
- Leave the upper surfaces lighter to represent the incoming light. These brighter areas help distinguish the raised curves from the recessed sections.
- Build shadows gradually with soft pencil strokes instead of pressing too hard. Layering the graphite gives you more control over the darkness and texture.
- Compare the dark and light areas across the whole ear to keep the shading balanced. Make sure one section does not appear noticeably darker or lighter without a reason.
From a drawing practice perspective, clean outlines make the shading stage much more manageable. I prefer refining the main curves before removing the guidelines completely. This helps preserve the ear’s natural structure. A neat line drawing also makes it easier to identify where shadows should fall.
Start Shading
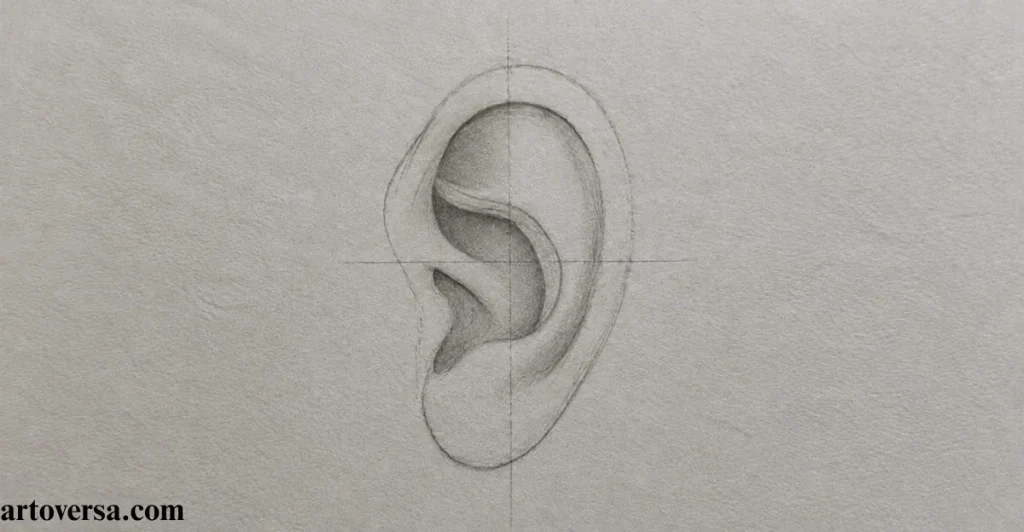
Starting with a complete sketch outline, begin adding light and dark values to give the ear a realistic appearance. Imagine the light coming from above so the shadows follow the lower sides of the curved surfaces.
- Lightly shade the lower portions of the ear’s curved structures. Use soft strokes to build a gradual transition between the lighter and darker areas.
- Darken the deepest folds where very little light reaches. Apply additional graphite carefully to create depth without hiding the inner details.
- Leave the upper surfaces lighter to represent the incoming light. These brighter areas help distinguish the raised curves from the recessed sections.
- Build shadows gradually with soft pencil strokes instead of pressing too hard. Layering the graphite gives you more control over the darkness and texture.
- Compare the dark and light areas across the whole ear to keep the shading balanced. Make sure one section does not appear noticeably darker or lighter without a reason.
During shading practice I have found that observing the direction of light makes a noticeable difference. The deepest folds usually need stronger shadows than the outer surfaces. Gradually building up graphite helps preserve detail. Keeping some areas light also makes the curved structures appear more natural.
Finish the Ear Drawing/Shading
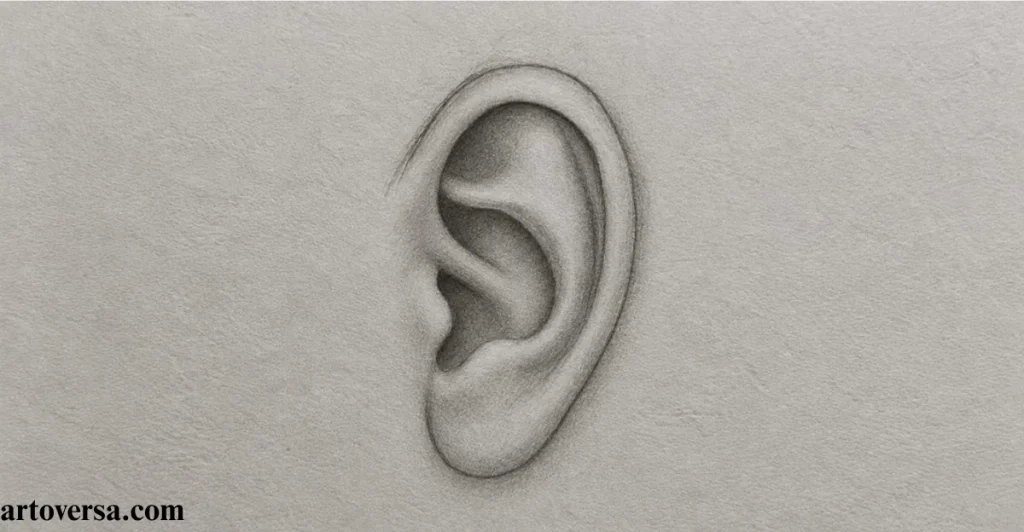
Complete your ear drawing by refining the tonal values and blending the shaded areas where necessary. Focus on creating smooth transitions that follow the ear’s natural curves rather than leaving harsh edges.
- Add extra pencil strokes to strengthen areas that look too light. Build up the graphite slowly until the shadows match the surrounding sections.
- Blend selected shaded areas gently to soften uneven transitions. Avoid excessive blending because it can remove important details from the inner folds.
- Deepen the darkest folds while preserving lighter surfaces. This contrast helps show which parts of the ear are recessed and which parts project outward.
- Smooth the shading along the curved rim and inner structures. Use gradual changes in tone to make the ear look rounded and three-dimensional.
- Review the complete ear and correct any areas that look too dark, too light or uneven. Remove any remaining unwanted marks while keeping the finished outline clean.
In my final checks I pay attention to how smoothly the light and dark areas connect. Soft transitions help the ear look rounded instead of flat. I also compare the inner folds with the outer contour to maintain consistent depth. Small adjustments at this stage can make the finished drawing look much more realistic.
Conclusion
Drawing an ear from the front becomes easier when you focus on its overall shape before adding the smaller details. By following each step, you can learn to sketch the outer outline, define the inner folds, and use gentle shading to create depth and a realistic appearance. Remember that ears come in different shapes and sizes, so taking time to observe proportions can make a noticeable difference. Keep practicing with simple pencil strokes and refine your work as your confidence grows. With patience and consistent practice, you can create a natural-looking ear drawing and strengthen your overall drawing skills.
FAQS
How to Make a Fake Ear for Drawing or Craft Projects?
You can make a fake ear using modeling clay, silicone or craft foam by shaping the outer rim, earlobe and inner folds. Add realistic details with small sculpting tools and use suitable colors to create natural skin tones and shadows.
What Are Fake Ears Called, and What Does the Perfect Ear Look Like?
Fake ears are commonly called prosthetic ears or artificial ears, depending on their purpose. A well-proportioned ear has natural curves, balanced cartilage folds and an earlobe that fits harmoniously with the rest of the ear and the face.
Why are shadows important in realistic ear drawings?
Shadows are important in realistic ear drawings because they create depth and make the cartilage folds look three-dimensional. Proper shading also highlights the raised areas defines the inner ear structure and adds natural contrast between light and dark tones.
Can you draw an ear realistically without a reference image?
Yes, you can draw an ear realistically without a reference image by learning basic ear anatomy, proportions and cartilage folds. Practise sketching the outer outline, adding inner curves and building shadows gradually to create depth and natural-looking details.
Please Write Your Comments