How to Draw a Snake Tattoo Design Step by Step
Updated: October 17, 2026
10
A snake tattoo design is a striking drawing idea that combines flowing curves, intricate details, and bold shapes to create an eye-catching design. Although a snake’s twisting body and overlapping scales may seem difficult to draw breaking the process into simple steps makes it easier for beginners to follow. You can start by sketching the snake’s overall shape refine its head and body and then add scales, patterns and finishing details. This step-by-step tutorial will guide you through drawing a snake tattoo design while helping you develop better line control, balanced proportions and confidence in your drawing skills.
Table of Contents
Choose the Right Tools for Your Snake Tattoo
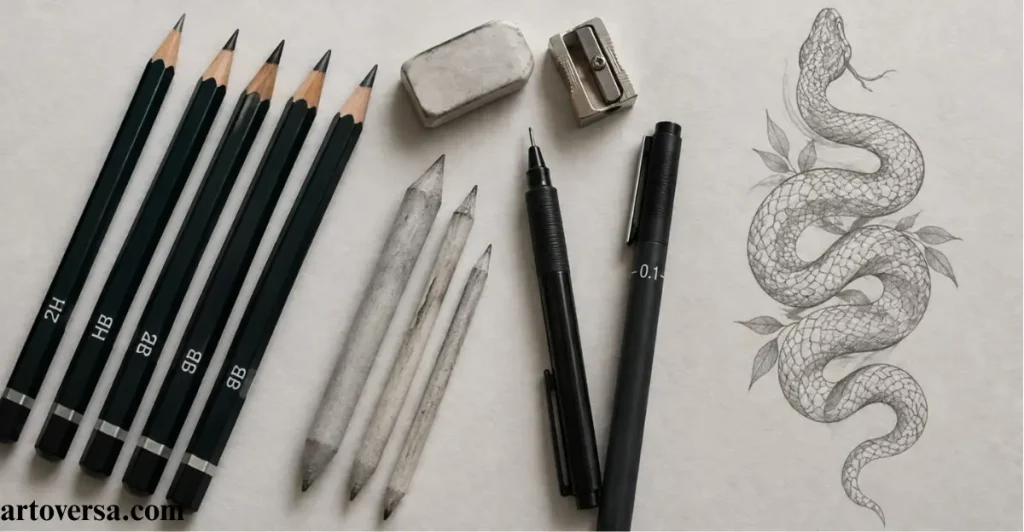
Start your snake tattoo drawing with tools that help you create smooth curves and clear outlines. Whether you use traditional pencils or digital software like Procreate, choosing the right brushes makes the process easier.
- Determine an HB pencil or a light sketching brush to create the first outline and establish the snake’s basic shape.
- Choose a fine liner for the eyes, mouth and smaller features to keep the facial details clean and precise.
- Select a thicker brush for bold outlines, especially when creating a traditional tattoo style with strong edges.
- Try a textured brush to add scales and decorative patterns without drawing every tiny detail individually.
- Keep an eraser or digital undo option ready so you can correct uneven lines and adjust the design easily.
From my experience starting with simple tools helps keep the drawing process manageable. A light sketch makes it easier to adjust the snake’s proportions before adding darker lines. I also find that testing different brush sizes improves line consistency. These small preparations can make the finished design look much cleaner.
Decide on the Snake Tattoo Size and Placement
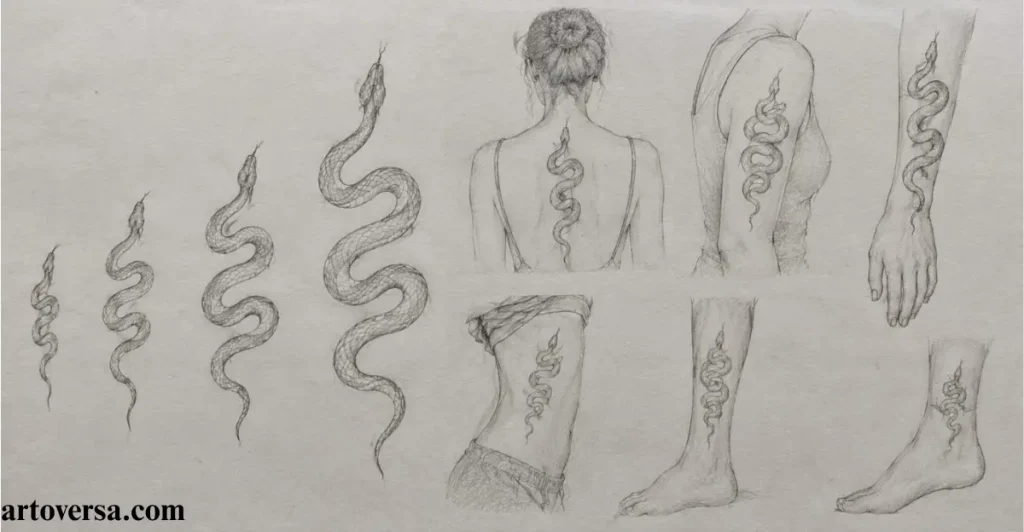
Before drawing the complete snake, decide how large the tattoo will be and where it is intended to fit. A snake’s long, flexible body can follow natural curves making it suitable for several tattoo compositions.
- Decide on a compact snake head if you want a simple tattoo that requires less space and fewer intricate details.
- Consider a full-body snake for larger areas where its curves, patterns and tail can be displayed clearly.
- Opt for an S-shaped curve to create a natural body position that gives the tattoo movement and visual flow.
- Leave enough space between overlapping body sections so the curves remain distinct and easy to recognize.
- Consider placements such as the forearm, upper arm, calf or thigh before deciding on the final composition.
One thing I have noticed is that the overall shape matters more than adding extra decoration. A snake that fits the intended space looks more natural and easier to understand. Smaller designs usually benefit from simpler patterns and fewer scales. Planning the composition first can prevent unnecessary corrections later.
Sketch the Snake’s Head and Body
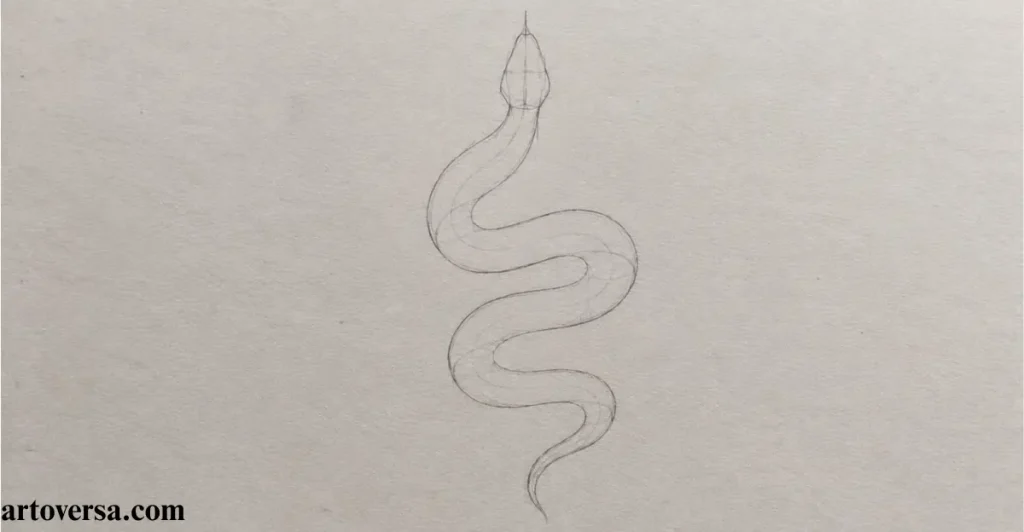
Create the basic structure before drawing the snake’s facial features or scales. The head establishes the direction of the design, while the body gives the tattoo its movement and flow.
- Draw a circle or oval to mark the approximate position of the snake’s head and establish its direction.
- Sketch a flowing S-shaped guideline to determine the body’s movement before adding its complete outline.
- Expand the guideline into two curved lines that define the snake’s thickness and overall body shape.
- Make the neck slightly narrower and allow the body to become thicker around the middle for natural proportions.
- Taper the body gradually toward the tail to create a smooth transition and a believable finishing shape.
Based on my drawing practice the guideline is one of the most useful parts of the process. It helps maintain the body’s movement before the final outline is added. I prefer checking the head and tail positions early to keep the composition balanced. A well-planned structure makes later detailing much easier.
Draw the Snake’s Face and Eyes
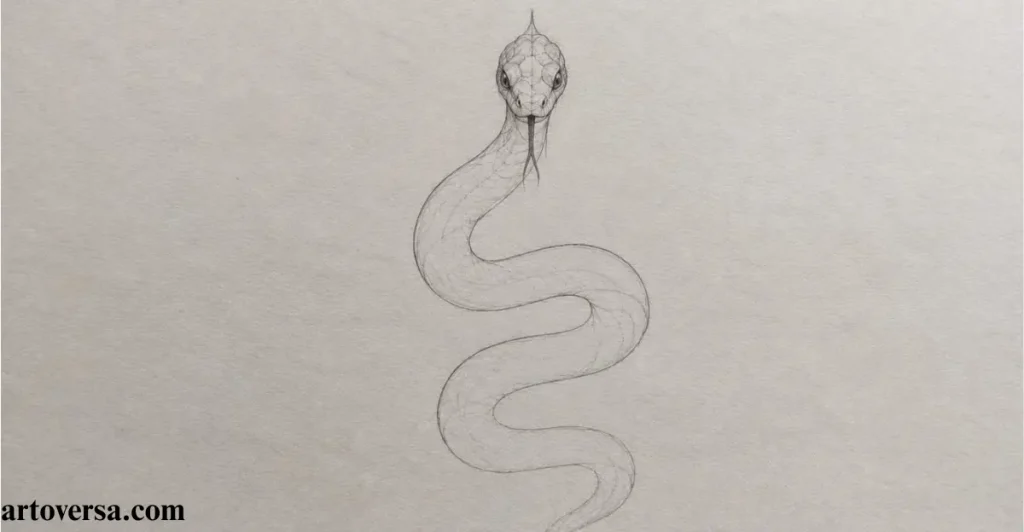
The snake’s face gives the tattoo its personality, whether you want an aggressive or calm appearance. Focus on the shape of the head before adding the eyes and fangs. Clear facial features are especially important when the design will be used as a small tattoo.
- Shape the top of the head with a slightly flattened profile instead of a completely round outline to create a recognizable snake-like appearance.
- Add two eyes using small ovals or narrow shapes that match the head’s angle and the expression you want.
- Select the right nose and mouth with clean lines that follow the direction of the head without making the face look crowded.
- Include two prominent upper fangs for a striking appearance, adding lower fangs only if they suit the overall design.
- Go with a short forked tongue to give the snake a recognizable feature and enhance its expression.
I have found that simple facial shapes often work better than excessive detail. The eyes should match the angle of the head so the expression feels consistent. Keeping the mouth lines clear also prevents the face from looking crowded. Small adjustments to these features can make a noticeable difference in the final design.
Add Scales and Body Patterns
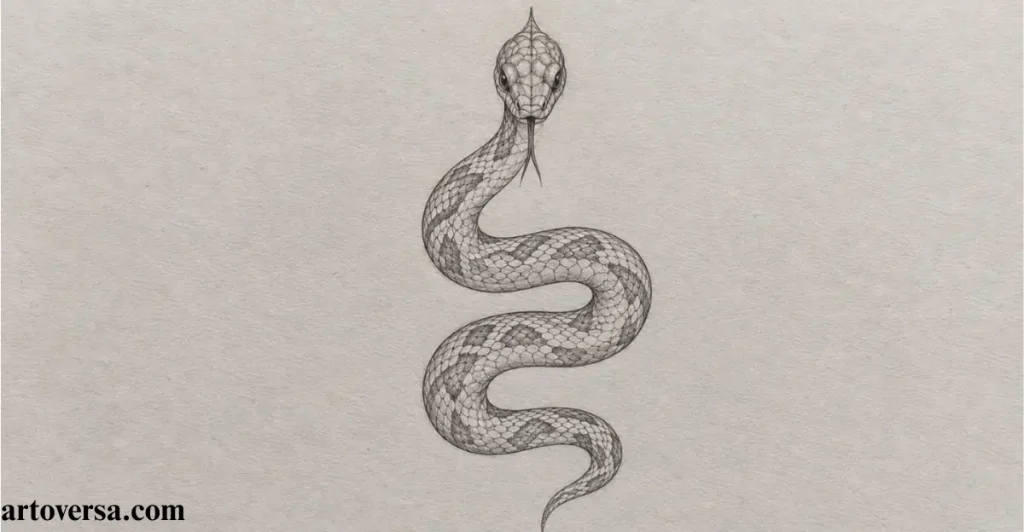
Scales help identify the snake and provide texture throughout its body. However, drawing every individual scale can make a tattoo design look overly busy especially when the artwork is small.
- Illustrate small curved scales along the head, arranging them according to its shape to create a natural appearance.
- Construct overlapping rows of scales across the body instead of using perfectly straight lines that make the texture look stiff.
- Make the scales smaller near narrow areas and adjust their size to follow the body’s curves and proportions.
- Include simple diamonds, dots, stripes or circular patterns to add decoration without covering the entire body.
- Leave some areas open so the snake remains easy to recognize and the design does not become cluttered.
From what I have observed, scale patterns look more natural when they follow the direction of the body. Repeating identical shapes everywhere can make the snake appear stiff. Mixing small details with larger decorative patterns creates better visual balance. Leaving enough open space also helps the design remain clear at different sizes.
Refine the Snake Tattoo Outline
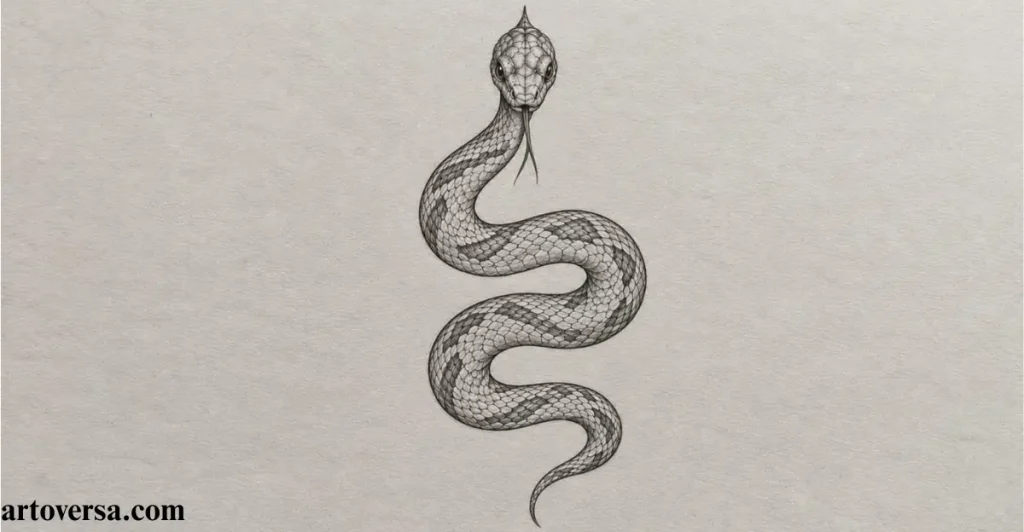
Once the sketch and body patterns are complete, refine the design into clean, confident lines. This stage removes unnecessary construction marks and makes the tattoo easier to read.
- Trace the main body shape using smooth lines that maintain the original curves and create a consistent silhouette.
- Render thicker outlines around the head and outer body to establish a strong silhouette inspired by traditional tattoo styles.
- Shape thinner lines to define the eyes, mouth, scales and decorative patterns without overpowering the main outline.
- Erase or hide the initial sketch lines that are no longer needed to keep the final artwork neat and professional.
- Check the complete design for uneven curves, awkward overlaps and inconsistent proportions before moving to shading.
In my experience clean outlines give a snake tattoo its strongest visual impact. I usually check the entire drawing before focusing on small corrections. Removing unnecessary lines makes the important features easier to recognize. This step is especially helpful when preparing artwork for a stencil.
Add Shading and Color to the Design
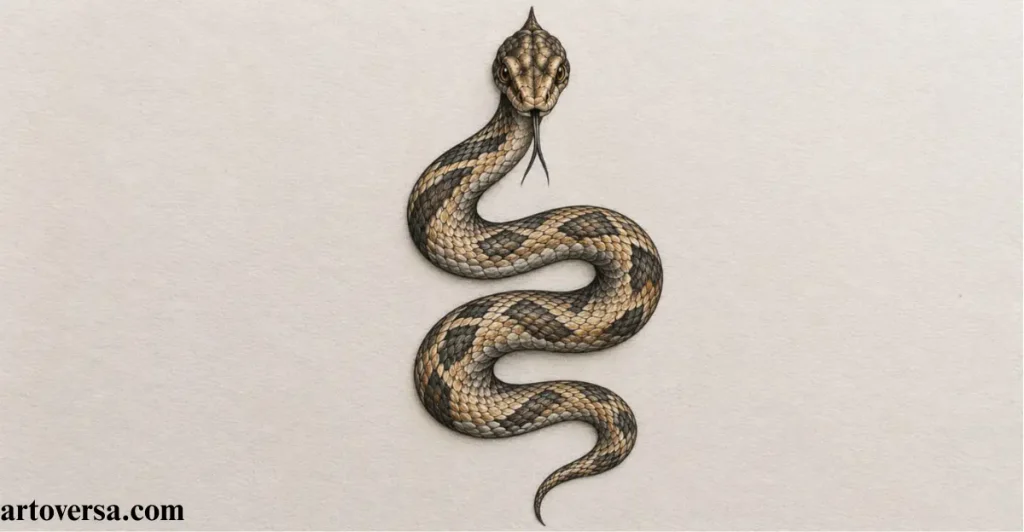
Shading creates depth and helps the snake’s body appear rounded rather than flat. You can keep the design in black and grey or introduce colors that match your chosen tattoo style.
- Identify the areas beneath overlapping body sections where natural shadows would appear to create a stronger sense of depth.
- Craft darker tones around the underside of the head, belly and curved sections to emphasize the snake’s body shape.
- Use smooth gradients or short strokes to create depth while keeping the scales and important outlines visible.
- Trace a limited color palette such as green, red, black or gold, to create a coordinated and attractive design.
- Keep highlights and lighter spaces visible so the scales remain distinct and the body patterns do not blend together.
One technique I find helpful is building shadows gradually instead of making every section equally dark. This preserves the difference between the snake’s body and its decorative details. A limited color palette can also make the design feel more unified. Reviewing the shading from a distance helps reveal whether the important shapes remain visible.
Finalize Your Snake Tattoo Design
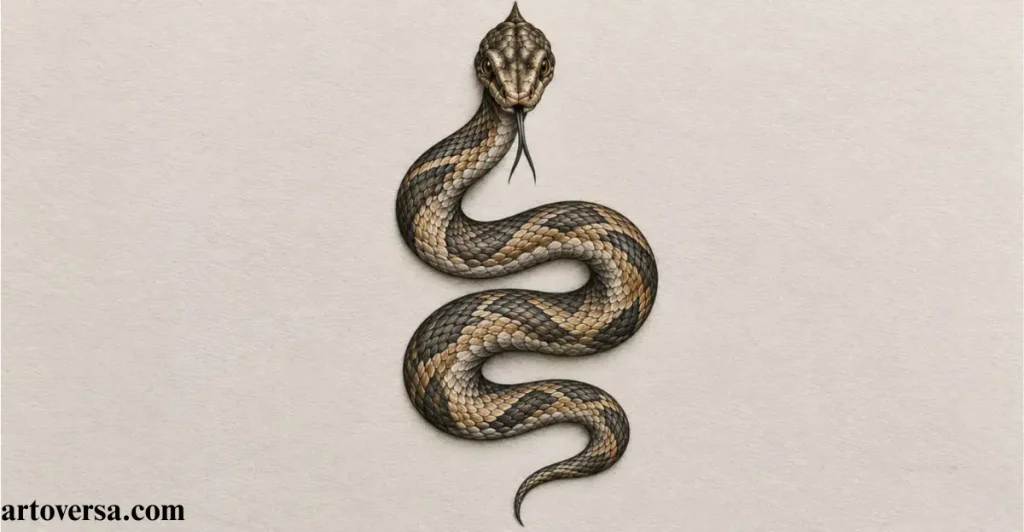
The final stage is about checking the complete artwork and making sure every element works together. A successful snake tattoo should have a clear silhouette, balanced details, and smooth transitions between the head and body.
- Inspect the head, body and tail to ensure their proportions look consistent and the complete design flows naturally.
- Correct broken outlines, uneven curves or overlapping details that reduce clarity and make the drawing difficult to read.
- Remove leftover sketch marks and keep the final line work clean so the artwork is ready for presentation.
- Check that the scales, shading and colors support the overall composition without hiding the snake’s recognizable features.
- Save a high-resolution digital copy or prepare a clean stencil-ready version of the artwork for the next stage.
I have noticed that a final review often reveals small issues that are easy to miss while drawing. Looking at the whole design helps identify areas that need more space or simpler details. I also recommend checking the artwork at a smaller scale before considering it complete. These final adjustments can make the snake tattoo look more polished and professional.
Conclusion
Drawing a snake tattoo design becomes much easier when you build the shape gradually and focus on each detail. Start with smooth curves to establish the snake’s pose, then refine the head, body and tail before adding scales and decorative elements. Clean outlines and carefully placed details can give your design a bold, professional appearance. You can also experiment with different poses, patterns and line weights to create a style that reflects your artistic vision. With regular practice and patience, you can develop a unique snake tattoo drawing and improve your overall design skills.
FAQs
How do you draw a snake tattoo design for beginners?
Start by sketching the snake’s head and an S-shaped body guideline. Add the body outline, eyes, mouth, scales and decorative details before refining the lines and adding shading.
What is the easiest snake tattoo design to draw?
A simple snake head or an S-shaped snake with minimal scales is easiest for beginners. These designs require fewer details and help you practice basic curves and proportions.
Which tools are best for creating a snake tattoo design?
You can use an HB pencil, sketchbook, fine liner and eraser for traditional drawing. For digital artwork Procreate offers useful brushes, layers and selection tools.
How can you make a snake tattoo look more realistic?
Focus on natural body curves, correctly positioned eyes, overlapping scales, and consistent proportions. Adding gradual shading and highlights can create depth and make the snake appear more lifelike.
Can you create a snake tattoo design in Procreate?
Yes, Procreate allows you to create snake tattoo designs using sketching brushes, smooth line work, layers, and clipping or selection tools. You can also experiment with colors and shading while keeping the original outline intact.
How do you draw scales on a snake tattoo?
Draw small, overlapping curved shapes that follow the direction of the snake’s body. Vary their size slightly and avoid adding too many scales, especially in smaller tattoo designs.
Which snake tattoo style is easiest for beginners?
American Traditional and minimalist snake designs are good starting points because they often use bold outlines and simplified details. These styles help beginners focus on shape, line quality, and composition.
Please Write Your Comments