How to Draw a Great White Shark – Step By Step
Updated: September 19, 2026
23
A great white shark is one of the most powerful and recognizable creatures in the ocean. This step-by-step guide makes the drawing process simple for beginners and experienced artists alike. You will learn how to build the correct body shape, add realistic fins and create natural details with smooth pencil shading. Each stage helps improve accuracy while making the shark look strong and lifelike. Follow along and enjoy creating a realistic great white shark with confidence. Start drawing today and bring a realistic great white shark to life with simple pencil techniques and steady practice.
Table of Contents
Learn to Draw a Great White Shark in 5 Simple Steps
Follow these five simple steps with patience and build your shark drawing one stage at a time.
Step 1 – Draw the Main Body of the Shark
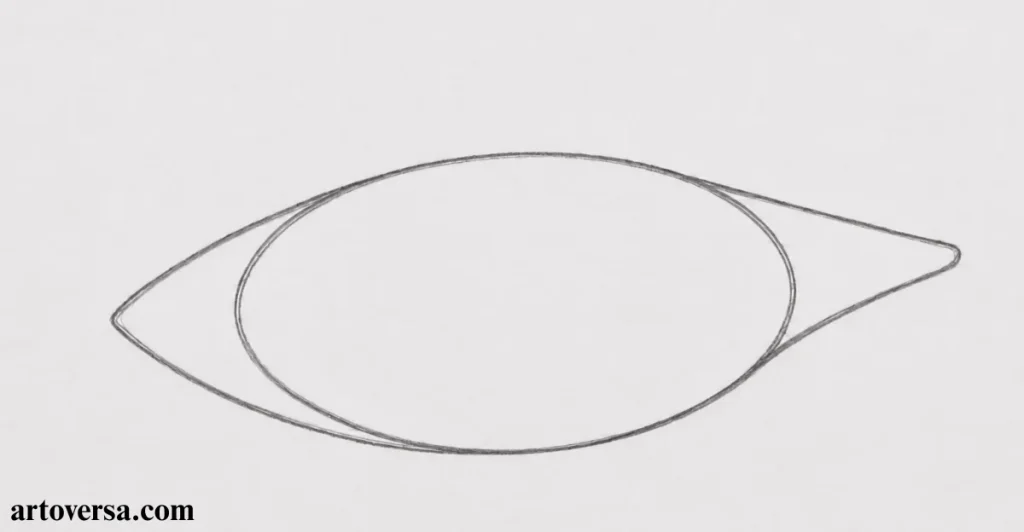
Create the shark drawing with light shapes first and build a solid foundation for the rest of the sketch.
- Draw a light oval to create the main body of the shark and place it at a slight diagonal. This simple angle gives the shark a natural sense of movement before any details are added.
- Sketch a curved triangle on the front of the oval to form the nose. Keep the outline soft so it blends smoothly into the front of the body without creating sharp edges.
- Add another curved triangle to the rear of the oval for the tail. Match its size with the body so the overall shape looks balanced and the proportions remain realistic.
- Use light pencil strokes while shaping the body and avoid pressing too hard. Gentle construction lines make it easier to adjust the nose and tail before refining the final outline.
- Compare the oval body, nose, and tail before moving to the next step. A balanced foundation makes the remaining parts of the shark drawing much easier to complete.
Common problems and how to overcome them
Drawing the oval too wide can make the shark look unbalanced and reduce the natural feeling of movement. Keep the body at a slight diagonal and compare the nose and tail before moving ahead. Light construction lines help fix mistakes easily and keep the sketch clean.
Spending extra time on the oval always improved the overall shape of the body and made the nose and tail easier to place correctly. That simple practice created cleaner proportions and helped every shark drawing look more realistic.
Step 2 – Add Some Fins
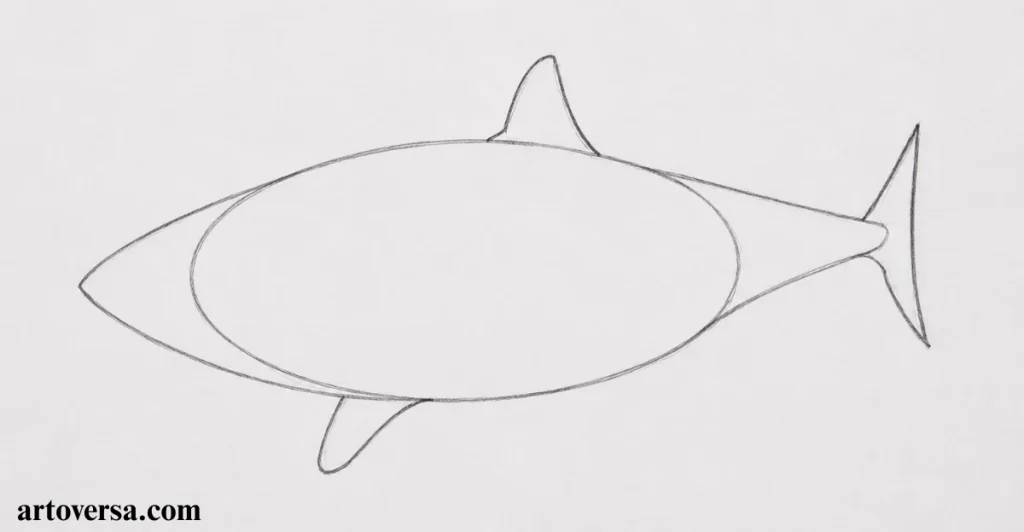
Place the fins carefully to give the shark drawing a more realistic shape and natural swimming position.
- Add the dorsal fin on the upper part of the body and place it farther back than the center. This position matches the angle of the shark as it moves toward the viewer.
- Keep the shape of the dorsal fin smooth and slightly curved. Its placement helps create depth and makes the shark appear closer to a real perspective view.
- Draw the second fin on the opposite side of the lower body. Notice its distance from the front because the swimming angle creates a small visual change.
- Adjust the length of the fin according to the direction of the shark. The correct size keeps the body balanced and prevents the drawing from looking flat.
- Compare every fin with the full body before adding darker lines. Careful placement improves the overall structure and makes the shark drawing look more natural.
Common problems and how to overcome them
Many artists place the dorsal fin too close to the middle of the body, which changes the swimming position of the shark. Keep the fin farther back and check the angle before refining the sketch. Light lines allow easy adjustments and better control.
Careful observation of the dorsal fin and other fins always improved the balance of the shark drawing. Taking time to study the body angle created more realistic depth and smoother results. This method continues to help create natural-looking sketches.
Step 3 – Draw Another Fin, the Mouth, and an Eye
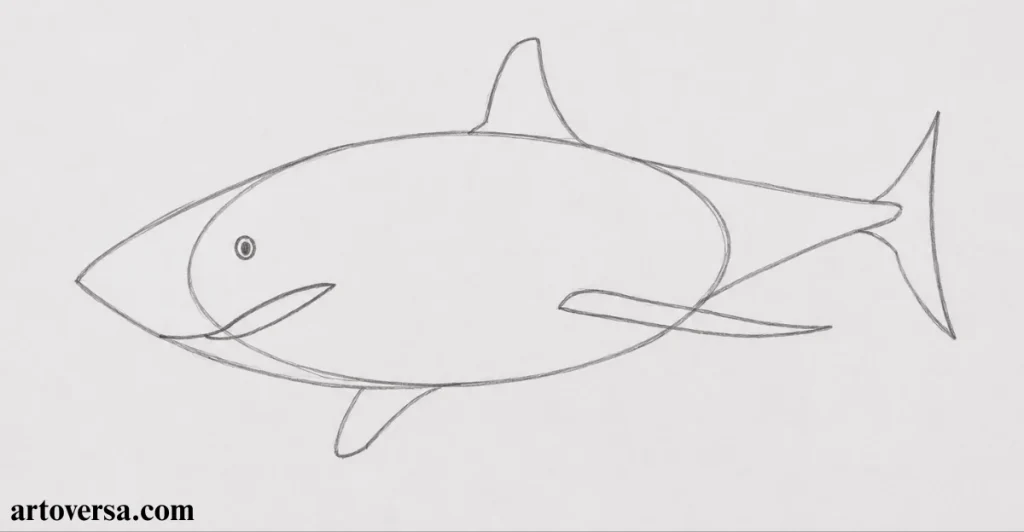
Add the final facial details and another fin to bring more realism into the shark drawing.
- Draw the second fin opposite the lower fin and place it farther back on the body. This position follows the natural angle of the swimming shark.
- Adjust the size of the second fin because the front view creates slight distortion. A smaller appearance helps maintain the correct perspective of the body.
- Sketch the mouth with a smooth curved line starting from the front of the shark. Keep the line controlled so it follows the shape of the head naturally.
- Add the eye near the upper area of the head and compare its position with the mouth. Proper spacing creates a balanced and realistic expression.
- Review the fin, mouth and eye together before continuing. Small corrections at this stage improve the complete shark drawing and make the features look connected.
Common problems and how to overcome them
A frequent mistake is placing the eye or mouth without considering the angle of the shark. Check the position of each feature carefully and keep the second fin aligned with the body. Small changes can greatly improve the final appearance.
Working on the mouth and eye after placing the fin always created better facial balance. Careful comparison of each feature helped maintain the correct perspective and made the shark drawing appear more realistic. This approach made detailed sketches easier to control.
Step 4 – Draw a Line for the Gray Section and a Couple More Fins
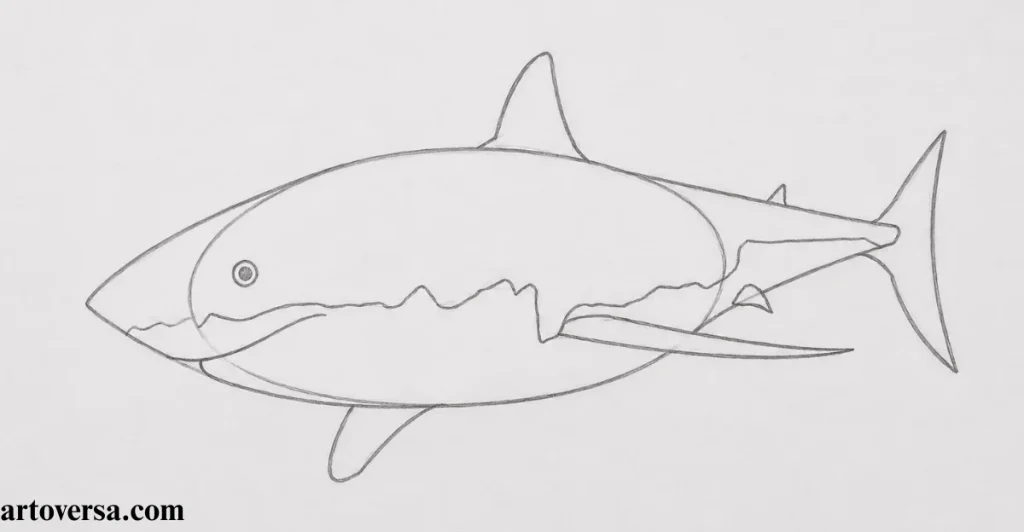
Add the body markings and small details to make the great white shark look more realistic and complete.
- Draw a small curved line below the mouth and guide it slightly upward toward the eye. This simple detail helps define the lower part of the face.
- Add a few small fins near the back half of the body. Use simple triangles for these parts and keep their size smaller than the main fins.
- Create an uneven line along the side of the body to separate the upper gray section from the lighter belly area. Keep the pattern natural instead of making it perfectly straight.
- Follow the side shape of the shark while extending the gray section line down the body. This creates a clear difference between the darker upper area and the white underside.
- Review the mouth, eye and small fins together before moving forward. Balanced details help the great white shark maintain a realistic appearance.
Common problems and how to overcome them
A common issue is making the gray section line too straight, which can make the shark look unnatural. Keep the pattern slightly irregular and avoid making the small fins too large. Soft curves help maintain the realistic shape of the body.
Adding the gray section slowly always created a more natural look in the shark drawing. Careful attention to the small fins and face details improved the overall balance. This technique helped create more realistic textures without making the sketch look crowded.
Step 5 – Finish the Drawing by Adding Details
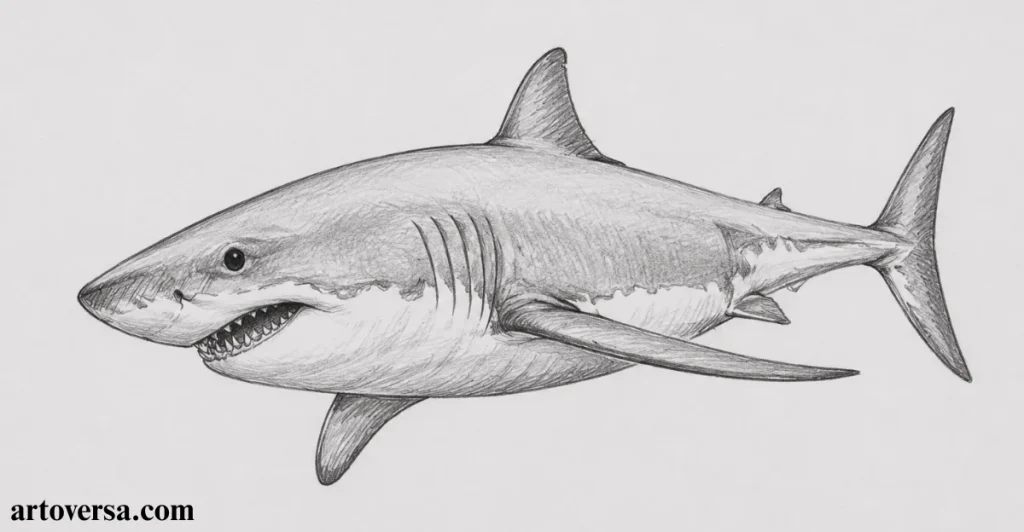
Refine the shark drawing by strengthening the outlines and adding the final details that bring the sketch to life.
- Go over the main outlines of the body and use the existing shapes as a guide. Stronger lines help define the structure and improve the final appearance.
- Add darker marks around important areas and increase the contrast with careful pencil strokes. A heavier outline makes the shark stand out more clearly.
- Apply shading with hatching and cross-hatching to create depth on the body. Keep the shadows smooth so the form looks more three-dimensional.
- Darken the eye as much as possible and add several gills along the side of the body. These details give the shark a more powerful expression.
- Draw sharp teeth and remove any extra pencil lines after the final marks are complete. Clean finishing touches make the entire shark drawing look polished.
Common problems and how to overcome them
Many artists add too much darkness too quickly, which can hide the details of the shark. Build the shading slowly and strengthen only important areas like the eye and outlines. Careful finishing creates better contrast.
Final details always made the biggest difference in completing a shark drawing. Building the shading gradually and refining the gills, teeth and eye created a stronger finish. This process helped achieve a more realistic result without losing the original structure.
Conclusion
Drawing a great white shark becomes easier when you follow each step with patience and careful observation. Building the body with simple shapes creates a strong foundation for the entire sketch. Taking time to place the fins and facial features correctly improves the overall proportions. Gradual shading adds depth and gives the shark a more realistic appearance. Clean outlines and refined details help every part of the drawing stand out naturally. Regular practice will strengthen your pencil control and drawing confidence with every attempt. Keep using these techniques, and you will create realistic great white shark drawings that continue to improve over time.
FAQs
What is the best pencil for drawing a great white shark?
Start with an HB pencil for the construction lines and use 2B to 6B pencils for darker outlines and shading. This combination makes it easier to build smooth values and realistic depth without damaging the paper.
How do I make my shark drawing look more realistic?
Focus on accurate body proportions before adding details. Place the fins correctly, keep the shading gradual, and use hatching or cross-hatching to create a natural three-dimensional appearance.
Why should I draw the body with light construction lines first?
Light construction lines make it easier to adjust the body shape, nose and tail before adding darker outlines. This method helps prevent mistakes and keeps the finished drawing clean.
How can I improve the shading on a shark drawing?
Apply graphite in light layers instead of pressing hard at the beginning. Blend the darker and lighter areas gradually while leaving highlights to create smooth transitions and realistic volume.
What are the most common mistakes when drawing a great white shark?
The most common mistakes are incorrect body proportions, poorly placed fins and heavy outlines added too early. Checking each part before moving to the next step helps create a balanced and realistic drawing.
How often should I practice drawing sharks?
Practice regularly by drawing the same shark from different angles and refining your shading techniques. Consistent practice improves pencil control, accuracy and confidence with every new sketch.
Please Write Your Comments