Drawing Realism: How to Draw Reflections in Water
Updated: September 12, 2026
25
A realistic water reflection can make any drawing feel more alive and believable. It adds depth to the scene while creating a calm and natural look. This tutorial shows an easy way to draw reflections with simple pencil techniques that anyone can follow. Each step helps you understand how light and water work together to create a realistic effect. With a little practice you will be able to draw clear reflections that give your artwork a more finished Start drawing today and discover how a few simple reflection techniques can make every water scene look more realistic and impressive.
Table of Contents
Reflections in Still vs Disturbed Water
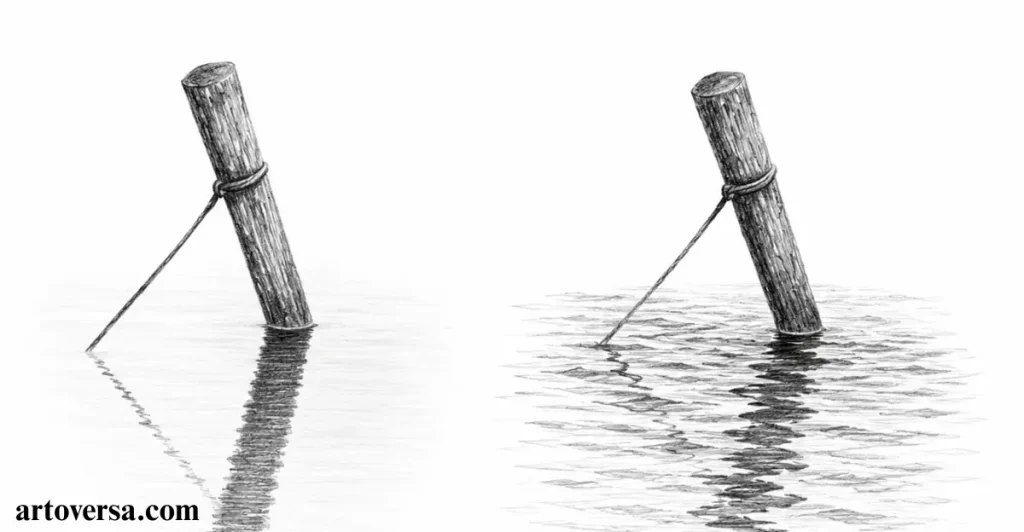
Explore the steps below to learn how each effect can make your drawings look more natural and realistic.
Step 1: Reflection of a Straight Object Should Be as Long as the Object
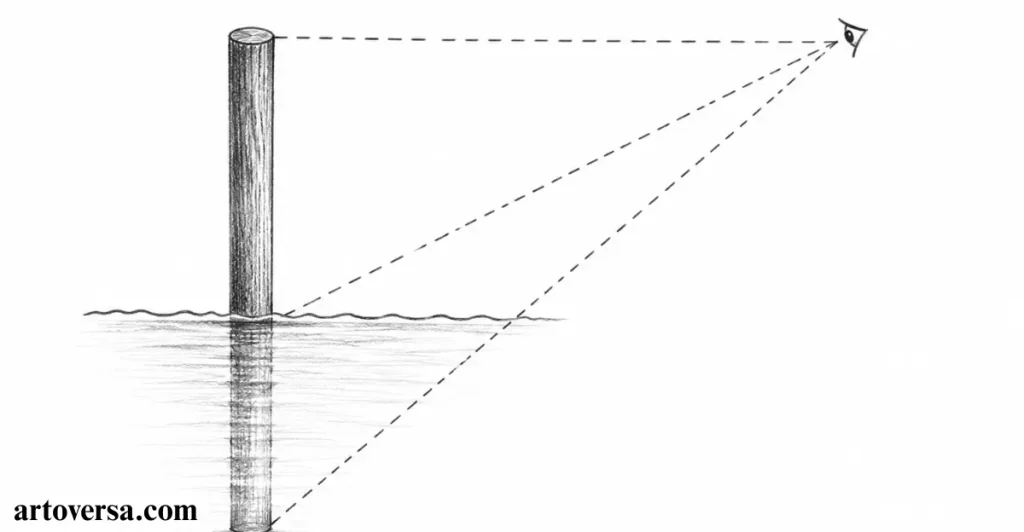
Understand the basic reflection rule and learn how object length creates a balanced water reflection.
- Draw the straight object first and keep it perpendicular to the calm water surface. A clean outline gives you a strong guide and makes the reflection much easier to place.
- Place the reflection below the waterline and keep it as long as the object whenever the water is still. This creates the natural mirror effect that is often seen in quiet lakes and ponds.
- Imagine the surface as a horizontal mirror that repeats the object at an equal distance below the water. Following this rule helps you keep the correct proportions from the beginning.
- Practice with a post, tree trunk or building because these simple upright shapes clearly show how reflections behave. They also make it easier to notice small drawing mistakes.
- Check the reflected shape before finishing your sketch. Only make it much shorter or longer when waves, perspective or viewer height naturally change the way the reflection appears.
Common Problems and How to Overcome Them
Some beginners guess the reflected length instead of observing the object carefully. This often makes the reflection look unnatural. Compare both shapes before shading to keep the proportions accurate.
When I first started drawing reflections the reflected shape often looked too short. Careful observation helped me match both lengths more accurately. That small change made every water scene look far more realistic.
Step 2: Reflection Is Longer if an Object Is Leaning Towards You
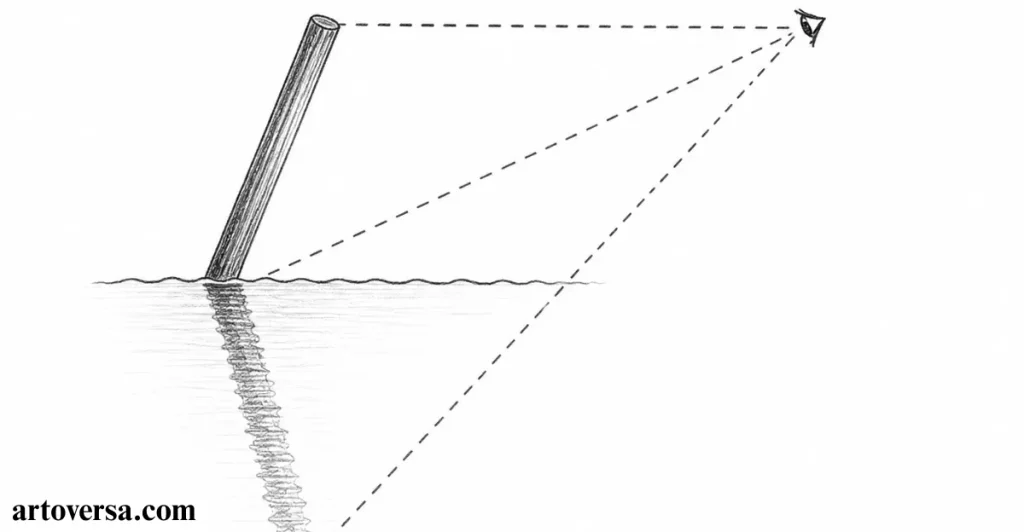
Explore how tilted objects change reflection length and make your drawings look more realistic.
- Look closely at the object before you begin drawing. When it is leaning towards you, the top appears closer to your view and the reflection will not match the exact height of the object.
- Allow the reflected shape to extend a little farther across the water instead of copying the visible height. This simple adjustment creates a more natural result and improves the overall balance.
- You can easily see this effect in a leaning tree, signpost or mast beside still water. These examples help you understand how the viewing angle changes the reflected image.
- Pay attention to the tilt before adding details because the direction of the object affects the reflected length. A careful observation makes the drawing feel more believable.
- The extra reflected length adds a stronger sense of depth and helps the observer understand that the object is coming forward. Small changes like this make water reflections look much more realistic.
Common Problems and How to Overcome Them
A common mistake is copying the object’s visible height without checking its tilt first. When an object is leaning towards you, the reflection should extend a little farther across the water. Study the angle carefully before sketching so the added length creates a natural sense of depth.
During my early practice every leaning object had the same reflected length. Watching real trees beside calm water helped me notice the difference. That simple observation made my landscape drawings feel much more natural.
Step 3: The Reflection Is Shorter if the Object Is Leaning Away
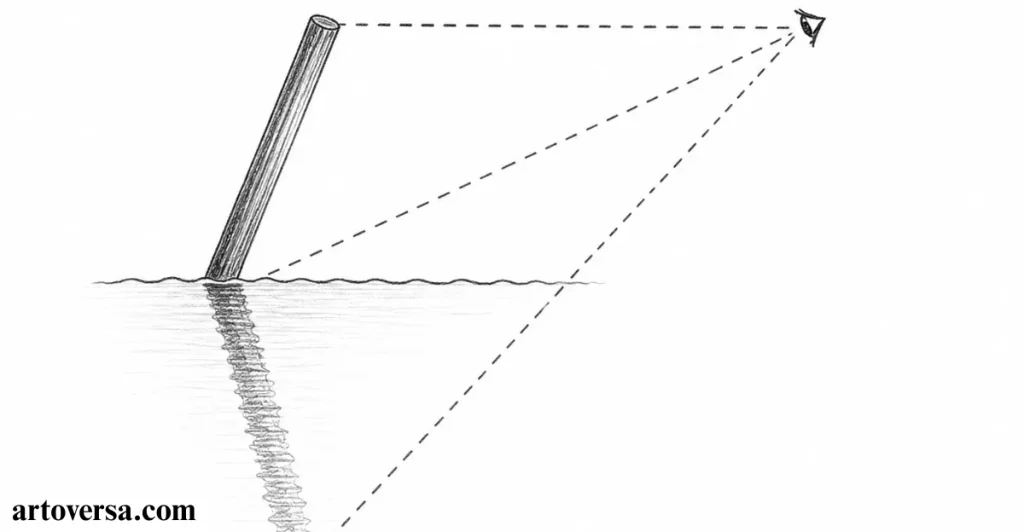
Discover how object direction affects reflections and helps maintain a natural perspective.
- Begin by checking if the object is leaning away from the viewer before sketching. As the upper part moves farther into space, the reflection naturally becomes shorter than the object above the water.
- Focus on the backward tilt instead of copying the visible height. This simple change helps the reflected image match the viewing angle and keeps the drawing believable.
- Practice this effect with fence poles or trees that stretch into the distance. These subjects clearly show how a shorter reflection improves natural perspective.
- Reduce the reflected length little by little instead of making a large change. A gentle adjustment creates a smoother transition and gives the scene a more realistic appearance.
- Finish by comparing the object with its reflection before shading. A carefully shortened reflection shows that the object is moving away and keeps the overall composition balanced.
Common Problems and How to Overcome Them
Some beginners keep every reflection the same size without checking the direction of the object. This removes the feeling of distance and makes the scene look flat. Observe the backward lean first, then shorten the reflection only as much as needed.
Early landscape sketches often looked flat because every reflection matched the object exactly. Watching real fences and trees beside water revealed how a backward lean changes the reflected length. That small adjustment made every drawing feel much deeper.
Step 4: The Reflection Will Always Lean to the Same Side as the Object
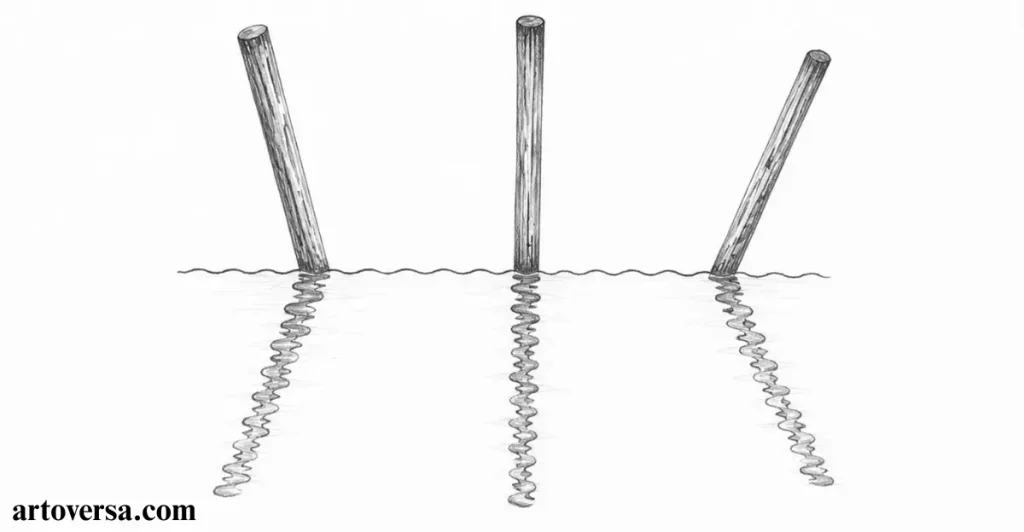
Apply this simple rule to create accurate reflections and make your artwork look more realistic.
- Start by looking at the direction of the object before drawing the reflection. If a tree leans left the reflected image also leans left because water flips shapes vertically instead of horizontally.
- Remember that only the top and bottom change places while the sideways direction stays the same. This creates an inverted reflection without changing the overall lean.
- Watch the sideways slant carefully before adding details to the water. Following the same angle helps the reflected image match the object above the waterline.
- Draw an imaginary vertical line from the object to the water surface before sketching. This simple guide keeps the reflection aligned and prevents mistakes caused by thinking about a wall mirror.
- Review both shapes one last time before shading the water. Keeping the same leaning direction creates a balanced reflection that looks accurate from every angle.
Common Problems and How to Overcome Them
A common mistake is reversing the reflection because water is confused with a wall mirror. Water only flips the image vertically while the sideways direction stays the same. Use a vertical line as a guide to keep the reflection on the correct side.
My first water studies often showed reflections leaning in the opposite direction. Careful observation beside quiet lakes helped this rule become easy to remember. Since then every finished sketch has looked more balanced and realistic.
Step 5: Perspective Is Vital in Drawing Water Reflections
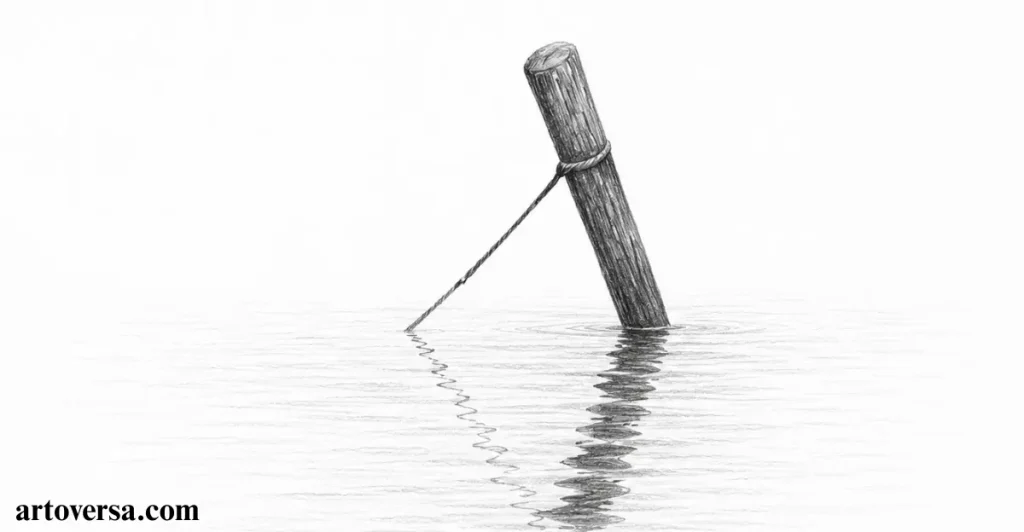
Improve your drawing skills by using proper perspective to create depth on the water surface.
- As the scene moves farther into the distance, the perspective becomes more noticeable across the water reflections. Using one-point perspective from the beginning keeps every object and its reflection in the correct position.
- Watch the surface carefully because the space between the ripples becomes smaller as they move away from your view. This gradual change helps the water feel deeper and more realistic.
- Still water provides the clearest guide for studying reflections because the mirrored image remains more definite. Calm surfaces make perspective easier to understand while sketching.
- Near the base of the object, the reflection appears more condensed before it slowly spreads out towards the viewer. Following this natural pattern creates a believable water effect.
- Before completing the drawing compare the full scene instead of focusing on one area. Balanced perspective and accurate reflections work together to create a realistic finish.
Common Problems and How to Overcome Them
Another mistake appears when every ripple is drawn with the same spacing across the water. This removes the feeling of distance and weakens the effect of perspective. Reduce the spacing gradually as the water moves farther away.
Quiet mornings beside small lakes taught me more than any reference book. Careful observation revealed how perspective changes every ripple and reflected shape. Since applying that lesson my water drawings have looked far more natural and convincing
Step 6: The Light Source Direction Affects How Dark or Light the Reflection Appears
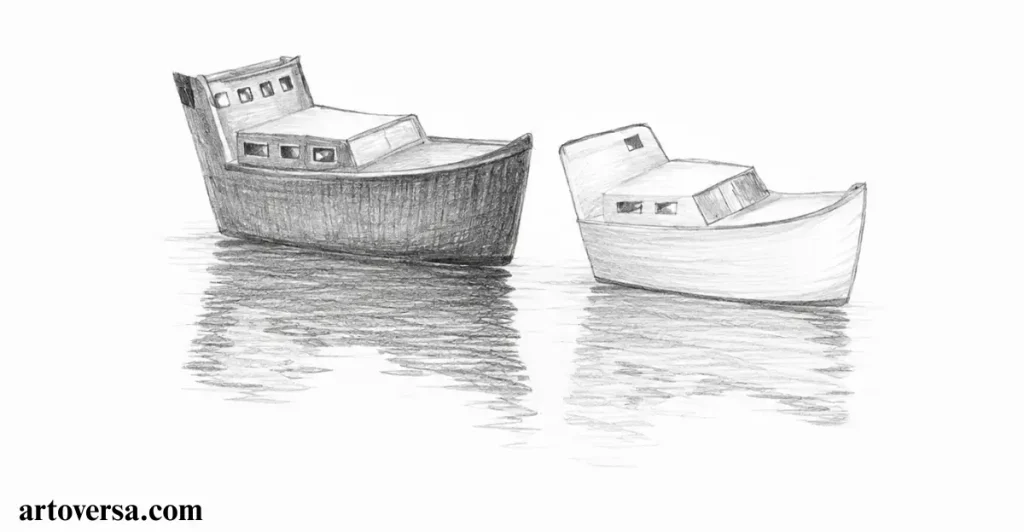
Understand how light direction changes reflection shades and brings more realism to your sketches.
- Observe the light source before adding any shading to the reflection. The direction of the sunlight decides whether the reflected image should appear darker or lighter than the object itself.
- Pay attention to the illuminated areas because every change in light creates a different effect on the water. Understanding where the light falls helps you shade with greater accuracy.
- When the side of an object stays in shadow and the sunlight reaches the top of the water the reflection often appears lighter. This contrast creates a natural balance between the object and the water surface.
- If the sun reaches the side of the object the reflection can appear darker than the visible side. Following this simple rule gives the drawing a more convincing and realistic appearance.
- Finish by comparing the object and its reflection before blending the tones. Matching the light direction instead of guessing the values helps the entire scene look balanced and believable.
Common Problems and How to Overcome Them
A common mistake is giving the object and its reflection the same brightness without checking the light source. This removes natural contrast and makes the water appear flat. Observe the direction of the sunlight first, then adjust the tones accordingly.
Watching sunlight change across quiet ponds completely changed the way I shaded reflections. Careful observation showed that light affects every reflected tone differently. Using that approach made my water drawings look much more natural and full of depth.
Step 7: The Color of the Object Affects the Reflection
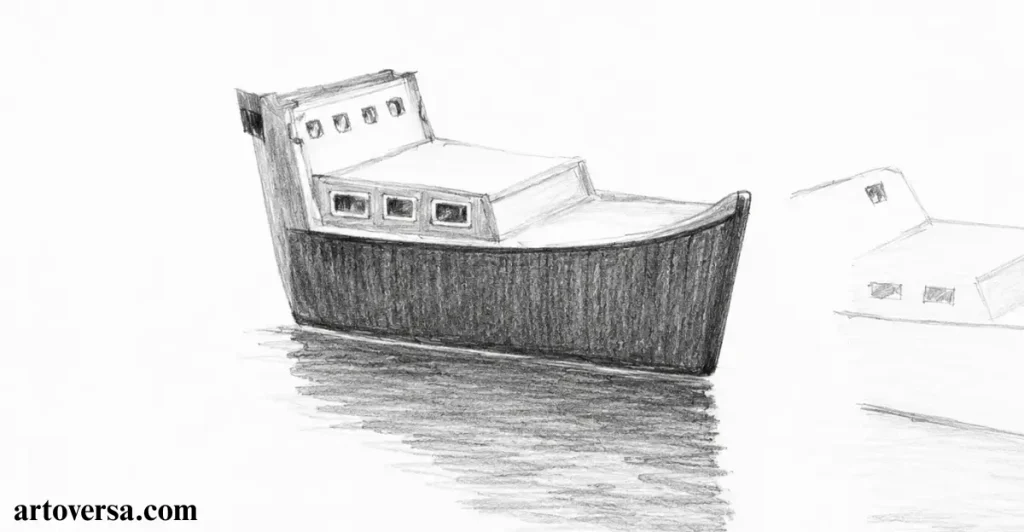
See how colors influence water reflections and add realistic depth by matching tones with the object.
- Observe the color of the object carefully because the reflection will not always have the same strength as the original. The water changes the appearance and creates softer reflected tones.
- Remember that a black object usually appears lighter in its reflection because the surface of the water reduces the intensity. This small difference helps create a realistic connection between the object and the water.
- Consider the transparency of the water while adding shades to the reflected image. Light passing through the surface can soften dark colors and make them appear more natural.
- Pay attention to the density and color of the water because both elements influence how the reflection looks. Clear or darker water can change the reflected values in different ways.
- Adjust the final shading by comparing the object with its reflection together. Gentle changes in tone will help the drawing show a more believable water effect.
Common Problems and How to Overcome Them
A frequent issue appears when artists make the reflection exactly the same darkness as the object. This ignores the effect of transparency and water color. Slightly lighter values create a more natural reflected appearance.
While practicing water scenes I noticed that dark objects rarely stayed equally dark in reflections. Studying real surfaces helped me understand these small value changes. That observation improved the realism of my reflection drawings.
Application: A Boat Scene in a Harbor
Use these reflection techniques in a boat scene to create a realistic and visually balanced harbor drawing.
- Study the boat scene closely and notice how each reflection technique works together. Observe the harbor view and see how the objects the water surface and reflected shapes create a smooth, balanced scene.
- Compare the boat reflection with the actual boat by checking its length, direction and position. Using proper perspective helps the reflection appear naturally below the boat and keeps the complete drawing realistic.
- Pay attention to the movement of the water and how small ripples affect the reflected forms. A calm surface keeps the image clearer while gentle changes add realism to the overall drawing.
- Use the correct light source and color values while shading the scene. These details control how dark or light the reflections appear and help the boat connect naturally with the surrounding water.
- Practice by recreating the same scene or choosing another reference with boats and water. Applying these reflection techniques repeatedly will improve your observation skills and make future drawings more realistic.
Common Problems and How to Overcome Them
One challenge beginners face is focusing only on the boat while ignoring the water around it. This can make the reflection look disconnected from the scene. Study the complete composition and apply each reflection rule together.
The biggest improvement came when I started studying full water scenes instead of single objects. Combining perspective, light, and reflection rules made my harbor drawings feel more complete. This approach helped me create scenes with stronger depth and realism.
Conclusion
Drawing realistic water reflections becomes easier when you understand how light, perspective, and object shapes work together. By practicing these simple reflection rules you can create water scenes that feel more natural and balanced. Each technique helps you improve accuracy while adding depth to your artwork. Keep observing real lakes, rivers, and harbor scenes to understand how reflections change in different conditions. With regular practice your pencil drawings will become more detailed and believable. Use these methods in your future sketches and enjoy creating realistic reflections that bring your scenes to life.
FAQs
How do you draw realistic water reflections in pencil?
To draw realistic water reflections start by observing the object shape, light direction and water movement. Keep the reflection aligned with the original object while adjusting its length and tone according to the scene. Practice with simple objects before creating detailed landscapes.
Why do reflections look different in still and disturbed water?
Still water creates clear mirror-like reflections because the surface remains calm and stable. Disturbed water breaks the reflected shapes into smaller sections due to ripples and movement. Understanding this difference helps you create more natural water scenes.
How can perspective improve water reflection drawings?
Perspective helps place reflections correctly and makes the water appear deeper. Objects farther away should have smaller spaces and softer details in their reflections. Using proper perspective creates a more realistic connection between the object and the water surface.
Should a reflection always be the same size as the object?
A reflection does not always have the same size as the object. Its length changes depending on the object’s angle, viewing position, and water condition. Careful observation helps you decide when to make it longer or shorter.
How does light affect the appearance of water reflections?
Light controls the brightness and contrast of a reflection in the water. The reflected shape may appear lighter or darker depending on the direction of the light source. Matching these values helps your drawing look more balanced and realistic.
Please Write Your Comments