How to Draw a Cozy Modern Guest Room Step by Step
Updated: September 12, 2026
25
Creating a cozy modern guest room drawing is a great way to practice furniture shapes and interior details. This step by step guide helps you build the room with simple lines before adding texture and shading. You will learn how to sketch a comfortable bed stylish decor and soft lighting with confidence. Each stage is easy to follow whether you are new to drawing or improving your skills. By the end you will have a warm and inviting guest room sketch that looks balanced and realistic.Follow each step and enjoy creating a cozy modern guest room with confidence.
Table of Contents
Modern Guest Room Design: Step-by-Step Sketching Guide
Turn your guest room vision into a beautiful pencil sketch with this easy guide. Start drawing today and build a stylish guest room step by step.
Step 1: Sketch the Guest Room Structure and Perspective
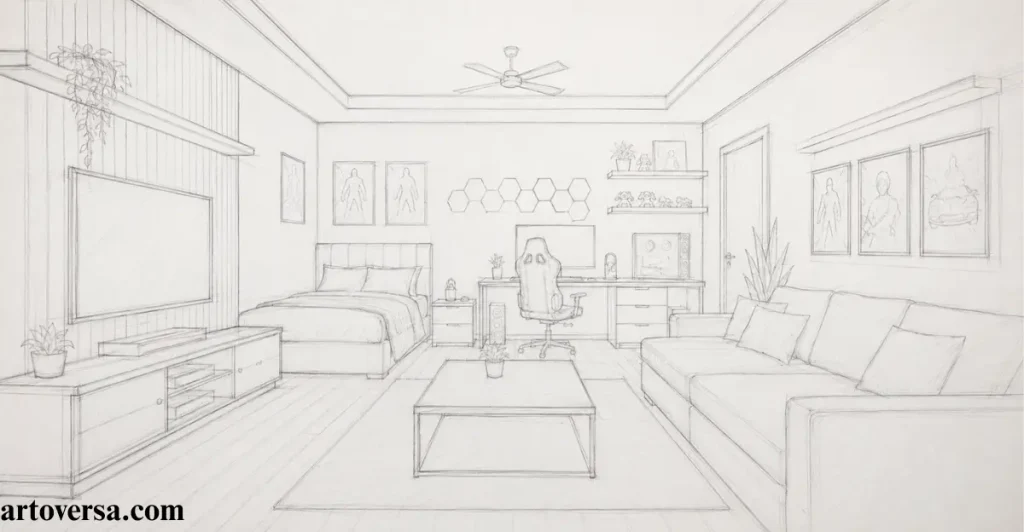
Create a clean foundation for the guest room structure and perspective before adding furniture.
- Begin with the main wall lines and floor area. Keep the pencil strokes light so the basic structure stays easy to adjust.
- Establish the room perspective by drawing the floor and wall lines toward a clear vanishing point. This helps the space look natural and balanced.
- Mark the position of the main bed area before adding any details. Leave enough space around it for the furniture shown in the design.
- Add the door and window placement while keeping their proportions consistent with the room. Avoid making these elements too large or too small.
- Review the complete structure and correct uneven lines before moving forward. A well-planned foundation makes the remaining sketch much easier.
Common problems and how to overcome them
A common mistake is making the walls or floor lines uneven which can make the room lookdistorted. Keep your construction lines light and check the perspective before adding furniture. This creates a cleaner foundation for the complete guest room sketch.
When I sketch a guest room I always establish the perspective before adding major furniture.
This helps me maintain accurate proportions throughout the drawing.I have found that a simple structure makes the final room look much more realistic.
Step 2: Draw the Bed and Padded Headboard
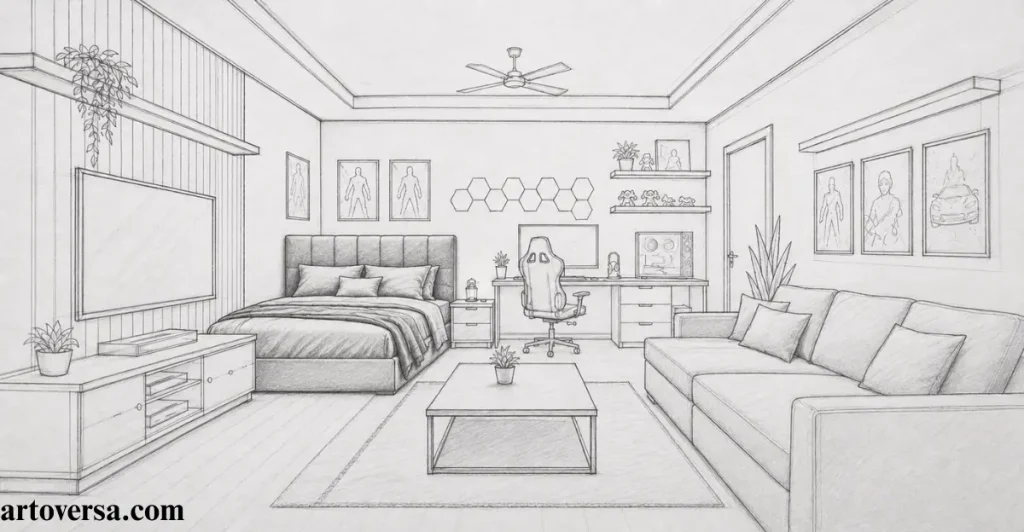
Bring the main sleeping area into focus with a comfortable bed and a refined padded headboard.
- Begin by outlining the mattress with straight lines that follow the perspective established in the first step. Keep the proportions realistic for the available space.
- Add the bed frame beneath the mattress and give it enough depth to create a solid three-dimensional appearance.
- Sketch the padded headboard behind the mattress using soft vertical sections. Keep each panel evenly spaced for a clean modern finish.
- Add the pillows and folded bedding with gentle curved lines. Use overlapping shapes to give the fabric a natural layered appearance.
- Refine the edges around the frame and headboard before adding shading. Light strokes can define depth without making the drawing look too dark.
Common problems and how to overcome them
A frequent mistake is making the headboard too narrow compared with the mattress. Keep both elements proportionate and follow the existing room perspective. This will make the sleeping area feel properly positioned within the overall design.
I usually spend extra time shaping the headboard because it gives the bedroom its strongest visual character. Keeping the panels even makes the furniture look more polished. I have found that subtle bedding details can add depth without making the sketch feel crowded.
Step 3: Add the TV Wall and Media Console
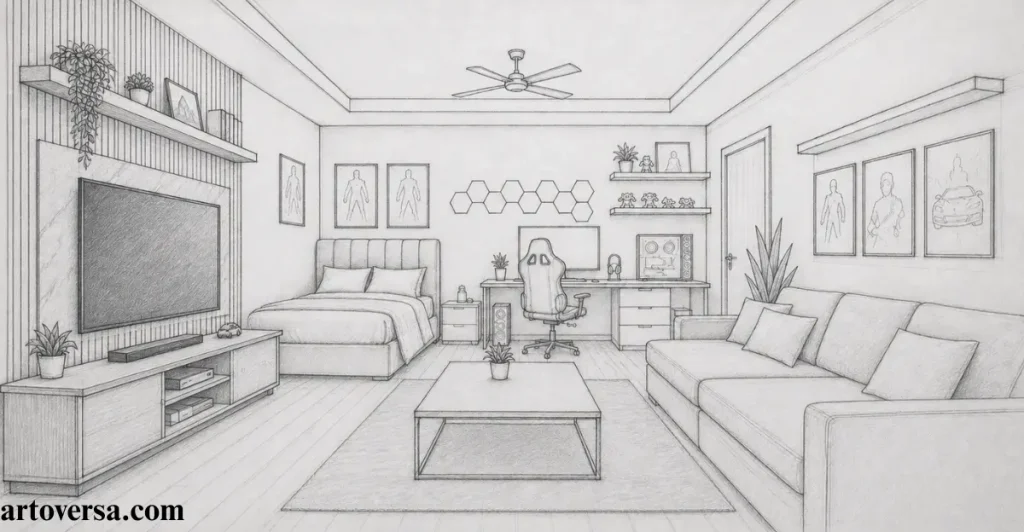
Give the opposite side of the room a clear focal point by adding the TV wall and media console.
- Start by marking the center of the TV wall according to the room’s perspective. Use light construction lines to keep the placement accurate.
- Draw the television with a slim rectangular frame and keep its size balanced with the surrounding wall. Make sure it sits at a comfortable viewing height.
- Add the media console directly below the screen. Sketch its top surface and lower sections with simple straight lines to create depth.
- Include the small compartments and storage areas beneath the console. Keep their shapes consistent so the furniture looks clean and realistic.
- Finish this area with subtle wall details and gentle shading around the furniture. Avoid heavy lines that could distract from the main features.
Common problems and how to overcome them
One common issue is placing the television too high or making the console too wide for the wall. Check the available space before adding smaller details. Balanced proportions will help this section blend naturally with the rest of the room.
The screen first and then build the console around it because this keeps the entire entertainment area balanced. Simple furniture lines work especially well in pencil sketches. I have found that light shading underneath the console adds convincing depth without overworking the drawing.
Step 4: Draw the Gaming Desk and Computer Setup
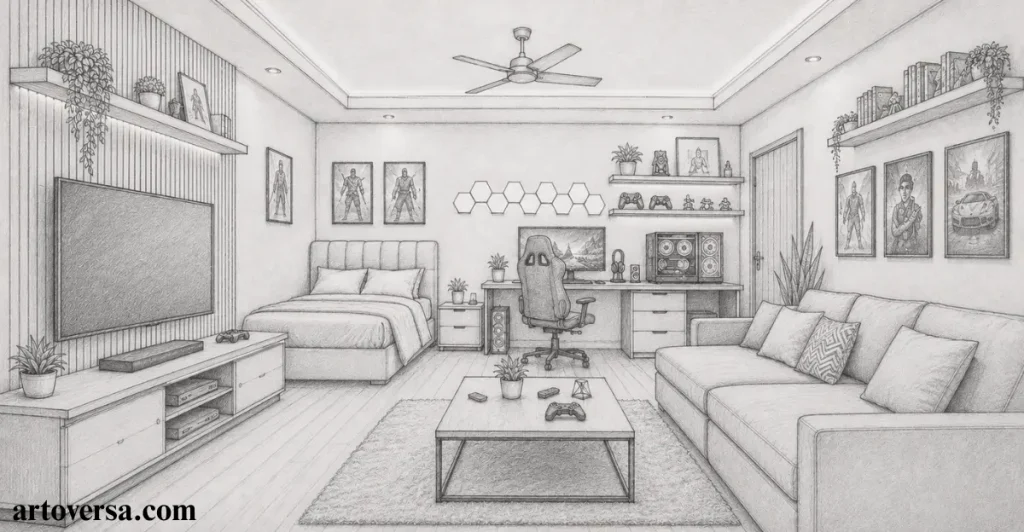
Shape this area around the available space so it feels practical while matching the modern style of the guest room.
- Use the wall lines as a guide to position the desktop at a comfortable height. Give the surface enough width for the monitor and essential accessories.
- Shape the supporting legs beneath the desk with simple strokes. A slightly open design can make the corner appear spacious rather than heavy.
- Build the monitor above the surface with a slim frame and centered placement. Its angle should follow the room perspective for a convincing result.
- Complete the workstation with a keyboard mouse and a few compact accessories. Keep these details subtle so the main furniture remains easy to recognize.
- Finish the corner with a comfortable gaming chair and soft shadows beneath the furniture. These touches help connect the setup naturally with the rest of the room.
Common problems and how to overcome them
A gaming corner can quickly look crowded when too many accessories are drawn together. Focus on the larger furniture first then introduce only the details that support the design. This keeps the workstation clean and visually balanced.
I prefer building the desk around the available wall space rather than drawing every accessory first. This gives the computer area better proportions and keeps the composition organized. In my experience a few carefully placed details make a gaming setup feel complete without overwhelming the sketch.
Step 5: Add the Sofa and Coffee Table
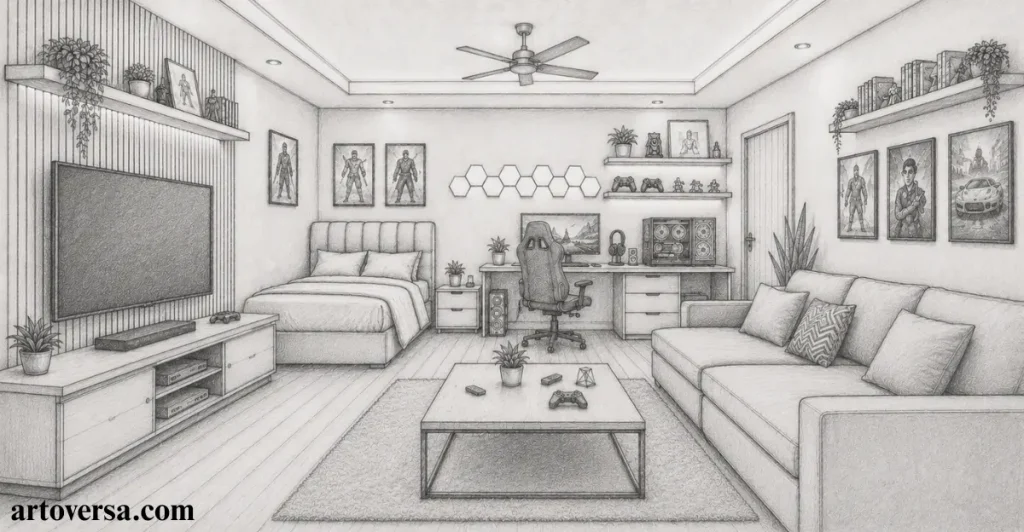
Introduce a comfortable seating area with a stylish sofa and coffee table to give the guest room a relaxed and welcoming feel.
- Position the sofa along the open section of the room while following the existing perspective. Give it enough width to look comfortable without dominating the space.
- Shape the backrest and seat cushions with soft lines. Slight curves can make the furniture appear more natural and inviting.
- Place the coffee table in front of the sofa with enough space between both pieces. Use simple geometric lines to create a clean modern appearance.
- Add the table legs and a subtle surface edge to give the piece some depth. Keep the details light so the furniture remains easy to sketch.
- Use gentle shading beneath the sofa and table to anchor them to the floor. This small detail can make the seating area feel more realistic.
Common problems and how to overcome them
A seating area can look awkward when the sofa is too large or the table sits too close. Check the surrounding space before refining the furniture. Proper spacing will keep the guest room comfortable and visually balanced.
From my sketching practice, placing the sofa after the main furniture gives the room a more balanced composition. A simple coffee table works well when enough breathing space is left around it. Careful spacing also helps the seating area feel natural rather than forced.
Step 6: Draw the Shelves, Wall Art and Room Decor
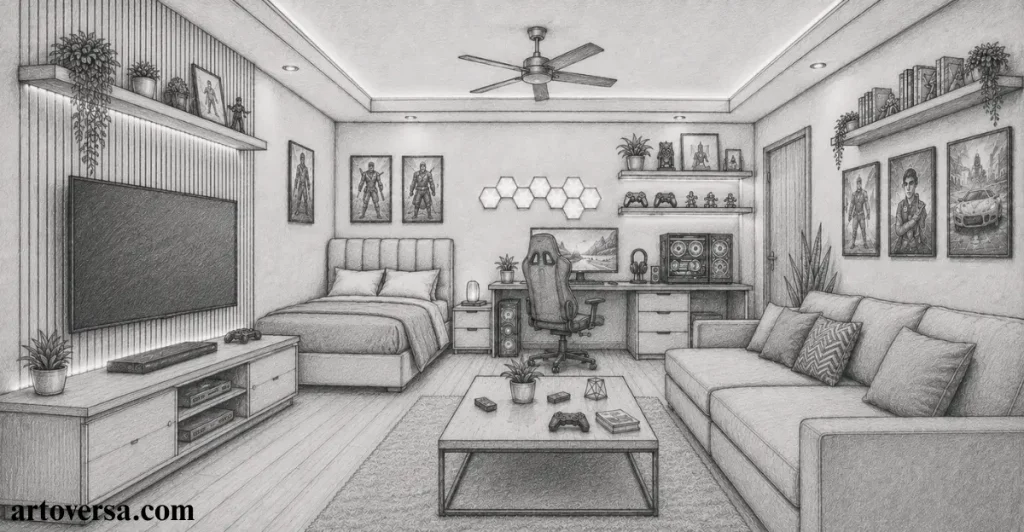
Keep each element balanced so the walls feel stylish without making the sketch look overcrowded.
- Map out the shelves on the open wall space and follow the room’s perspective. Use clean horizontal lines with enough separation between each level.
- Fill the shelving with a few simple decorative pieces such as books plants or small objects. Vary their shapes to create a natural arrangement.
- Frame the wall art with neat rectangular outlines and position each piece at a balanced height. Avoid filling every empty section of the wall.
- Introduce subtle room decor around the furniture to connect the different areas. Small accessories can add personality without distracting from the main design.
- Finish these details with gentle pencil shading and light texture. Keep the darker tones limited to selected areas so the overall drawing stays clean.
Common problems and how to overcome them
Too many decorative elements can make the walls appear cluttered and distract from the furniture. Choose only a few pieces and leave some open space around them. This creates a more polished and comfortable guest room design.
Through my own sketching work, wall details look strongest when they are kept simple and well spaced. A few shelves and carefully positioned art pieces can give the room plenty of personality. Subtle decoration also keeps the pencil drawing clean and refined.
Step 7: Refine the Complete Modern Guest Room Sketch
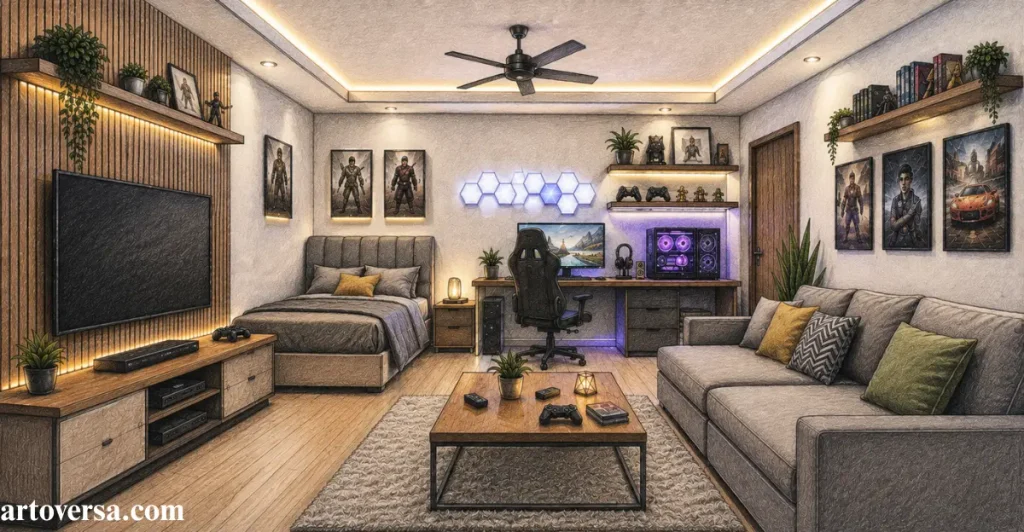
Focus on clean lines balanced shading and small finishing touches that make the entire design look polished.
- Review the walls floor and furniture to correct any uneven lines or awkward proportions. Clean construction marks that are no longer needed.
- Strengthen the main outlines around the bed sofa desk and media console. Use slightly darker strokes to give important features more definition.
- Add gentle shading beneath furniture and around selected corners. This creates depth while keeping the pencil style soft and natural.
- Refine the shelves wall art bedding and smaller decorative details. Make sure each element feels connected to the overall room design.
- Give the finished sketch one final check for balance and clarity. Erase distracting marks and enhance only the areas that need more depth.
Common problems and how to overcome them
Overworking the final stage can make a pencil sketch look dark and messy. Refine only the important areas and leave lighter sections untouched. This keeps the modern guest room clean and visually balanced.
After completing the main drawing, I focus on small corrections rather than adding unnecessary details. Controlled shading usually gives the furniture enough depth and definition. A clean final pass can make the entire guest room sketch feel much more professional.
Conclusion
Drawing a cozy modern guest room becomes easier when you build the space one section at a time. Start with accurate perspective before adding the main furniture and room features. Keep the bed sofa desk and decor balanced so the space feels natural and inviting. Use light pencil strokes to create soft shading without making the sketch look too dark. Small details such as wall art shelves and lighting can give the room more personality. Take time to refine proportions and remove unnecessary construction lines at the end. With practice you can create a polished guest room sketch that feels warm modern and realistic.
FAQs
What should I draw first in a modern guest room?
Start with the walls floor and basic perspective lines. This creates a clear structure for the main furniture. Keep the first strokes light and easy to adjust.
How can I make the guest room sketch look realistic?
Focus on accurate proportions and clean perspective. Add soft shading beneath furniture to create depth. Keep darker tones limited to important areas.
Which furniture should I add first?
Begin with the bed and padded headboard as the main focus. Then add the TV console desk and sofa. Finish with smaller furniture details and accessories.
How do I avoid making the drawing look crowded?
Leave enough open space between furniture pieces. Choose only a few decorative items for the walls. This keeps the room clean balanced and modern.
What pencil technique works best for this room sketch?
Use light strokes for the basic structure and darker lines for details. Build shading gradually instead of pressing hard from the start. This creates natural depth while keeping the sketch clean.
Please Write Your Comments