Easy Way to Draw Long Anime Hair
Updated: October 2, 2026
13
Drawing long anime hair becomes much easier when you break it into simple shapes and flowing sections. Start with light pencil lines to map out the head and overall direction of the hair before adding smaller details. Focus on creating smooth strands that follow the natural movement of the character instead of drawing every strand separately. With a little practice, you can create long anime hair that looks soft, detailed and full of movement. Grab your pencil and start with the basic hair shape, then slowly build up the strands and details to bring your anime character to life.
Table of Contents
Simple Guide to Drawing Long Anime Hair
Follow these simple steps to shape, detail and shade long anime hair with smooth flow and natural movement.
Step 1 – Make an Outline Drawing of the Head & Shoulders
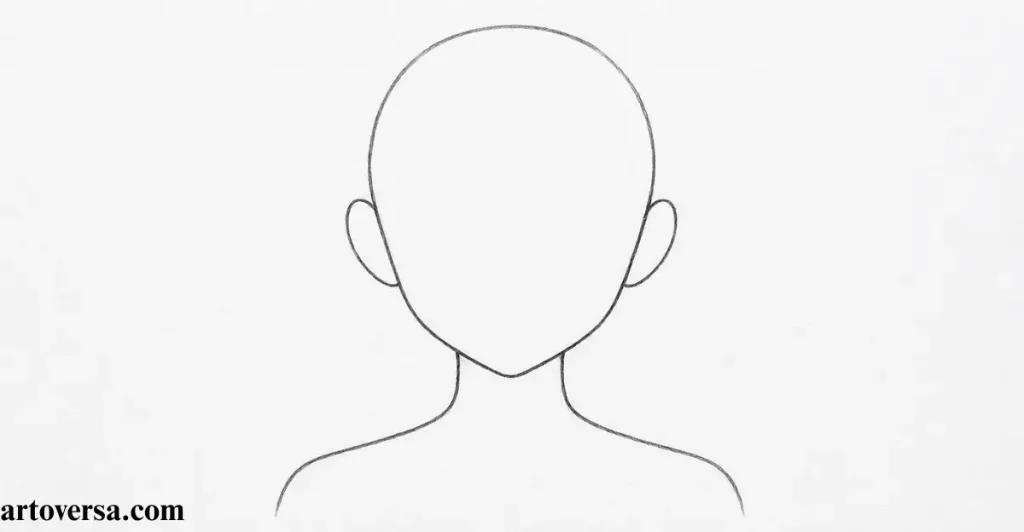
Keep the head neck and shoulders light and balanced to create a strong base for the long anime hair.
- Begin with a simple outline drawing of the head, keeping the lines light so the shape remains easy to adjust during sketching.
- Add the neck beneath the head and maintain a natural width that keeps the character’s proportions balanced and clean.
- Sketch the shoulders with smooth curved lines, leaving enough space for the hairstyle to fall naturally around them.
- Keep the facial structure simple because the main focus is the long anime hair head drawing, not detailed facial features.
- Use the provided reference to check the anime head and face proportions before moving forward with the hairstyle.
Common problems and how to overcome them
Keeping all the clumps identical can make the bangs appear rigid and unnatural. Give each section a slightly different length and angle, while making the center clump more noticeable than the surrounding sides.
An experienced approach is to establish the basic proportions first and avoid dark lines during this stage. Keeping the structure flexible makes corrections easier and helps the long anime hair sit naturally around the character.
Step 2 – Draw the Hair Along the Forehead
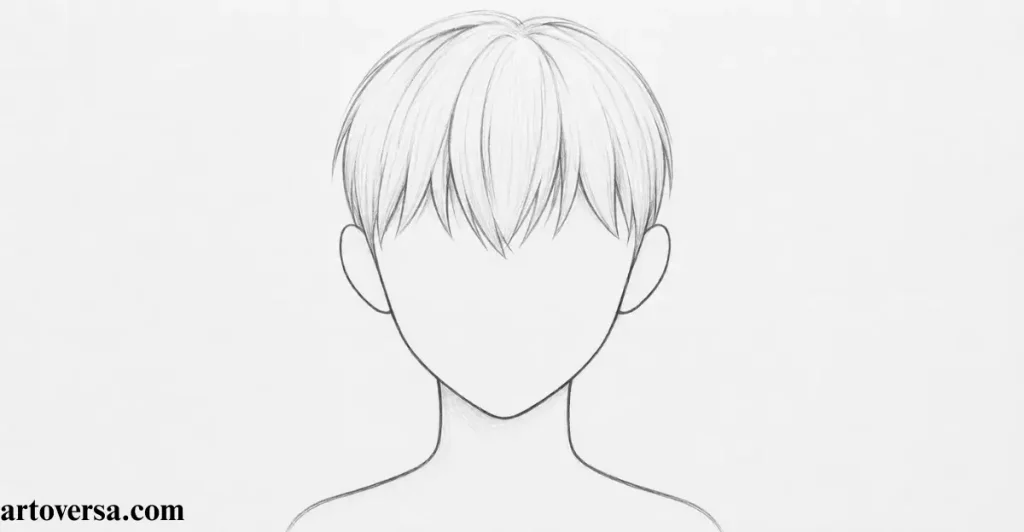
Start with light bangs along the forehead, using simple clumps to create a natural anime/manga hairstyle.
- Begin along the forehead with one larger middle clump, adding a small split at its pointed end for a defined shape.
- Add smaller clumps beside the center section, keeping their lengths varied to avoid a flat or repetitive appearance.
- Sweep the side clumps farther outward near the edges of the head, following the natural curve around the face.
- Keep the forehead hair fairly short while allowing the ends to connect smoothly with the longer sections around the sides.
- Use pointed hair clumps with gentle variations to create a more natural anime/manga look and give the bangs better movement.
Common problems and how to overcome them
A common mistake is making every clump equal in size or pointing in the same direction, which can make the bangs look stiff. Vary the lengths and angles while keeping the middle section slightly stronger than the sides.
An effective sketching approach is to establish the middle clump first and then build the surrounding sections outward. This keeps the forehead hair balanced while giving the side clumps enough room to flow naturally
Step 3 – Draw the Hair Along the Sides Running Past the Shoulders
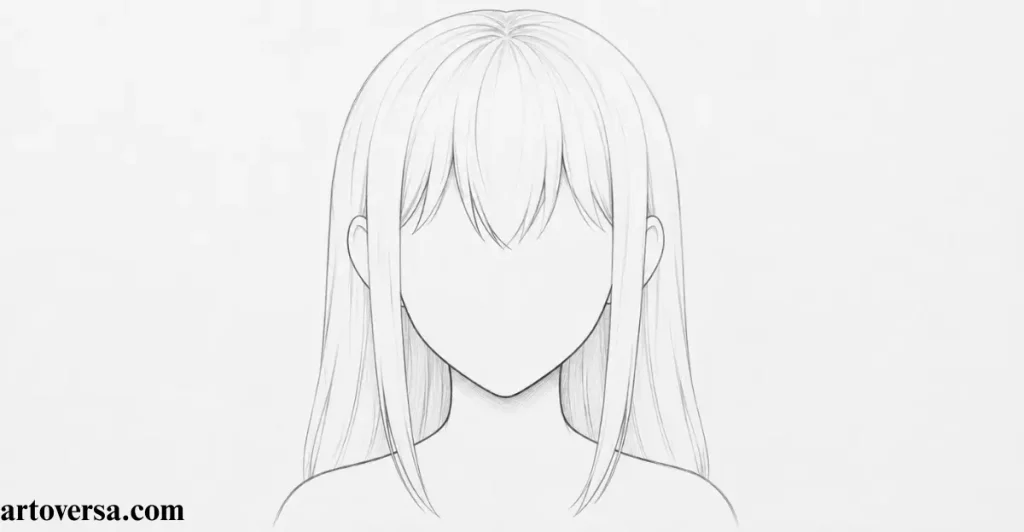
Extend the side hair smoothly past the shoulders, using gentle curves and flowing sections for a natural long hairstyle.
- Begin adding the hair along both sides of the head, keeping the sections balanced around the face and neck.
- Extend each side section down past the shoulders so the hairstyle clearly shows its long length and natural flow.
- Give the side hair a slight inward curve around the head instead of drawing completely straight lines.
- Add small splits at the ends of each section, then let these shapes transition gradually into soft folds moving upward.
- Adjust the length and shape as needed, making the side sections shorter, longer, or trimmed while keeping the overall style consistent.
Common problems and how to overcome them
Straight lines can make the side hair feel stiff and lifeless, especially when it extends past the shoulders. Add gentle curves, vary the ends, and let both sections follow a smooth downward flow for a softer and more natural hairstyle.
A practical approach is to establish the outer shape first and then refine the folds within each section. Keeping the curves gentle gives the long hair a softer and more believable flow around the shoulders. Small variations in length can also make the finished hairstyle feel less rigid and more natural.
Step 4 – Draw the Hair in the Back Running Down Behind the Shoulders
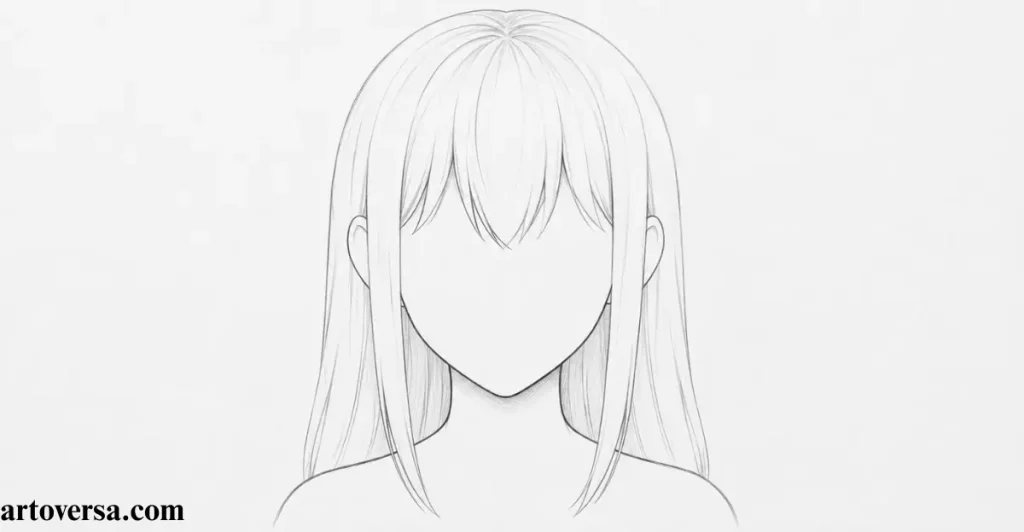
Shape the back hair from the crown to the shoulders, letting it gradually widen for a natural flowing hairstyle.
- Start from the top of the head and outline the back hair one side at a time, following the head’s shape closely at first.
- Let the hair gradually move away from the head as it travels downward, creating a smooth transition into the longer back section.
- Make the outline wider around the shoulders, allowing the long hair to fan outward naturally where it rests.
- Define the inner area around the neck with a few curved lines, helping the hairstyle wrap around the head instead of looking flat.
- Add soft hair folds that curve upward from the shoulders toward the bottom of the head, giving the back section more depth and movement.
Common problems and how to overcome them
One issue that often affects the back hair is keeping the entire section too narrow and straight. Let it follow the head near the crown, gradually widen around the shoulders, and add curved folds near the neck to create depth.
A polished anime sketch usually looks better when the back section changes width gradually from the crown toward the shoulders. Keeping the hair folds subtle creates a smoother flow without making the hairstyle look heavy.
Step 5 – Outline the Reflections in the Hair
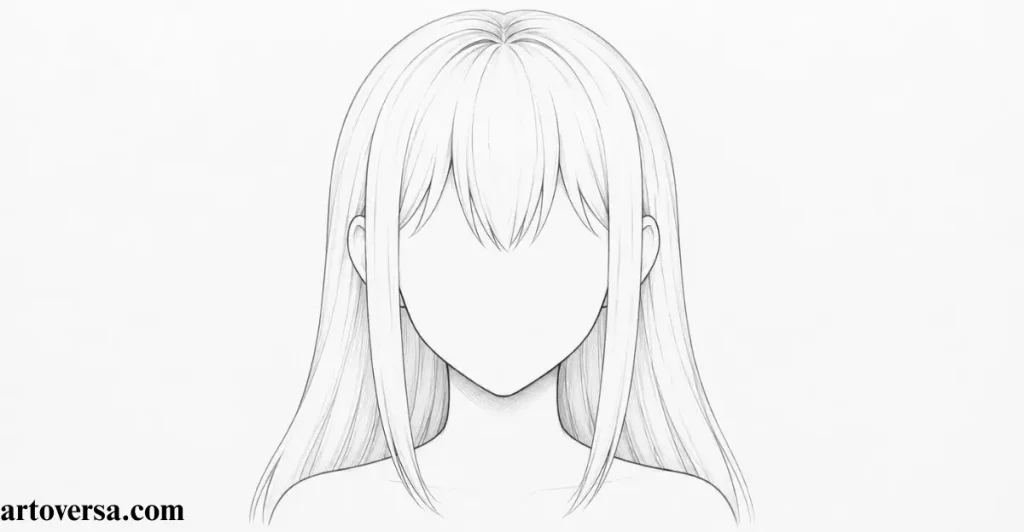
Lightly outline the reflections in the hair to create a smooth shine while keeping the anime hairstyle clean and natural.
- Lightly mark the reflections before shading when working with a pencil and paper, keeping the outlines subtle and easy to refine.
- If working digitally, place the reflections on a separate layer above the color or shading for easier adjustments.
- Arrange the highlights in gentle rows across the forehead, following the direction and flow of the hair.
- Add optional reflections along the sides of the hair, using shapes that complement the hairstyle without overcrowding it.
- Keep the reflection shapes simple and controlled, as a few well-placed highlights can make the anime-style hair appear much more polished.
Common problems and how to overcome them
Too many bright reflections can make the hair look busy instead of shiny. Leave enough space between each highlight and follow the natural direction of the strands so the effect remains clean and balanced.
A refined anime drawing usually benefits from planning the reflections before heavy shading begins. Keeping the highlights light allows the hair to retain a smooth surface while still showing convincing shine. Subtle placement across the forehead and sides often gives the cleanest result without distracting from the hairstyle.
Step 6 – Add Shading to Finish the Long Hair Drawing
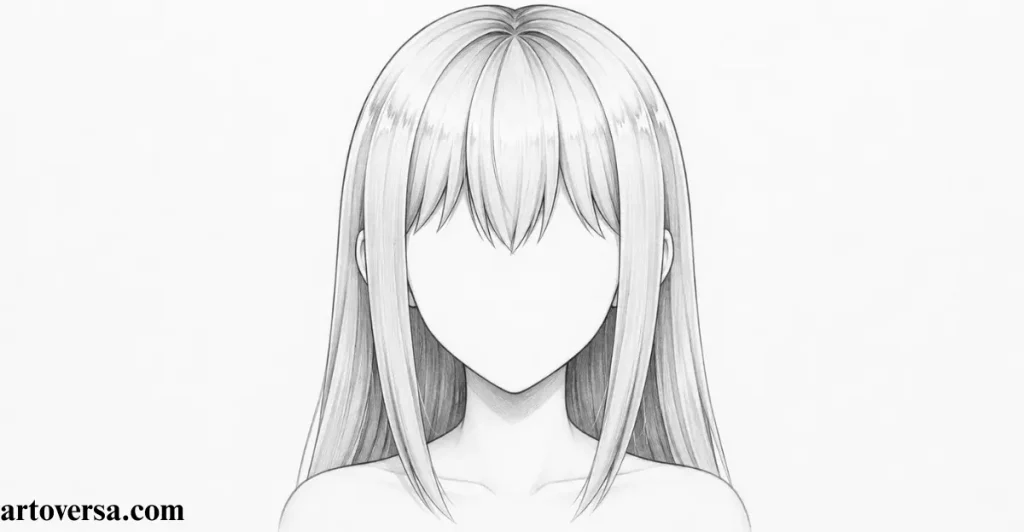
Add controlled shading and shadows while keeping the reflections white for a clean anime finish.
- Shade the hair with a regular pencil or choose any color you prefer, keeping the tone even while preserving the white reflections.
- Build the basic shading across each section, following the direction of the hair clumps so the long hairstyle keeps its natural shape.
- Add shadows along the forehead area, especially around the lower and side edges of the hair clumps where darker areas naturally appear.
- Continue the shadows through the side and back sections, allowing neighboring hair clumps to cast subtle darker areas onto one another.
- Use defined edges instead of soft gradients, outlining the darker areas first before filling them with stronger shading for a clear anime style.
Common problems and how to overcome them
Over-blending the shading can remove the crisp anime appearance and make the reflections less noticeable. Keep clear transitions between light and dark areas, leave the highlights white, and place shadows according to the direction of the light source.
Clean anime shading works best when the light and dark areas are planned before adding deeper tones. Keeping the reflections untouched gives the hair a convincing shine, while firm shadow edges add depth without requiring complicated gradients. Following the existing hair sections also keeps the finished drawing cohesive.
Conclusion
Creating long anime hair can feel simple once the hairstyle is approached through clear sections and flowing shapes. The head, shoulders, forehead, sides and back each provide a useful foundation for building the final look. Keeping the early lines light makes it easier to refine proportions and adjust the direction of the hair. Adding subtle reflections and defined shading gives the hairstyle more depth without making the drawing overly complicated. Different clump sizes and gentle curves can also make the finished style feel more natural and expressive. With steady practice, these techniques become easier to apply to different anime characters and hairstyles.
FAQs
How do you draw long anime hair easily?
Start with simple shapes and light guidelines to establish the head and overall direction of the hair. Build the hairstyle section by section before adding smaller details. Finish with subtle shading, shadows, and reflections to give it depth and movement.
What is the easiest anime hairstyle to draw?
Long straight hair is a simple option because its main shape can be created with smooth flowing sections. Focus on the overall direction instead of drawing individual strands. Gentle curves and basic hair clumps can make the style look clean and natural.
How do you make anime hair look more natural?
Vary the length, direction, and size of the hair clumps instead of making every section identical. Use soft curves and pointed ends to create movement around the character. Light shading and carefully placed reflections can add a realistic sense of depth.
How do you add shine to anime hair?
Leave selected areas white and lightly outline the reflections before applying darker shading. Place the highlights across the forehead and sides while following the direction of the hairstyle. Keeping the highlights limited helps create a smooth and polished shine.
How do you shade long anime hair?
Begin with an even layer of shading, then add darker shadows around overlapping sections and areas facing away from the light. Keep the transitions between light and dark areas clear for a classic anime appearance. Leave the reflections untouched to maintain a bright and dimensional finish.
Please Write Your Comments