How to Draw a Modern Luxury Backyard Pool Step by Step
Updated: September 25, 2026
30
A luxury backyard pool can become the main feature of a beautiful outdoor space. In this tutorial you’ll learn how to sketch a modern pool area from the basic layout to the final details. We’ll build the scene step by step with clean lines realistic proportions and stylish elements. You’ll also learn how to add depth through shading furniture landscaping and surrounding features. With a simple approach even beginners can create an impressive poolside drawing. Grab your pencil and follow the steps to turn a simple backyard idea into a stunning modern pool sketch.
Table of Contents
7 Steps to Draw a Modern Luxury Backyard Pool Design from Start to Finish
Follow these simple steps and create a stylish luxury pool sketch with realistic depth and beautiful outdoor details.
Step 1: Sketch the Basic Backyard Layout
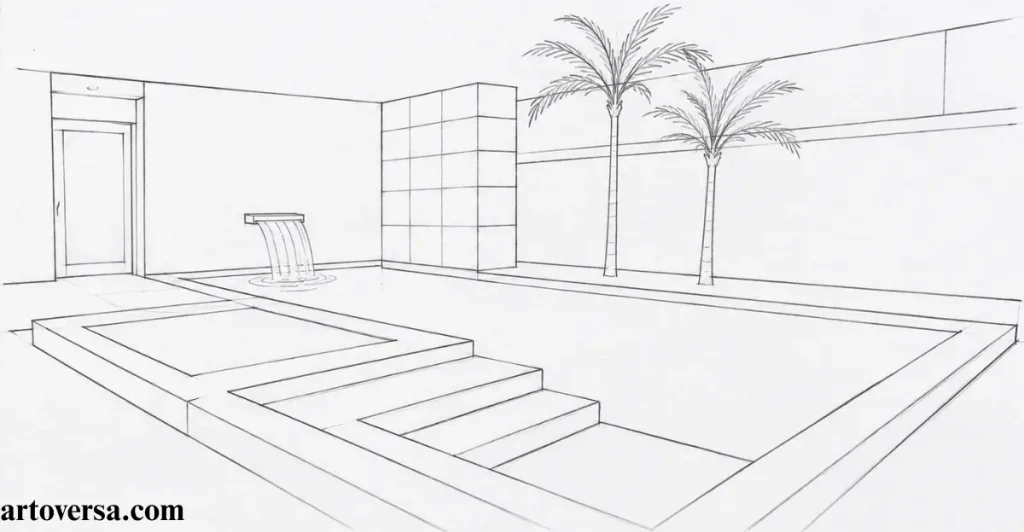
Keep the first lines soft so the overall backyard structure remains easy to adjust as you develop the drawing.
- Start with light boundary lines to define the overall backyard space and keep the proportions balanced. Keep the lines soft so you can easily adjust the layout later.
- Sketch the main swimming pool shape and position it naturally within the backyard layout. Make sure there is enough space around the pool for other features.
- Add simple guidelines around the pool to show the deck and available walking space. Keep these lines light and avoid adding small details at this stage.
- Mark the general placement of garden areas walls and other large backyard features. Focus on their size and position rather than detailed decoration.
- Review the complete layout carefully and adjust the spacing before adding smaller details. A balanced arrangement will make the final backyard sketch look more natural.
Common Problems and How to Overcome Them
Beginners often make the layout too crowded by adding details too early. Keep the guidelines light and focus on the main shapes first. Check the spacing around the pool to keep the backyard balanced.
I always start backyard sketches with very light construction lines. This makes it easier to correct proportions without disturbing the main drawing. With practice I found that a simple layout creates a cleaner and more realistic result.
Step 2: Draw the Main Swimming Pool Shape
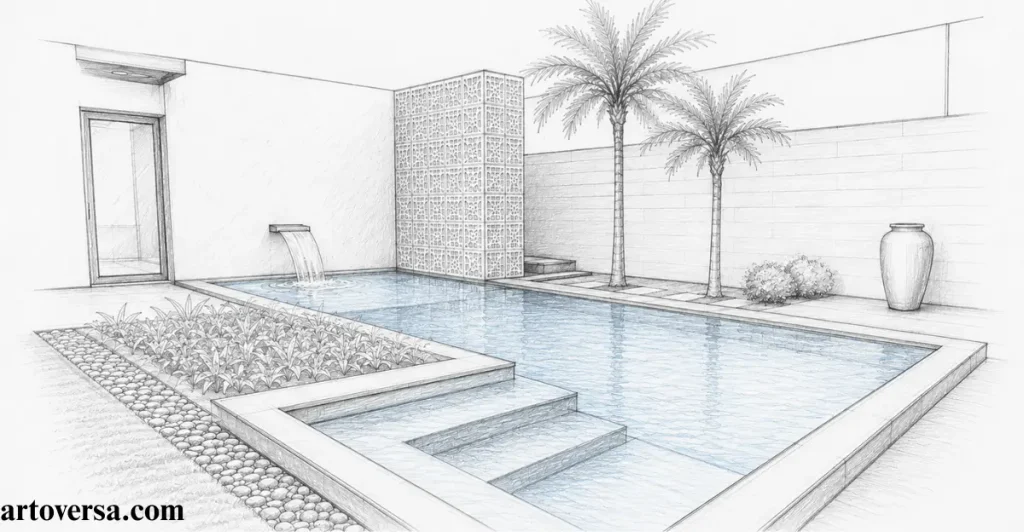
With the backyard layout in place, move your attention to the main swimming pool shape and decide how it should sit within the available space.
- Lightly map out the pool using smooth guidelines and leave enough room around it for the surrounding backyard features. Avoid making the outline too dark at this stage.
- Work along the edges with gentle curves and keep the shape consistent from one side to the other. Pay attention to the perspective so the pool looks properly placed.
- Give the water area a second inner line to define its boundary and create a little visual depth. Keep the gap between both outlines even and clean.
- Where the design includes different pool levels add them with subtle lines instead of heavy shading. This helps show the structure without making the sketch look complicated.
- Take a moment to compare the pool with the overall backyard before moving ahead. Fix uneven curves or awkward spacing now while the guidelines are still easy to change.
Common Problems and How to Overcome Them
A common mistake is making the pool too wide or too narrow compared with the backyard. Uneven curves can also make the shape look unnatural and difficult to refine. Use light guidelines and check the proportions before adding darker lines.
I usually judge the pool shape from the surrounding space rather than drawing it in isolation. This helps me keep the proportions natural and gives the whole backyard a better flow. I have found that small corrections to the curves can greatly improve the finished sketch.
Step 3: Add the Raised Water Feature and Planter
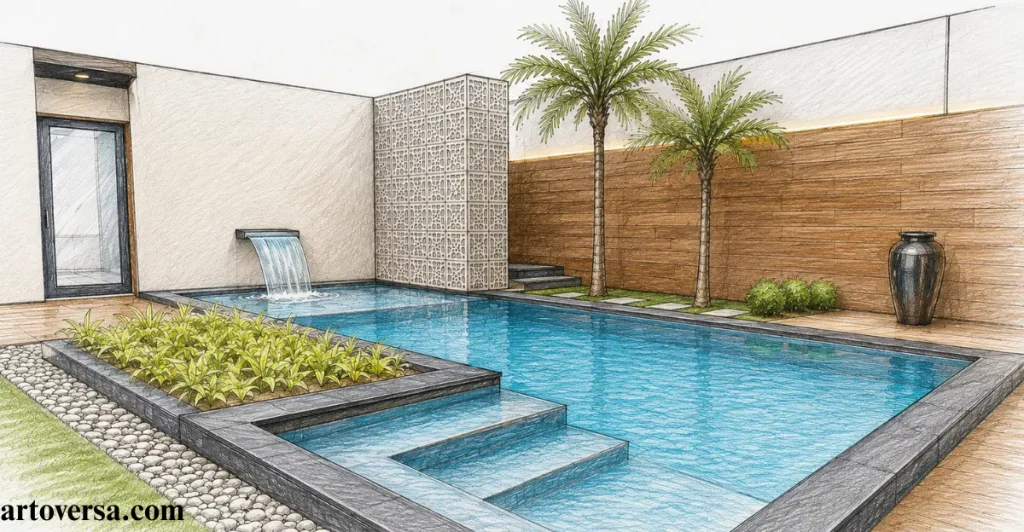
Now bring more character to the pool area by adding the raised water feature and planter as connected elements within the backyard design.
- Place the raised water feature beside the pool and use light lines to establish its height and width. Keep its position aligned with the existing pool structure.
- Shape the upper section carefully so the water feature looks solid and properly connected to the pool. Avoid heavy pencil pressure while refining the edges.
- Introduce the planter near the water feature and give it a simple geometric form. Leave enough space around it so the landscaping does not overwhelm the pool area.
- Add a few light guidelines for the plants inside the planter without drawing detailed leaves yet. Focus mainly on their height and overall placement.
- Look at the water feature and planter together with the pool before moving forward. Adjust their size or position if they appear too large or disconnected from the backyard layout.
Common Problems and How to Overcome Them
One common mistake is making the raised feature too large compared with the pool. Another is placing the planter too close to the water area which can make the composition feel crowded. Keep both elements proportional and use the surrounding empty space to guide their placement.
I like to treat the water feature and planter as part of one balanced composition. In my sketches I usually adjust their height several times before adding any fine details. This approach helps the pool area feel more natural and professionally planned.
Step 4: Sketch the Privacy Walls and Wooden Panels
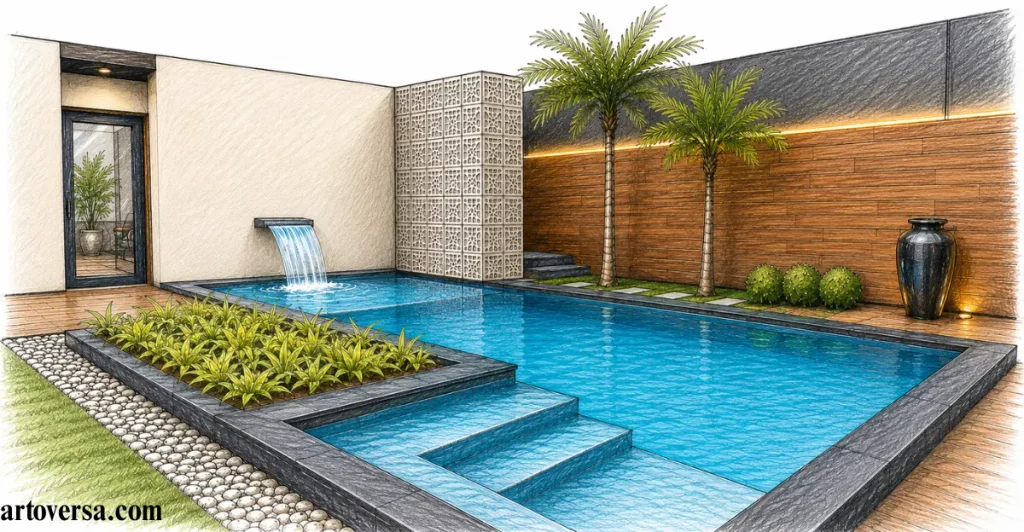
Give the backyard more structure by adding the privacy walls and wooden panels around the pool area.
- Work out the position of each privacy wall using light vertical and horizontal guidelines. Keep the lines straight and aligned with the existing backyard perspective.
- Add the wooden panels between the walls with even spacing and simple rectangular shapes. Vary the depth slightly where needed to make the structure feel more natural.
- Refine the wall edges with cleaner pencil lines once the placement looks right. Avoid making them too dark because softer lines will blend better with the rest of the sketch.
- Add subtle panel divisions to suggest the wooden texture without filling the area with unnecessary details. Keep the pattern neat and consistent across each section.
- Step back and check how the walls and panels frame the swimming pool. Adjust their height or position if they overpower the pool or make the backyard feel too enclosed.
Common Problems and How to Overcome Them
Uneven wall lines can quickly make the backyard perspective look off. Keep the panel spacing consistent and compare each section with the pool before refining it. Avoid making the walls too heavy because they should support the design rather than dominate it.
Draw the main wall structure first and add the wooden divisions afterward. This makes it much easier to maintain clean proportions across the whole backyard. I have found that simple panel details often look more realistic than heavily drawn textures.
Step 6: Detail the Pool Deck, Stones, and Garden Decor
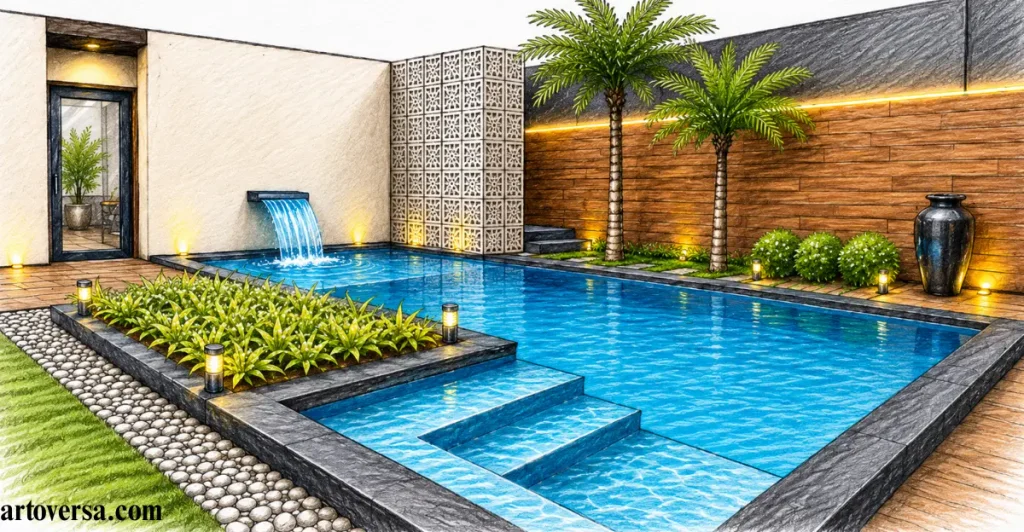
The main structure is ready so now add smaller details that give the backyard more texture and personality.
- Add clean lines across the pool deck to define its surface and show the direction of the flooring. Keep the spacing natural rather than making every section identical.
- Place a few stones around the garden edges and near the pool area using different shapes and sizes. Leave small gaps between them to create a more realistic arrangement.
- Introduce simple garden decor such as pots small ornaments or decorative pieces where there is open space. Keep each item subtle so the backyard does not feel overcrowded.
- Use gentle shading beneath the stones and decor to show their position on the ground. A little contrast can make these small elements stand out without heavy detailing.
- Step back and check how the finished details work with the pool deck and tropical plants. Remove anything that feels unnecessary and keep the overall backyard clean and balanced.
Common Problems and How to Overcome Them
Small details can easily become too dark or crowded when every area is filled. Keep the stones and decor varied but simple so they do not compete with the pool. Leave some clean spaces around the deck to maintain a relaxed composition.
Over time I have found that small details work best when they are added with restraint. I usually place only a few decorative elements and let the empty spaces balance them. This keeps my backyard sketches detailed while still giving them a clean professional appearance.
Step 7: Refine and Shade the Complete Backyard Pool Design
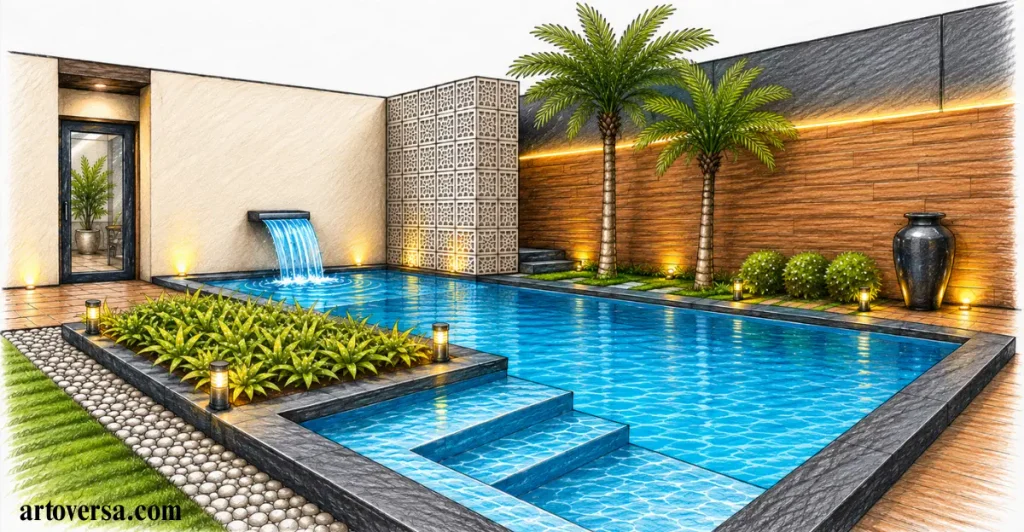
At this final stage refine the complete backyard pool design by strengthening important outlines and adding soft shading where depth is needed.
- Go over the main swimming pool outline with controlled pencil strokes and strengthen only the areas that need more definition. Keep the curves smooth and consistent.
- Add soft shading to the pool water and nearby surfaces to create a sense of depth. Blend the darker areas gently so the water does not look flat.
- Deepen selected shadows beneath the palm trees, planters, stones, and garden decor. These subtle contrasts help each element sit naturally within the backyard.
- Refine the privacy walls and wooden panels with light texture and darker areas where shadows would naturally fall. Keep the details controlled so the walls do not overpower the pool.
- Finish by checking the entire pool deck and surrounding landscaping for uneven lines or empty-looking areas. Erase unnecessary guidelines and add final shading only where it improves the overall balance.
Common Problems and How to Overcome Them
Many beginners make the final sketch too dark by shading every surface equally. Keep the strongest shadows near important edges and leave lighter areas around them. Avoid adding extra details once the backyard already has a balanced and finished appearance.
I usually save the darkest pencil work for the very end because it gives me more control over the final contrast. Working from light to dark has helped me keep my pool sketches clean while still creating realistic depth. I have found that subtle shading often makes a bigger difference than adding excessive details.
Conclusion
Drawing a modern luxury backyard pool is a rewarding way to practice proportions perspective and realistic outdoor details. By starting with a simple layout you can create a strong foundation before adding the pool raised water feature privacy walls and landscaping. Each step helps bring more depth and character to the overall backyard design. Soft shading and carefully placed shadows can make the pool water furniture stones and plants feel more natural. Remember to keep your early lines light and refine the darker areas only when the main structure is complete. With steady practice you can improve your control and create cleaner more balanced pool sketches. Most importantly enjoy the process and let each drawing help you develop your own style and confidence.
FAQs
What pencil is best for drawing a modern backyard pool?
An HB pencil is a good choice for creating the basic pool layout and clean outlines. You can use softer pencils such as 2B or 4B for darker areas. This combination helps create both structure and depth.
How do I make the pool look realistic?
Focus on smooth curves and keep the pool proportions consistent with the backyard. Add a second inner outline to show depth around the water. Soft shading can also make the pool look more three-dimensional.
How can I draw the backyard in proper perspective?
Start with light guidelines before drawing the main pool and surrounding features. Keep walls deck lines and wooden panels aligned with the same perspective. Check the spacing often to maintain a balanced composition.
How do I add realistic shading to the pool area?
Begin with very light shading and gradually build darker areas where natural shadows would fall. Add deeper tones beneath plants stones and raised structures. Blending softly will help the surfaces look more natural.
Can beginners draw a luxury backyard pool?
Yes beginners can create this type of drawing by breaking the design into simple shapes. Start with the layout and gradually add the pool walls landscaping and small details. Practicing each step will make the process much easier.
How can I make my pool sketch look more professional?
Keep the construction lines light and avoid adding too many unnecessary details. Use darker pencil strokes only on important edges and shadowed areas. A clean composition with balanced spacing will make the finished sketch look polished.
Please Write Your Comments