How to Draw Sushi Step by Step
Updated: October 1, 2026
13
Sushi is one of the most interesting foods to draw because of its unique shapes, textures, and colorful ingredients. In this tutorial, you will discover how to build a sushi drawing step by step using simple pencil lines. Each stage will help you create the rice, seaweed wrap and filling with better detail. You can take your time and focus on making every shape look natural. By the end, you will have a clean and attractive sushi illustration. Start drawing your own sushi today and enjoy bringing this tasty food illustration to life.
Table of Contents
How to Draw Maki Sushi Step by Step
Start drawing your own maki sushi today and enjoy creating this delicious food illustration step by step.
Step 1 – Draw the Outer Shape of the Sushi Roll
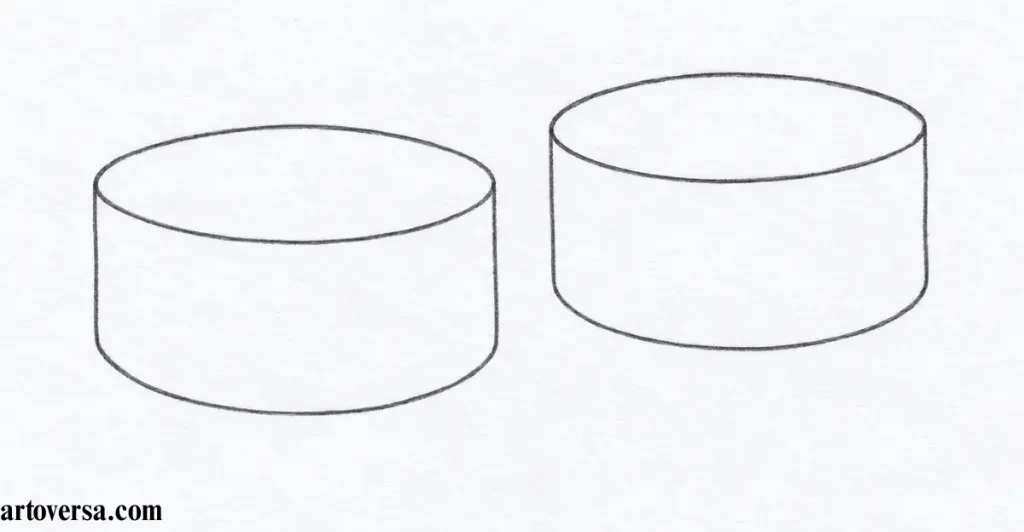
Start your sushi sketch with confidence and use the steps below to create a smooth outer shape with balanced curves.
- Begin with a light oval for the visible top surface, then extend both sides downward to create the basic cylindrical shape.
- Keep the bottom edge slightly rounder than the top, as a flatter lower curve can make the roll appear stiff or oddly shaped.
- Use gentle guidelines around the sides to maintain even proportions while developing the basic maki roll structure.
- Avoid pressing heavily with the pencil at this stage because soft lines make it easier to adjust the outline drawing and correct uneven curves.
- Step back and check the complete outer shape before moving forward, making sure the roll has convincing perspective and smooth rounded form.
Common Problems and How to Overcome Them
A common mistake is making the bottom completely flat or giving the top and lower curves identical shapes, which can make the sushi look unnatural. Keep the lower section gently rounded and use light guidelines to correct the perspective before adding finer details.
From my experience with food sketches, beginners usually get better results when they focus on proportions first. I keep the initial outline very light and adjust the curves several times before adding details. This simple habit helps the finished sushi maki look balanced and natural.
Step 2 – Draw the Filling
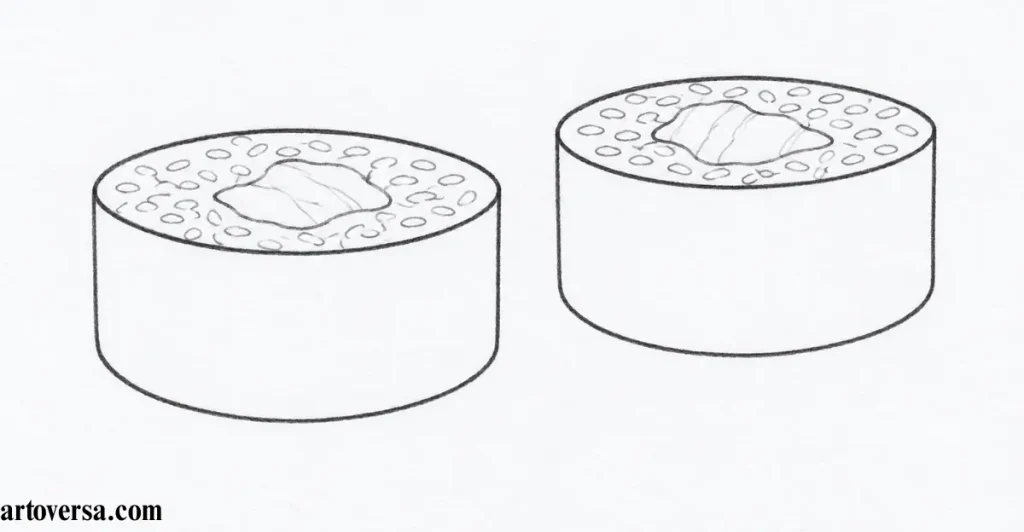
Since the roll is viewed from an angle, slightly flatten the ingredients so they follow the same direction as the top surface rather than appearing too tall or upright.
- Start by adding a few combined ingredients inside the center, using simple shapes that fit comfortably within the roll without touching the outer edge.
- Include fish with small sections of vegetables, or keep the center entirely vegetable-based depending on the type of sushi maki you want to create.
- Adjust each ingredient slightly because different fillings can have their own shape, thickness and placement inside the roll.
- Follow the viewing angle of the roll by keeping the ingredients somewhat flattened, allowing them to match the curve and direction of the top surface.
- Keep the filling simple at first and check its spacing before adding small lines, textures, or extra details to the sushi maki details drawing.
Common Problems and How to Overcome Them
Uneven filling often happens when the fish or vegetables are drawn too tall, making them look as though they are standing upright inside the roll. Follow the angle of the opening and gently flatten each ingredient so the filling sits naturally within the available space.
Through regular food sketching practice, I have found that simple filling shapes create a cleaner result than adding too many details early. Keeping each ingredient slightly flattened makes the sushi maki feel more believable. This technique also makes later outlining much easier.
Step 3 – Add the Other Filling Type
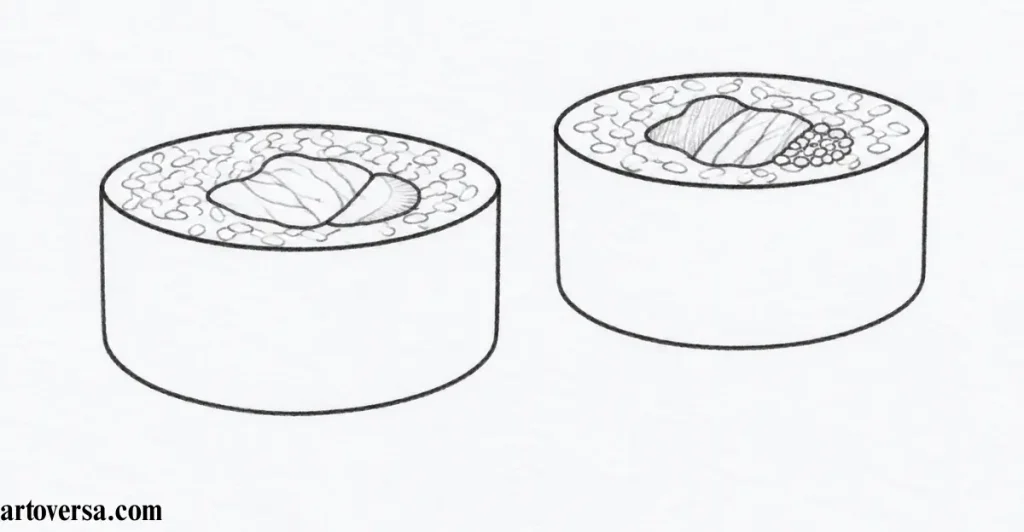
A single slice of fish or vegetable can create a neat sushi maki line drawing while keeping the sketch easy to follow.
- Choose one ingredient such as a slice of fish and place it near the center of the roll for a clean and recognizable filling.
- You can also use a vegetable as the main filling, shaping it with simple curves that follow the opening of the sushi.
- Keep the selected ingredient slightly flattened so it follows the same angle as the roll instead of appearing too thick.
- Use a few controlled lines to define the filling while leaving enough open space around it for a balanced line drawing.
- Check the complete center before refining the edges, making sure the single filling remains clearly visible within the maki.
Common Problems and How to Overcome Them
A single filling can look misplaced when it is drawn too large or pushed against one side of the roll. Keep the ingredient centered and match its curves to the surrounding opening so the fish or vegetable looks naturally enclosed.
I prefer working with one strong filling before attempting multiple ingredients. A carefully shaped slice of fish can make the whole sketch recognizable without complicated detailing. This approach has consistently helped me maintain cleaner proportions and smoother lines.
Step 4 – Color the Maki Drawing
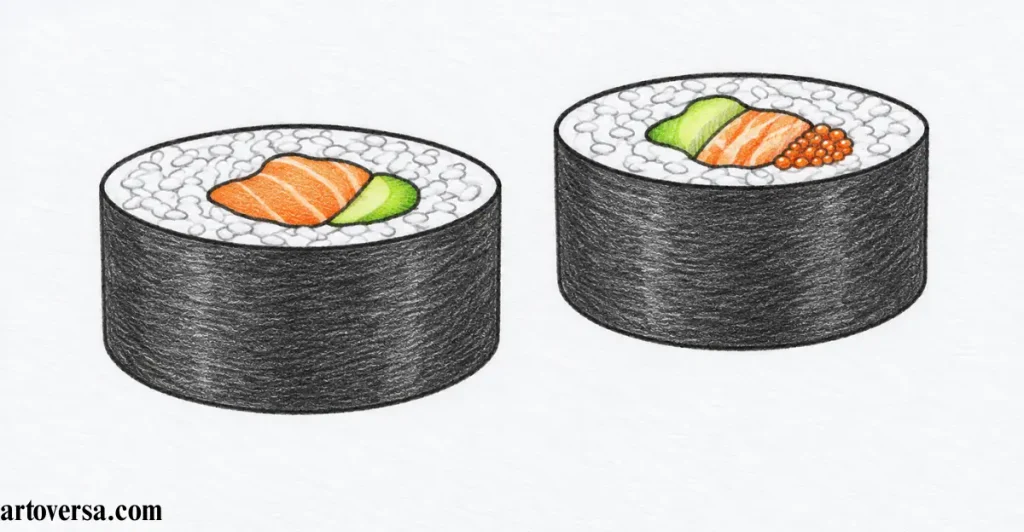
Use dark grey for the seaweed, then choose natural shades for the fish and vegetables to make the finished sushi maki drawing look fresh and appealing.
- Start by filling the seaweed with a dark grey shade, keeping the color even around the outside of the roll.
- Leave the rice white so there is a clear contrast between the outer layer and the colorful filling inside.
- Give the fish an orange or pink tone, depending on the type you want to represent in your maki drawing.
- Add different shades of green to the vegetables, using lighter or darker tones to separate individual pieces.
- Keep the coloring neat and within the outlines, allowing each ingredient to remain distinct while preserving the clean appearance of the sushi maki.
Common Problems and How to Overcome Them
One frequent mistake is applying strong color everywhere, which can hide the rice and make the seaweed less noticeable. Keep the rice white, use dark grey around the outside, and choose controlled shades for the fish and vegetables so every ingredient remains easy to recognize.
I usually build the lighter areas first and then strengthen the darker sections. Keeping the rice white gives the finished sushi maki drawing a much cleaner appearance. I also find that natural orange, pink and green shades make the ingredients stand out without overwhelming the sketch.
How to Draw Uramaki Sushi Step by Step
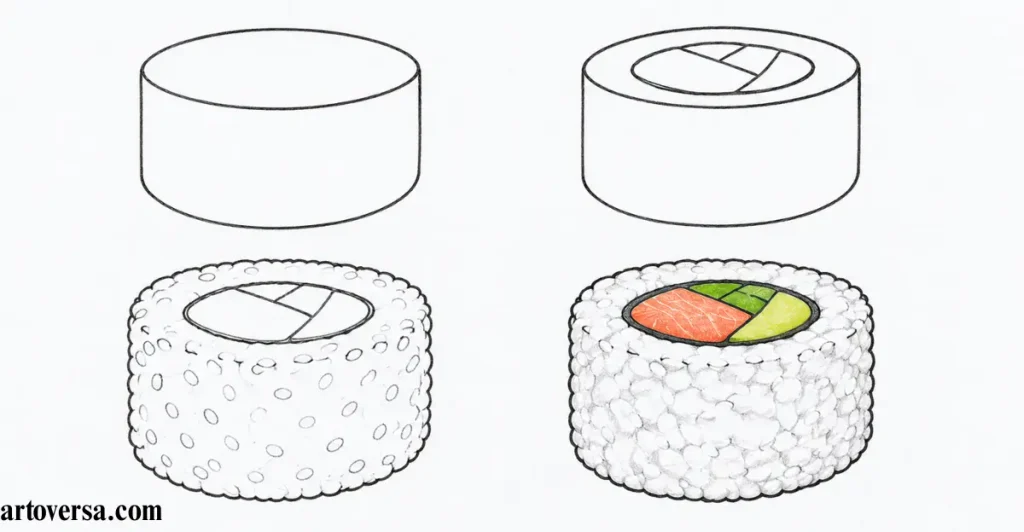
Grab your pencil and follow these simple steps to draw a delicious Uramaki sushi roll with ease.
Step 1 – Draw the Base Shape of the Roll
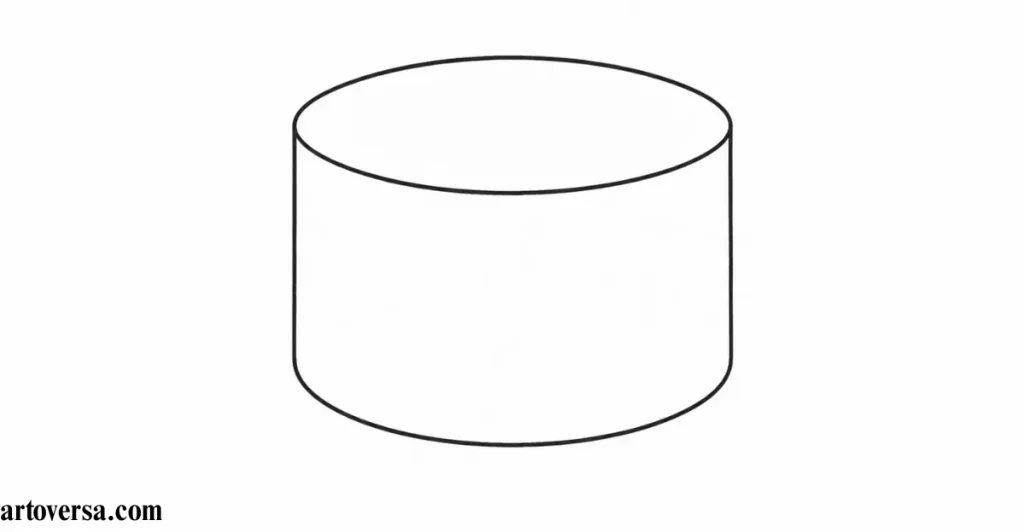
Keep the cylinder simple and evenly proportioned, because this initial structure will be erased once the rice and filling details are added.
- Draw a simple cylinder with light pencil strokes, keeping the top and bottom curves smooth and balanced.
- Make the outer form slightly rounded so the sushi uramaki does not look flat or overly rigid.
- Use soft pencil pressure because the entire guide will need to be removed after the main details are completed.
- Check the width and height before continuing, ensuring the base shape leaves enough room for the rice layer and filling.
- Keep the temporary lines clean and minimal so the later outline can be placed accurately.
Common Problems and How to Overcome Them
A frequent issue is drawing the guide too dark, which makes it difficult to erase without affecting the finished sushi uramaki drawing. Keep the cylinder very light and focus on accurate proportions rather than permanent lines.
Light construction work consistently produces cleaner results when drawing rounded food forms. A soft base shape makes proportion changes simple before the final outline begins. This method also keeps the finished uramaki more natural and polished.
Step 2 – Add the Rice Details & Filling
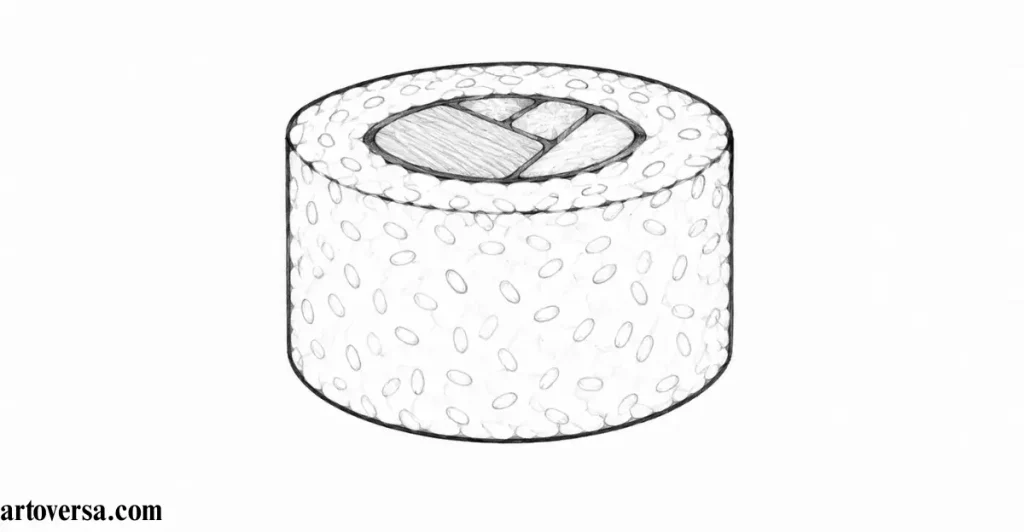
Build the rice texture around the roll by following the temporary cylinder and adding small irregular bumps that resemble joined rice grains.
- Trace the roll with small bumps of different sizes to create the appearance of individual rice grains pressed together.
- Add a row of gentle curves along the forward-facing edge, giving the rice a soft and textured appearance.
- Draw the filling inside the center and allow it to occupy slightly more space than in a smaller maki roll.
- Follow the roll’s angle when shaping the ingredients, so they appear properly positioned rather than upright.
- Erase the original cylinder guide once the rice details and filling are established, leaving only the cleaner final structure.
Common Problems and How to Overcome Them
Too many identical rice grains can make the surface look mechanical instead of natural. Vary their shapes and sizes while keeping the upper edge smoother, then remove the construction lines gently after the details are secure.
Natural-looking rice texture usually comes from controlled irregularity rather than repeated identical marks. Small variations in each grain give the sushi uramaki details a more convincing surface. Keeping the upper section smoother also creates a clearer sliced appearance.
Step 3 – Add More Rice Grains
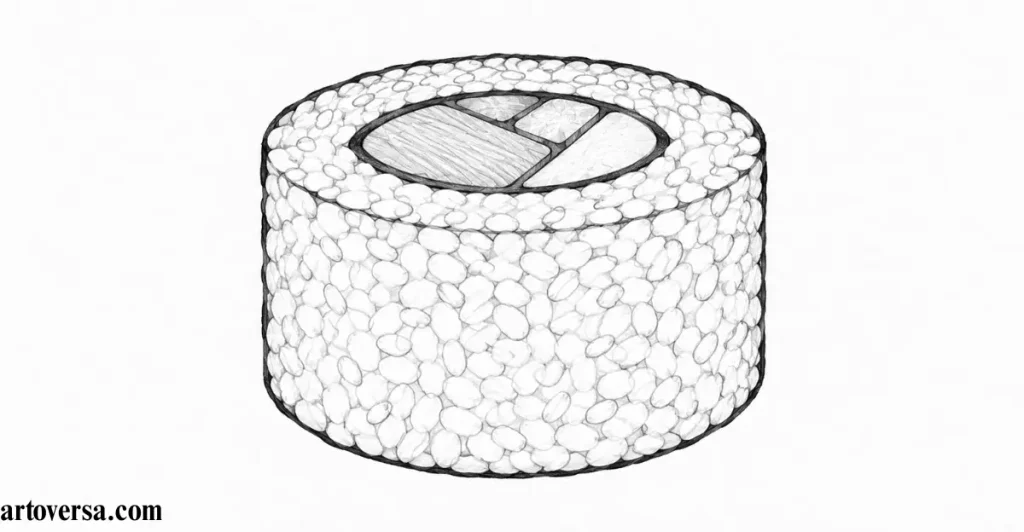
Keep these marks selective rather than covering every section, especially across the smooth top surface.
- Add a few individual rice grains along the curved outer edge where they naturally appear to stick out.
- Vary the size and direction of each grain to create a subtle texture without making the roll look crowded.
- Follow the curvature of the sushi when placing these details so the marks support its rounded form.
- Avoid adding grains across the top, where the sliced rice should appear smoother and more even.
- Keep the final line drawing clean by using only a few carefully placed marks instead of excessive texture.
Common Problems and How to Overcome Them
Adding too many grains across every surface can make the sushi uramaki appear rough and cluttered. Concentrate the small details around the curvature and outer edges while leaving the top comparatively smooth.
Selective texture tends to make food illustrations look more refined than heavily detailed surfaces. A handful of carefully positioned rice grains can suggest the entire texture without distracting from the roll. This balance keeps the line drawing clean and easy to understand.
Step 4 – Color the Uramaki Drawing
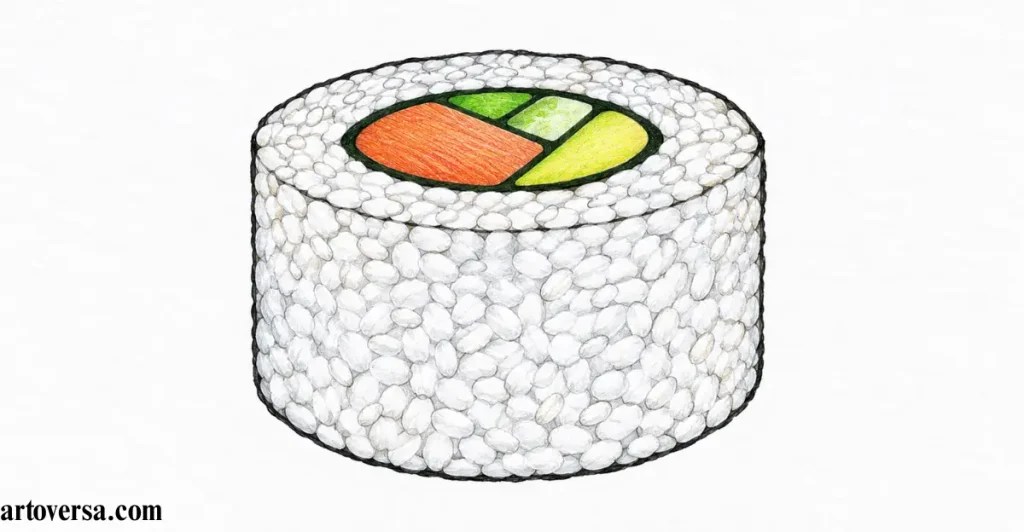
Add natural colors to your uramaki drawing by choosing shades that match the ingredients inside the roll.
- Begin with a soft off-white shade for the rice, leaving small areas lighter to preserve its natural appearance.
- Choose a suitable color for the filling, such as pink or orange for fish or green tones for vegetables.
- Apply darker shades sparingly around selected edges to give the uramaki drawing more depth without covering the line work.
- Keep the rice grains slightly varied in tone so the texture remains visible while the surface still looks soft.
- Blend the colors carefully within each section, maintaining clear separation between the rice and ingredients.
Common Problems and How to Overcome Them
Heavy coloring can hide the small rice grains and make the filling lose its definition. Use lighter layers first, then build stronger tones gradually around the edges while keeping the central areas clean.
Balanced coloring works especially well for detailed uramaki drawings because subtle tones preserve the texture. Light rice paired with stronger ingredient shades creates clear visual separation. Gentle layering also keeps the original line work crisp and recognizable.
Conclusion
Creating a sushi illustration becomes more enjoyable when each stage is approached with patience and simple techniques. Starting with basic shapes provides a strong foundation for developing the roll filling rice grains and other details. Maki and uramaki styles also offer different ways to practice proportions, texture and perspective. Light pencil strokes make corrections easier while thoughtful coloring gives the finished artwork more character. With consistent practice, even beginners can develop smoother lines and more natural-looking food sketches. Every new attempt brings an opportunity to improve small details and drawing control. Grab your pencil choose a sushi style and enjoy creating your next tasty sketch.
FAQs
Which sushi style is easiest for beginners?
Maki sushi is a simple option because its cylindrical structure is easy to build. Start with the outer form before adding the filling and seaweed. Light pencil strokes make each stage easier to adjust.
What materials work best for sushi sketching?
An HB pencil and smooth drawing paper are enough for creating a clean sushi illustration. Softer pencils can help with darker areas and subtle shading. Colored pencils can be added later for the ingredients.
Why does sushi rice need irregular details?
Uneven marks help the rice look more natural instead of appearing like a repeated pattern. Small curves and varied grain shapes create a softer texture. Keeping the top smoother also improves the sliced appearance.
Which colors suit a sushi illustration?
Off-white or white works well for rice, while dark gray can represent seaweed. Pink and orange are useful for fish, while green shades suit vegetables. Light layering keeps the different ingredients distinct.
Can Uramaki be drawn without advanced skills?
Uramaki can be created by starting with a simple cylinder and building the rice texture around it. The filling can then be added while following the roll’s angle. Basic shapes and patient detailing are enough for a beginner-friendly result.
Please Write Your Comments