Drawing a Petunia Flower with Graphite Pencils
Updated: October 5, 2026
10
Delicate petunia flowers bring beauty and elegance to any graphite pencil drawing. This step-by-step tutorial shows an easy way to sketch the flower with clean lines and smooth shading. You will learn how to shape each petal, add soft textures and create natural depth with simple pencil techniques. Every stage is designed to help beginners improve their drawing skills while achieving realistic results. With a little practice you can create a detailed petunia flower that looks soft balanced, and full of life. Pick up your graphite pencils today and enjoy turning a simple sketch into beautiful artwork.
Table of Contents
How to Draw a Veined Petunia Flower
Start drawing your veined petunia flower today and enjoy bringing every delicate line and petal to life with graphite pencils.
Step 1: Sketching the Flower Outline
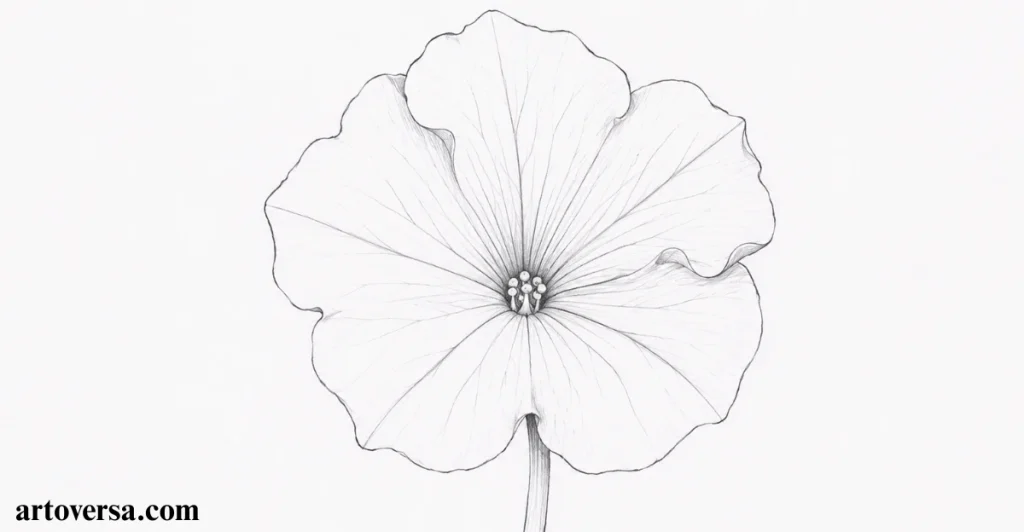
A carefully sketched outline makes every shading step easier and helps create a balanced, realistic petunia drawing.
- Bring your petunia sketch closer to life by creating a smooth and balanced foundation with graphite lines. A well-planned outline helps every curve, petal and detail develop naturally in the upcoming stages.
- Creating the flower outline with soft pencil strokes helps establish the main structure before adding smaller features. Keep the shape flexible and focus on capturing the natural form of the petunia flower without making the lines too heavy.
- Shape the funnel-like bloom by arranging the broad petals around the center while maintaining proper proportions. Building the overall structure first makes it easier to achieve realistic spacing and a more graceful appearance.
- Adjust the edges of each petal with gentle curves, slight waves, and soft folds because petunia petals often have uneven natural movements. These small details prevent the sketch from looking flat or overly perfect.
- Place the flower center carefully and add light guide marks for the main veins extending outward across the petals. Keep these lines subtle because they will support the shading process rather than dominate the artwork.
Common problems and how to overcome them
Many beginners make the outer shape too rigid by drawing straight and heavy lines. Keep the structure loose and allow natural curves to appear. A flexible outline makes refining the flower much easier.
When I first practiced petunia sketches, I spent too much time perfecting details before fixing the basic shape. The petals looked disconnected and uneven. After focusing on a simple framework first, my drawings became more balanced and realistic.
Step 2: Shade the Center and Veins
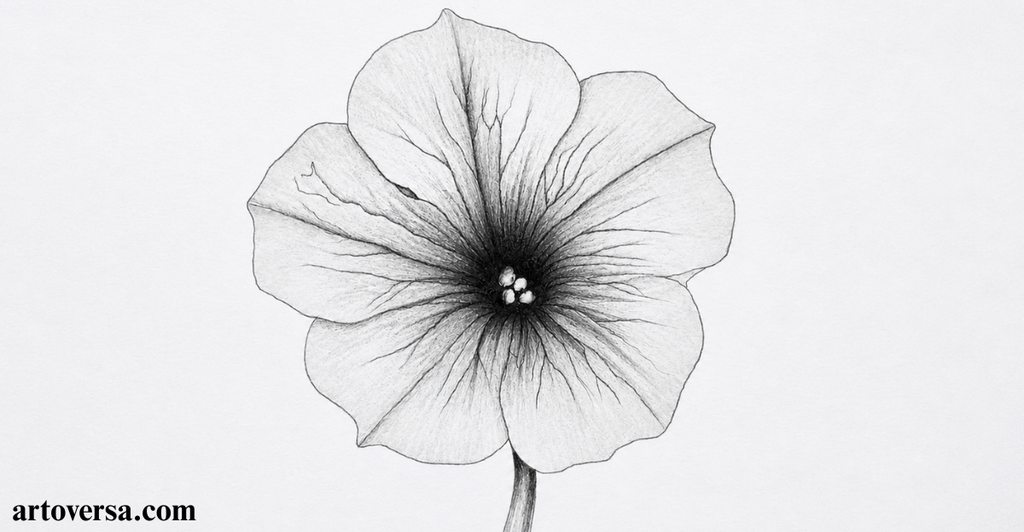
Shading the center and veins with care adds depth texture and a more lifelike look to every petal.
- Develop realistic depth by adding darker values to the center and delicate vein patterns of the petunia. Careful shading choices help create contrast while keeping the flower soft and natural.
- Build the darkest area by shading the flower center with controlled pencil layers, allowing the throat of the bloom to become the main focal point. Stronger values in this section immediately add depth to the surrounding petals.
- Use a softer pencil such as a darker graphite grade to create rich shadows without losing texture. Gradually blend the darker area outward so the transition between light and shadow remains smooth.
- Follow the natural path of the veins as they move across the petals instead of drawing them as simple surface lines. Varying the pressure creates some stronger marks while allowing others to disappear softly.
- Balance the darker channels with lighter spaces because every vein does not receive the same amount of shadow. Different values help the petunia flower appear more three-dimensional and realistic.
Common problems and how to overcome them
A frequent mistake is applying the same pressure to every vein, which makes the flower look unnatural. Change the intensity of each stroke and allow some areas to remain softer. Balanced shading creates a more believable texture.
During my early graphite practice, I treated every vein with identical darkness and the flower appeared flat. Learning to control pressure and layer shadows slowly improved the depth. Small changes in value made my petunia drawings feel much more realistic.
Step 3: Shade the Whole Flower with an HB Pencil
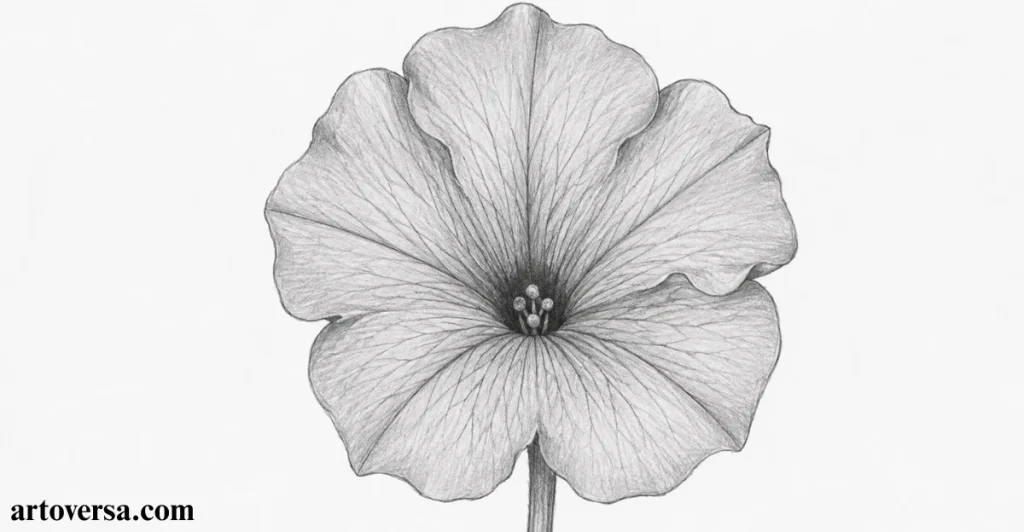
Even HB pencil shading blends every petal together and gives the flower a soft, natural appearance.
- Create a smooth base layer across the petunia flower to bring softness and balance into your graphite artwork. A gentle midtone layer connects the darker areas with lighter spaces for a realistic finish.
- Apply an even layer of HB pencil across the flower while leaving the brightest highlights untouched. This soft value creates a foundation that helps the petunia flower develop a more natural and dimensional appearance.
- Cover the petals with light circular strokes or gentle shading movements to avoid harsh marks. A smooth application keeps the delicate texture visible and allows the earlier veins to remain noticeable beneath the graphite.
- Blend the midtones carefully so the darker sections do not lose their strength and the lighter areas still maintain their softness. This balanced layer works like a connection between the outline, shadows, and final details.
- Keep the shading consistent throughout the bloom while preserving the natural differences between each petal. Even values help the flower appear unified instead of looking like separate sections placed together.
Common problems and how to overcome them
Many artists create uneven patches while applying the base shading layer. Use controlled strokes and avoid pressing too strongly on the paper. A steady midtone layer keeps the flower texture clean and realistic.
During my early graphite work, I used to rush through the midtone stage and focus only on dark shadows. The drawings often looked disconnected because the values were not balanced. Learning to build a smooth base layer improved the overall realism of my flowers.
Step 4: Deepening the Shadows on the Flower
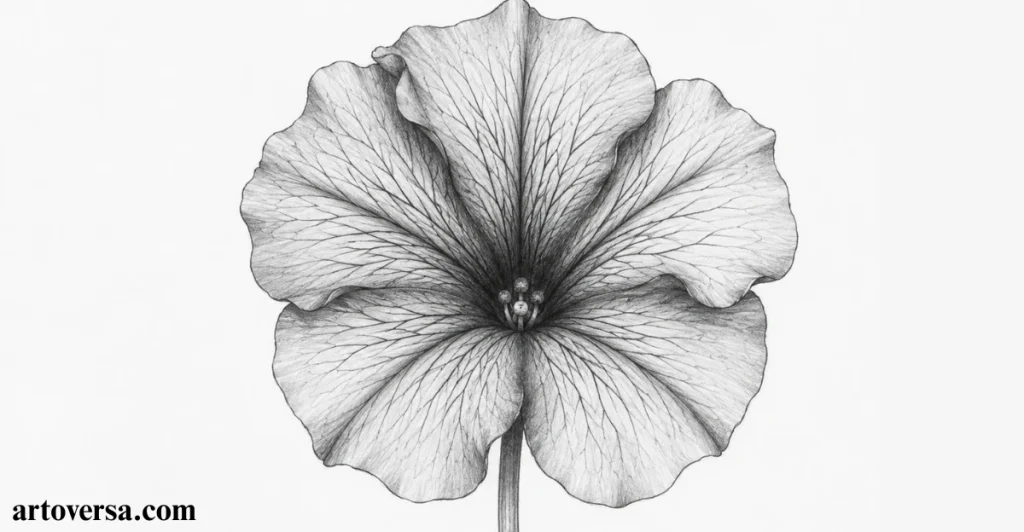
Rich shadows create realistic depth and give the petunia a more detailed and three-dimensional finish.
- Deepen the petunia’s depth by developing stronger shadows around folds, overlaps, and curved areas. Careful layering of darker values helps the bloom appear more natural and three-dimensional.
- Identify the areas where petals overlap bend, or move away from the light source because these sections naturally hold deeper shadows. Recognizing these spaces creates a stronger sense of form.
- Build darker values gradually with a softer pencil, focusing on areas near the flower center and along the curved edges. Slow layering gives better control and prevents the shading from becoming too heavy.
- Strengthen the shadows beneath folded sections where one petal crosses over another. These darker transitions create separation and help each part of the petunia flower stand out clearly.
- Pay close attention to the throat of the bloom because the inward curves often create soft shadow changes. Adding depth around this area naturally guides attention toward the center.
Common problems and how to overcome them
A common issue is adding deep shadows too quickly, which can make the flower appear harsh. Build darker areas slowly with multiple layers instead of heavy pressure. Gradual shading creates smoother and more believable results.
My initial attempts at shading flowers often became too dark because I wanted quick depth. After practicing slower layering, the shadows started blending naturally with the lighter areas. This approach helped my petunia drawings gain a softer and more realistic appearance.
Step 5: Highlights for Creating Contrast
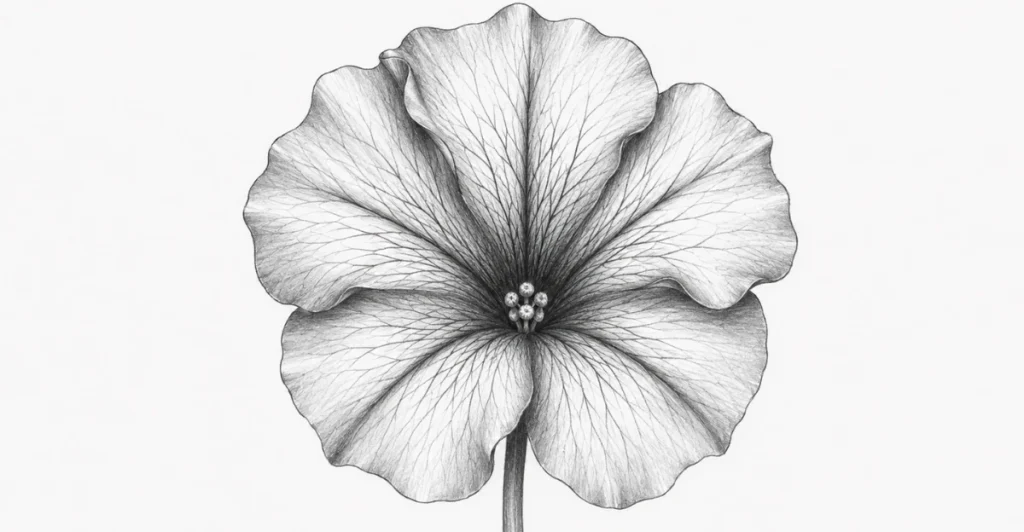
Well-placed highlights enhance contrast, brighten the petals, and bring the finished petunia drawing to life.
- Bring your petunia artwork closer to realism by adding soft highlights that enhance the delicate beauty of each petal. Careful light adjustments create stronger depth and make the graphite shading appear more natural.
- Remove small amounts of graphite from the brightest areas of the petals with a kneaded eraser to reveal gentle highlights. Focus on curved surfaces where light naturally falls and creates a soft glowing effect.
- Keep the highlights subtle because petunia flower petals have a smooth and velvety texture rather than sharp reflections. Soft brightness blends better with the surrounding shades and keeps the bloom looking realistic.
- Strengthen the difference between light and dark sections by carefully balancing highlights with existing shadows. This contrast helps separate each petal and gives the graphite pencil drawing a more dimensional appearance.
- Soften any highlight that looks too strong by lightly adding a thin layer of HB pencil over the area. Adjusting both graphite and erased spaces creates a smoother transition between values.
Common problems and how to overcome them
Many beginners remove too much graphite while creating highlights, making the petals look unnatural. Keep the erased areas gentle and build brightness slowly. Soft changes always create a more realistic flower texture.
When I first practiced adding highlights, the light areas appeared too sharp because I erased too deeply. Learning to use lighter touches improved the softness of my petals. Careful contrast control helped my graphite flowers achieve a more natural finish.
Conclusion
Drawing a petunia flower with graphite pencils becomes more rewarding with every sketch you complete. Each step helps you understand how simple lines and soft shading create a realistic flower. Taking your time with the petals, veins, and shadows makes a noticeable difference in the final result. Do not worry if your first drawing is not perfect because every practice session builds confidence. Keep observing real flowers to improve your sense of shape and texture. With regular practice, your pencil control and shading techniques will continue to improve naturally. Enjoy the creative process and turn every petunia sketch into a beautiful piece of artwork.
FAQs
Which graphite pencils work best for drawing a petunia flower?
HB pencils are great for the first sketch because they create light, clean lines. Softer grades like 2B, 4B, or 6B help build rich shadows and smoother depth. Using several pencil grades gives the flower a more realistic appearance.
How can I make the petals look soft and natural?
Use gentle shading with light pressure and blend the tones gradually across each petal. Follow the natural curves instead of filling every area with dark values. Subtle transitions create a delicate and lifelike texture.
Why do my flower drawings look flat?
Flat results usually happen when the light and dark values are too similar. Increase contrast around folds, overlap and the center of the bloom. Careful layering adds form and creates a stronger sense of depth.
Should I erase mistakes while sketching?
Small corrections are completely normal during the drawing process. Lift unwanted graphite lightly with a kneaded eraser instead of rubbing the paper hard. This keeps the surface clean and protects the paper texture.
How much time does it take to finish a graphite petunia drawing?
The time depends on the amount of detail you want to include. A simple study may take less than an hour, while a carefully shaded artwork can require several sessions. Working patiently usually produces the best results.
Is this tutorial suitable for complete beginners?
The lessons are arranged in an easy sequence that is simple to follow. Every stage introduces one technique before moving to the next, making the process less overwhelming. Regular practice will gradually improve both confidence and drawing skills.
Please Write Your Comments